Constant business optimization is one of the keys to maintaining a competitive advantage in the market and attracting new customers. As a part of such optimization, some businesses decide to move their online stores from one platform to another, one that offers more opportunities. Very often, they choose Shopify as the base e-commerce platform due to its simplicity in setup and use, transparent management, multi-language support, and other notable benefits.
If you currently use Magento as the e-commerce provider and want to switch to Shopify, you have landed on the right page. In this article, we explain how to make such a migration smooth by using one of the methods. We also describe typical use cases for each method, helping you to make the right decision.
Table of Contents
- Understanding Magento and Shopify
- Why Convert Your Magento Store to Shopify
- Preparing Data
- How to Migrate to Shopify from Magento
- Method 1: Manual Export/Import
- Method 2: Custom Scripts/Development
- Method 3: Automated Migration Tools/Platforms
- Common Data Migration Pitfalls & Mitigation Strategies
- Conclusion
Understanding Magento and Shopify
What is Magento?
NOTE: Magento was acquired by Adobe in 2018, so now it’s also known under the Adobe Commerce brand. For simplicity, we will use Magento throughout this article.
Magento is a global e-commerce platform that allows merchants to build and customize online stores. It provides a comprehensive set of services for digital commerce, including marketing, SEO, product management, and other tools. What’s more, this platform provides access to diverse extensions on the Magento marketplace that can be easily integrated into your store with third-party apps.
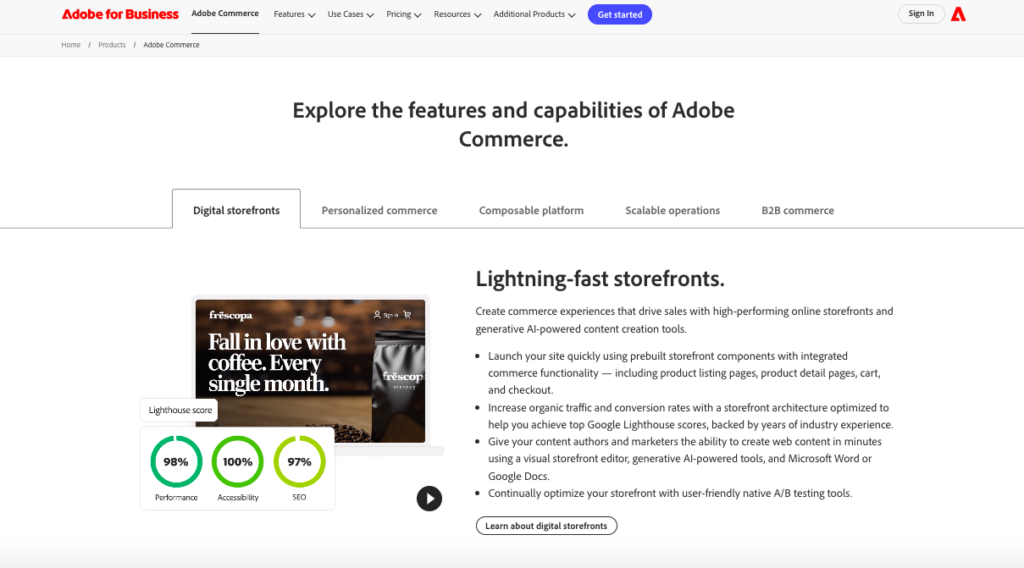
Magento’s ample feature set enables users to solve almost any e-commerce task or challenge. This platform also supports multiple payment gateways, currencies, and languages.
What is Shopify?
Shopify is a cloud-based e-commerce platform that enables companies to create and manage their online stores. This service is user-friendly, which makes it available for business owners with any level of technical skills.
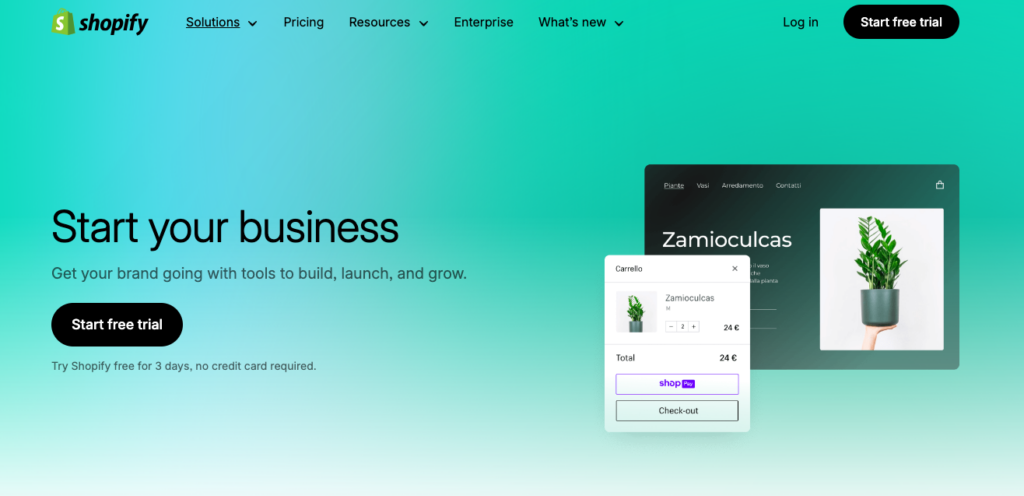
Shopify helps companies sell their products in multiple locations around the globe, from brick-and-mortar to web-based shops. It also dramatically simplifies the distribution of goods across various channels, including social media and online marketplaces.
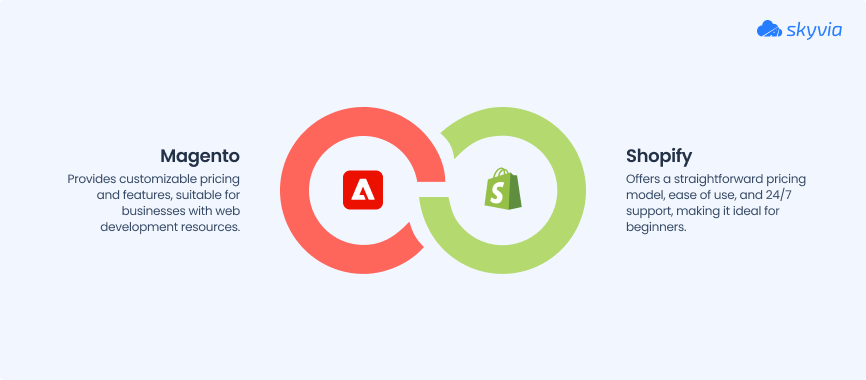
Comparing Magento and Shopify in eCommerce
| Criteria | Shopify | Magento |
|---|---|---|
| Pricing | Starting from $24 per month (paid annually). A trial is available. | Pricing depends on the available features, company size, infrastructure, security, and other parameters. Contact Adobe directly to calculate the cost of the platform for your business. A free plan and trial are available. |
| Ease of use | Easy-to-use, beginner-friendly visual editor. | You need web development skills to customize your store. |
| Templates and Design | 13 free and 233 paid, ready-made themes with prices from $100 to $500 per theme. All themes are adapted for mobile or tablet devices. | Free themes are available. Paid theme prices range from $29 to $499. Custom themes can cost up to $25,000 per theme. |
| Transaction Fee | Free for Shopify payments. 0.5% to 2% for the external gateway. | Contact Adobe Commerce directly for details. |
| Marketing Features | – Multilingual site support.- Email campaigns via third-party app integration. | Marketing activities are carried out using the extension on the marketplace extensions and coding. |
| Extensions | 3200+ apps on the Shopify App Store. | 3600+ native integrations available via Adobe Commerce Marketplace. |
| Customer Support | 24/7 support for all plans. | Email or help desk, chat, frequently asked questions (FAQs), forums, and a knowledge base. |
Why Convert Your Magento Store to Shopify
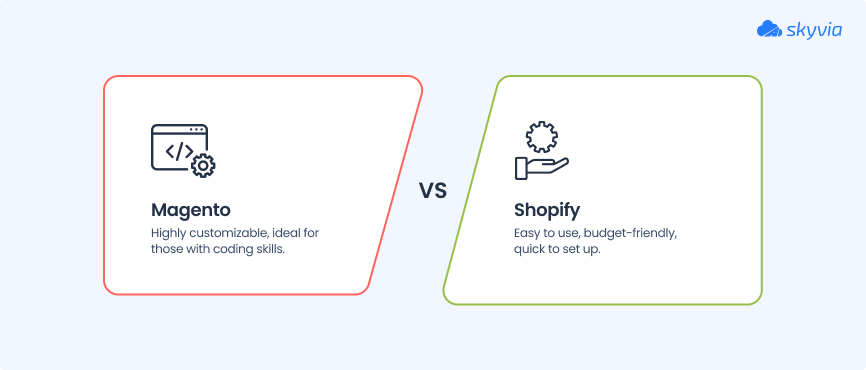
Magento is one of the best e-commerce platforms nowadays, with 120,000+ live websites on the Internet as of October 2024. It offers a high degree of flexibility and scalability, which enables businesses to customize websites to meet their specific needs. At the same time, this platform requires proficiency in coding to be able to fully benefit from its potential. What’s more, the prices for Magento are usually higher than average, which mightn’t be affordable for some businesses.
Those looking to reduce spending on their e-commerce store may find that switching from Magento to Shopify could be a good solution. Shopify offers plenty of features that Magento does, though it’s much more user-friendly and affordable, which makes it attractive even for small businesses.
In fact, Shopify is one of the easiest ways to set up your business presence online and promote its growth over time. This platform also provides thousands of partner third-party apps and extensions, opening literally unlimited integration and customization opportunities.
If you decide to migrate your online store from Magento to Shopify, there are three possible options, which will be discussed in this article. One of those, the most user-friendly and fastest one, is to use the Skyvia data integration tool.
Preparing Data
Before the actual migration of your e-commerce store takes place, you need to develop a step-by-step plan for that. One of the aspects to include concerns the data that could be extracted into a CSV file or transferred from Magento to the Shopify store directly.
Which Data Can Be Migrated?
Please find the list of items that can be retrieved from Magento:
- Product details: name, price, SKU, description, weight, manufacturer, product image, tags, meta title, meta description, URL.
- Order details: date, status, product info, shipping address, customer name and email.
- Manufacturer information: name.
- Customer data: first name, last name, email, phone, billing address, shipping address, newsletter subscription status.
- Coupon information: code, date.
- Reviews data: title, date, user name, rate.
Information You Can’t Move
Due to the differences in the databases and technologies of these two e-commerce platforms, not all data can be transferred from Magento to Shopify. Below, please find the list of items that can’t be migrated directly but only with the use of third-party partner integration apps or manual recreation.
- Product collections
- Product categories
- Blog and page content
- User passwords
- Discount codes
How to Migrate to Shopify from Magento
In this article, we introduce three scenarios to move data from one online store to another. Each of them utilizes a different set of instruments for the implementation of the method. Moreover, the variety of items that can be exported also ranges from one approach to another.
- Method 1: Manual Export/Import
- Method 2: Custom Scripts/Development
- Method 3: Automated Migration Tools/Platforms
Note that all these methods differ from each other and can’t be considered equivalent. While the manual method could be suitable in one use case, API integration would absolutely be the right choice in another instance. Therefore, we have prepared a comparison table where you can briefly explore the main characteristics of each mode and decide which of them is likely to meet your integration needs.
| Manual Migration | API integration | Skyvia | |
|---|---|---|---|
| Best for | SMBs that want to obtain full control over the migration process | Teams with technical expertise | Any company |
| Skill level | Low | High | Low |
| Objects available for migration | Advanced Pricing, Products, Customer Finances, Customer Main File, Customer Addresses, and Stock Sources | All objects | All objects |
| Transformation opportunities | You can modify Magento files manually to make the data valid for Shopify. | Transformation logic is embedded in the script code. | Built-in mapping feature. |
| Time needed | Time-consuming | Time-consuming | Fast |
| Pros | – Simple to implement- Accessible for everyone- Additional Shopify extensions are available for process simplification | – A high degree of customization- Support of various Magento and Shopify platform versions- All data can be exported | – No-code approach- Support of 200 data sources- Comprehensive documentation- Basic and advanced integration scenarios |
| Cons | – Error-prone- A limited number of items can be exported- Requires much time | – Programming skills are required- Suitable for companies with dedicated IT teams- Expensive | – No phone support- Advanced features come only under the paid plan |
| Price | Free If you decide to use Shopify extensions, additional costs may apply | The cost depends on the developers’ work | Free plan available Paid plan price starts at $79/month |
Method 1: Manual Export/Import
Direct migration is a manual or half-automated data transfer process from Magento to Shopify. First of all, plan each step carefully in advance, considering even minor details. Another vital thing to do before the migration starts is to register on Shopify and perform the initial setup of your online store. It’s also highly recommended that you explore how this e-commerce platform works and what its specifics are.
Best for
This method is a good choice for those who want to fully manage and control the migration process.
In reality, the manual approach is rather suitable for small and mid-size businesses rather than for large organizations. For the latter, it mightn’t be very safe since big corporations usually have enormous amounts of data, the migration of which takes plenty of time.
Step-by-Step Guide to Manually Migrating from Magento to Shopify
STEP 1: Backup your Magento Store
We strongly recommend backing up all your data in Magento in advance to ensure its integrity and safety.
For that, take the following steps:
- Log in to your Magento admin panel and click SYSTEM -> Backups.
- Select the Backup type, enter the backup name, and enable the maintenance mode if needed.
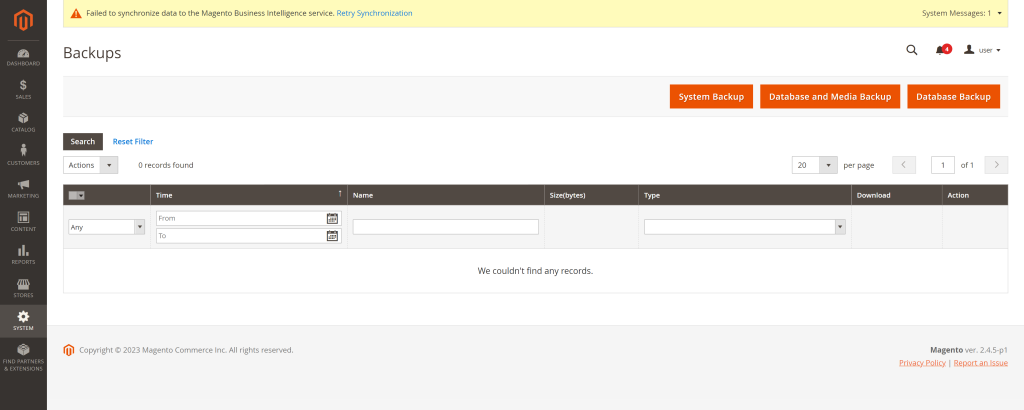
- System Backup saves the entire system, including your source code and the database.
- Database and Media Backup saves the content of the database and media folder. Store themes aren’t included in this backup.
- Database Backup saves the store database only.
STEP 2: Export Magento Data
NOTE: Magento allows users to export the following entities: Advanced Pricing, Products, Customer Finances, Customer Main File, Customer Addresses, and Stock Sources. Only one entity can be exported at a time, and to a separate file.
To get Magento data, proceed with the following steps:
- Go to the Magento admin panel and click SYSTEM -> Export.
- Select the Entity Type and Export File Format. Then, enable the Fields Enclosure option if needed.
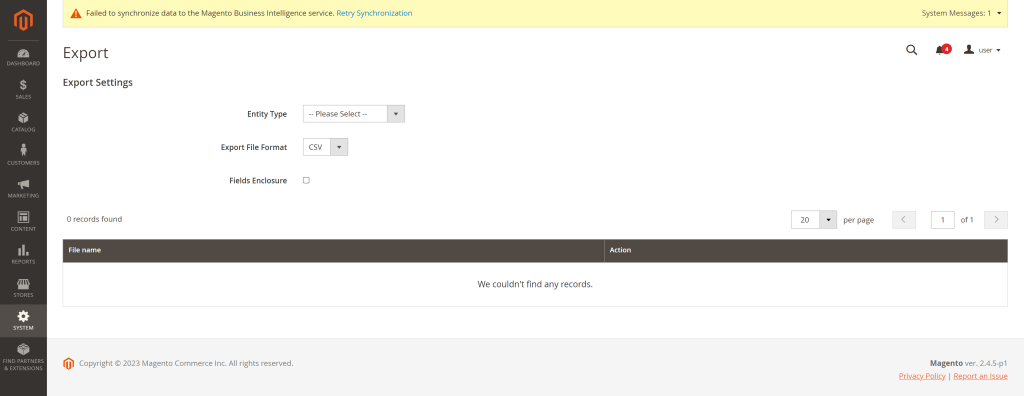
- Set the Entity attributes if needed. You can exclude fields or filter the set of data for export.
- Click Continue to start the data export. The operation runs in the background.
- Download the CSV file once the operation is completed.
STEP 3: Import Data to Shopify
Shopify supports several ways to import data. You can manually upload data using CSV files or use the data integration apps available on the Shopify marketplace. It’s also possible to take advantage of the API integration if there is enough technical expertise on the team. The choice of the preferred method depends on the amount of data and developer resources.
Let’s have a look at importing product items from a CSV file into Shopify.
- Download a sample CSV file that matches Shopify standards.
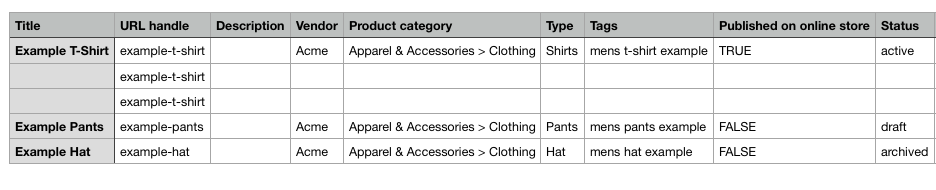
- Adjust your current CSV file with products accordingly to make it match the template style. Don’t exclude any columns or change their names.
- Follow other tips in the video to prepare your CSV file for import.
- Go to the Admin panel in your Shopify store and select the Products tab. Click Import in the upper-right corner of the screen and browse your computer to upload the needed CSV file.
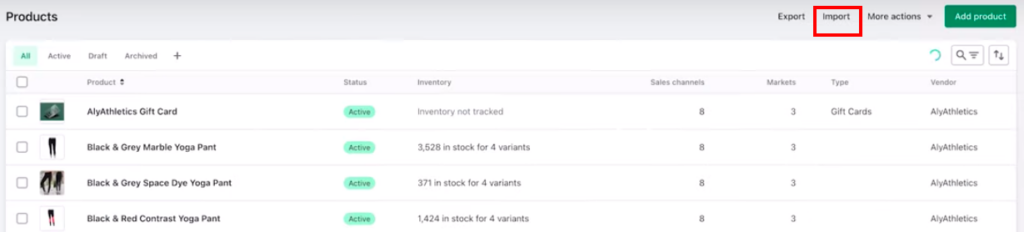
- Specify whether you’d like to overwrite the products with the existing handle by checking the corresponding option. Click Upload and Continue.
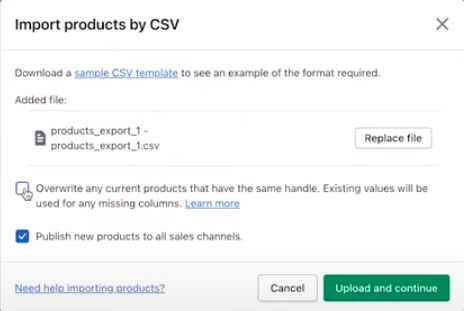
- Preview the products and click Import products.
For more details on how to import other items, feel free to refer to the Shopify Help Center.
NOTE: Only the Products, Customers, and Inventory data can be put into Shopify from CSV files.
Additional Options
Apart from the CSV data import method, there are also other approaches considered to be manual. Those include API integration and third-party extensions for data migration.
Shopify Migration Apps
As an alternative to relatively limited CSV Import, Shopify offers a variety of data migration apps. Unlike CSV Import, such applications support data other than just Products, Customers, and Inventory. They allow you to import historical orders, Gift cards, certificates, store credits, and other items from Magento to Shopify.
Migration apps vary by the supported features, capabilities, and price. There are several completely free options on the Shopify Marketplace. At the same time, there are extensions that cost hundreds of dollars instead.
Shopify API
This method provides the largest number of data exchange features between e-commerce platforms. With API, you can literally import any data from Magento to Shopify. Note that this approach requires proficiency in programming languages and a deep understanding of technical concepts.
Pros
- Data import from CSV files costs $0.
- Manual integration from Magento to Shopify is simple to implement.
- A large variety of additional apps and extensions for data migration are available on the Shopify Marketplace.
Cons
- The manual approach is error-prone.
- CSV file import supports only Customers, Products, and Inventory.
- Shopify migration apps come at an extra cost.
Method 2: Custom Scripts/Development
As mentioned above, one of the ways to transfer data from Magento to Shopify involves using a programming language. In this case, developers write code blocks known as scripts to fetch data from your Magento store and send it to your Shopify shop. To fully exploit this method, a comprehensive understanding of Magento architecture, database schemas, PHP, and Shopify API (REST/GraphQL) is strongly required.
Even though custom scripts seem to be rather challenging in the implementation, they conceal a strong potential for customization. They also allow you to migrate that data from Magento to Shopify that can’t be extracted with other integration methods.
Best for
This option is generally suitable for businesses with highly unique, complex migration requirements that cannot be met by existing automated tools. Being a high-investment approach, API integration is typically reserved for specific edge cases in large enterprises with dedicated internal teams, rather than as a standard approach for most SMBs or mid-market businesses.
Pros
- Offer a high degree of customization.
- Allows businesses to move all available data from Magento to Shopify.
- Supports various versions of the Magento and Shopify platforms.
Cons
- Technical expertise, PHP knowledge, and Shopify API understanding needed.
- Not suitable for most small and mid-size businesses.
- High costs of implementation.
Method 3: Automated Migration Tools/Platforms
Another way of migrating Magento data to Shopify is to use Skyvia, a powerful no-code universal data platform. It removes the pain and trouble of connecting platforms with different data structures.
It offers diverse products for various data-related tasks:
- Data Integration
- Backup
- Query
- Connect
- Automation
To perform data migration from one online store to another, the Data Integration set of tools would be the most appropriate. You can also consider the Backup solution to create a copy of your Magento store before transferring data to Shopify.
Best for
Skyvia is used by thousands of businesses, from individual entrepreneurs to large enterprises, for their daily data integration operations. In a nutshell, this product is suitable for any company operating in Healthcare, Education, Manufacturing, Software Development, and other industries.
Step-by-Step Guide to Migrating from Magento to Shopify with Skyvia
Before moving data from Magento to Shopify with Skyvia, please take some preliminary steps:
- Set up your Shopify store.
- Create and use an active Skyvia account.
- Creating connections in Skyvia for Magento and Shopify.
STEP 1: Create the Integration
To start your Magento to Shopify Migration with Skyvia, proceed with the following steps:
- Click +Create New -> Import.
- Select the Data Source as a source type.
- Select the existing Magento connection or create a new one.
- Select the existing Shopify connection or create a new one under the Target settings.
- Enable other Import settings if needed.
- Click Add new on the right to create an integration task.

STEP 2: Add Integration Task
In the window that appears, you can configure the integration task.
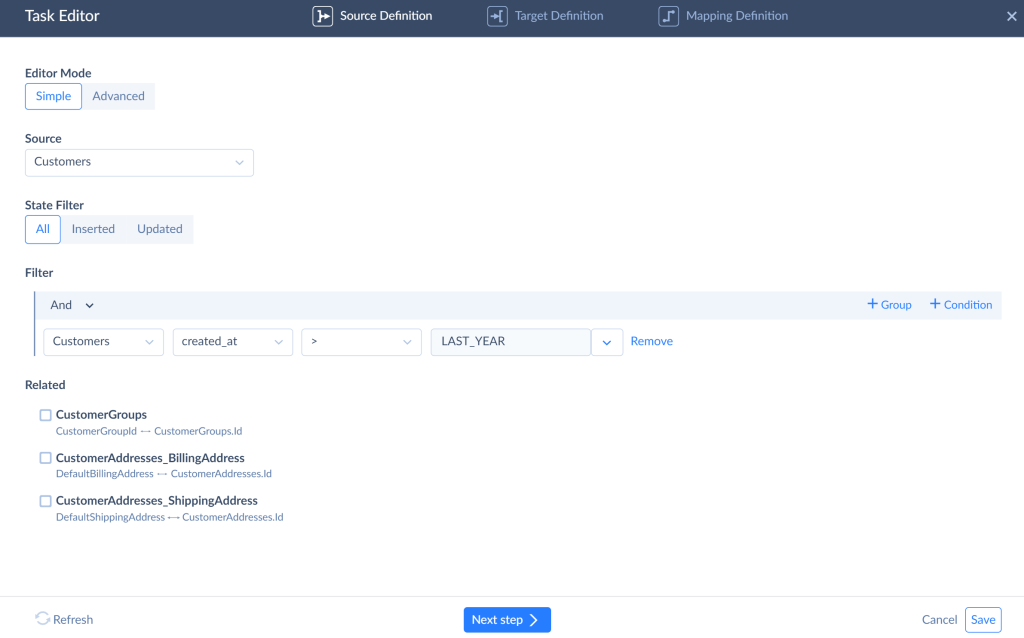
- In the Source Definition tab, select the Magento object you want to migrate.
NOTE: Skyvia allows you to set filters if you need to limit the data selection.
- Select the target Shopify object and operation to perform in the Target Definition tab.
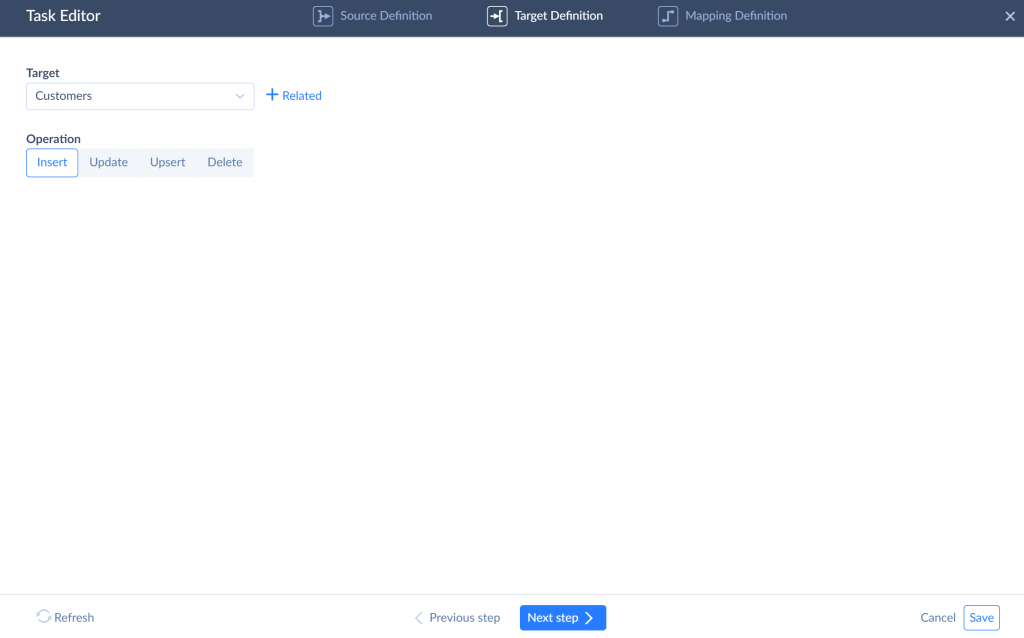
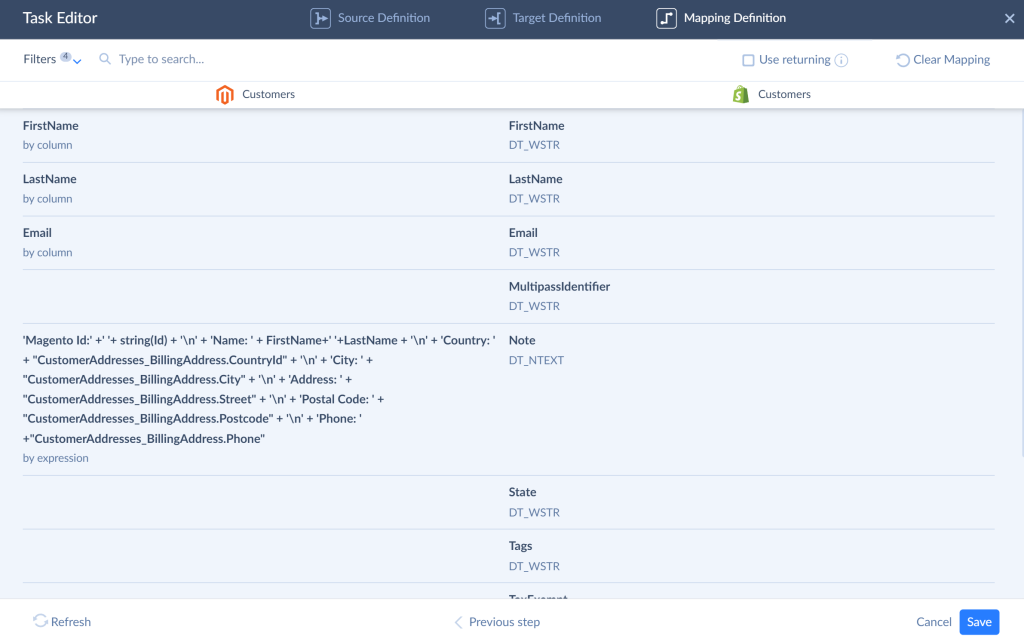
- Magento and Shopify have different data structures. Thus, you have to map the fields in the Mapping Definition tab. Skyvia supports several mapping types, enabling the transformation of source data to be valid for a target.
STEP 3: Run the Integration and Check the Results
When the mapping is ready, save the task. You can add multiple tasks to one integration, one task for one object.
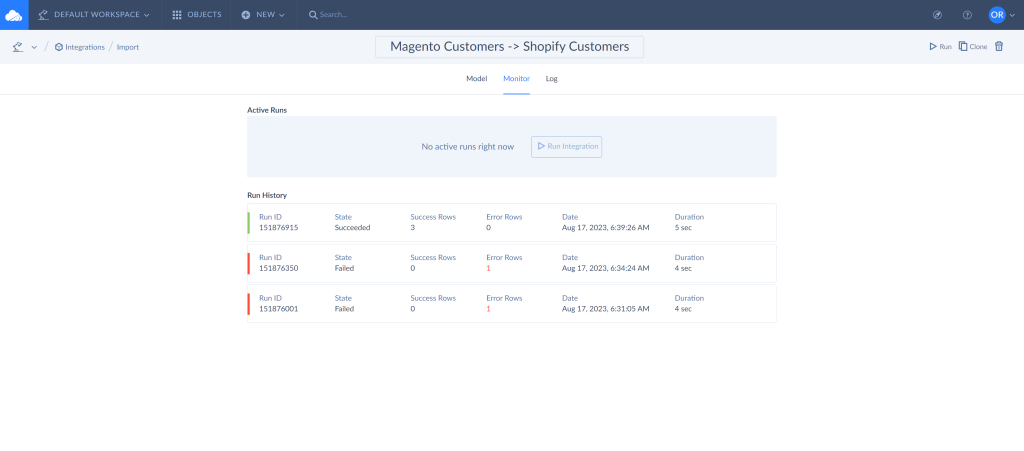
After preparing the tasks, you can save the integration and launch it. When the run is completed, you can check its results on the Monitor and Log tabs of the Integration Editor. It shows the number of successfully imported records and failed records. You can click any run you want to check and see the error message for each failed record, if needed.
Pros
- No-code approach that makes Skyvia suitable for both technical and business users.
- Support of 200+ data connectors that enable you not only to migrate data from Magento to Shopify but also to create various integration scenarios.
- Comprehensive documentation and built-in tips that simplify the data migration process.
- Simple and complex integration scenarios.
Cons
- No support over the phone.
- Advanced features are available only under the paid plans.
Common Data Migration Pitfalls & Mitigation Strategies
In theory, moving data from Magento to Shopify seems doable. It will definitely take some time and resources to achieve the final goal.
If the integration goes smoothly and seamlessly, then you are the lucky one. As a rule, the practical implementation of any method is associated with minor pitfalls, which don’t impact the overall result of the integration, though they might create some inconveniences in the process. Therefore, we present some of the known issues associated with Magento to Shopify migration.
| № | Issue | Description | Mitigation |
|---|---|---|---|
| 1 | Data corruption | Data on the destination system appears different from that in the target one. | – Create a backup- Test the migration- Map data correctly |
| 2 | Custom Magento fields handling | There may be no equivalent fields on the destination system that match the Magento custom fields | – Strategy for mapping custom fields to the available fields on the destination store |
| 3 | SEO impact | Moving an online store from one platform to another may also impact the website’s positions on search engines | – Copy meta titles and descriptions correctly |
| 4 | Downtime | It might happen that the migration process is interrupted by the system downtime. | – Use tools that ensure data integrity on transfer to handle downtimes |
Conclusion
If you need to switch from Magento to Shopify as your principal online store platform, you can do that in several ways:
- Migrate your data manually by exporting Magento entities to separate CSV files and importing them to Shopify manually or using Shopify extensions
- Use APIs for moving data
- Perform a no-code, convenient Magento to Shopify migration with Skyvia
The manual method is relatively easy but time-consuming and limited by the number of objects for export and transformation opportunities. API integration is the most complex and expensive one, though it offers the highest level of customization. Meanwhile, the Skyvia data integration method is the simplest and fastest, allowing you to migrate any objects with relations and transform data to avoid data structure mismatch. What’s more, Skyvia offers a free tier to start, so you can see it in action!
F.A.Q. for Magento to Shopify
Can I migrate customer passwords from Magento to Shopify?
Account passwords can’t be moved from one platform to another. Users will need to recreate their accounts by specifying the same or new account credentials. Otherwise, you may consider the use of third-party partner integration apps.
How long does the actual data migration process take?
The duration of migration depends on the selected method. It might take weeks with custom scripts and API, or several hours with Skyvia.
What are the primary cost factors involved specifically in data migration?
The costs associated with data migration depend on the tools used, the time needed, and the specialists involved.
What happens to data from my custom Magento extensions or specific custom fields?
It’s possible to transfer custom Magento fields to Shopify. To perform that, you need to create an explicit mapping strategy to create a correspondence of custom Magento fields to the existing Shopify fields.