

Summary
- Salesforce provides powerful features for customer data storage, but Google Sheets offers simplicity and flexibility for data analysis and sharing.
- There are multiple methods to connect Salesforce to Google Sheets, including using Salesforce Data Loader, add-ons, and third-party integration platforms.
- Salesforce Data Loader allows bulk data operations but requires technical expertise and lacks automatic scheduling.
- Add-ons like Salesforce Connector and Skyvia Query provide user-friendly interfaces for data transfers but may have limitations on scheduling and complexity.
- For scalable and automated solutions, third-party integration platforms like Skyvia offer advanced features for seamless synchronization and complex transformations between Salesforce and Google Sheets.
Are you tired of manually exporting Salesforce to Google Sheets and wasting hours on routine? Ineffective data transfers between these two solutions are a problem for many companies. Luckily, there are multiple ways to simplify this process.
In this article, we’ll walk through the best integration methods – from native tools to third-party automation platforms. We will discover both sides of the coin for each of them so you can choose the right approach for your workflow.
Table of Contents
- Why Connect Salesforce to Google Sheets?
- Best Ways to Connect Salesforce to Google Sheets
- Method 1: Salesforce Data Loader
- Method 2. Add-ons
- Method 3. Third-Party Integration Platforms
- Conclusion
Why Connect Salesforce to Google Sheets?

Salesforce, with its powerful features, is good at storing customer data and reporting. But sometimes, you just need the simplicity and flexibility of Google Sheets. For instance, if you want to analyze trends quickly, create a custom report, or share data with someone who doesn’t have Salesforce access.
With Google Sheets, you can sort, filter, and visualize SF data without dealing with complex CRM functionalities. Let’s walk through some common use cases:
- To track sales performance, pull live data into a spreadsheet and create a custom dashboard with formulas and charts.
- Assume your finance team needs revenue data for forecasting, but they don’t work in Salesforce daily. Instead of manually exporting reports, you can sync Salesforce with Google Sheets and let the numbers update automatically.
- Marketing teams might want to monitor lead data alongside ad spend, combining Salesforce insights with Google Ads data in a single spreadsheet.
- If you’re working with external partners, sharing a Google Sheet is much easier than granting Salesforce access.
So, connecting Salesforce to Google Sheets is getting the best of two worlds: structured CRM data and spreadsheets’ flexibility.
Best Ways to Connect Salesforce to Google Sheets
You may connect Salesforce and Google Sheets in several ways:
- Using a native Salesforce Data Loader,
- With one of the add-ons like Salesforce or Google Cloud Connector,
- Using third-party tools like Skyvia.
Each of these methods has its benefits and drawbacks. Let’s break them down in the comparison table.
| Salesforce Data Loader | Add-ons | Integration Platforms | |
|---|---|---|---|
| Ease of Use | Requires manual setup and technical knowledge | Easy setup, user-friendly interface | No-code, intuitive UI with guided setup |
| Automation | No scheduling – requires manual execution | Some add-ons offer scheduled syncs | Supports automated, scheduled syncs |
| Customization | Limited to predefined options | Some add-ons allow custom queries | Highly customizable with filters and transformations |
Scale | Small to medium transfers | Small to medium transfers | Large transfers |
| Technical Knowledge Required | Salesforce admin skills | Minimal technical skills | No coding |
Method 1: Salesforce Data Loader
Salesforce Data Loader is a native solution that’s helpful in routine work with bulk data, like inserting, editing, updating, exporting, and deleting. It reads, extracts, and loads data from CSV for Import to Salesforce and outputs CSV for Export. CSV files can then be easily opened and edited in Google Sheets.
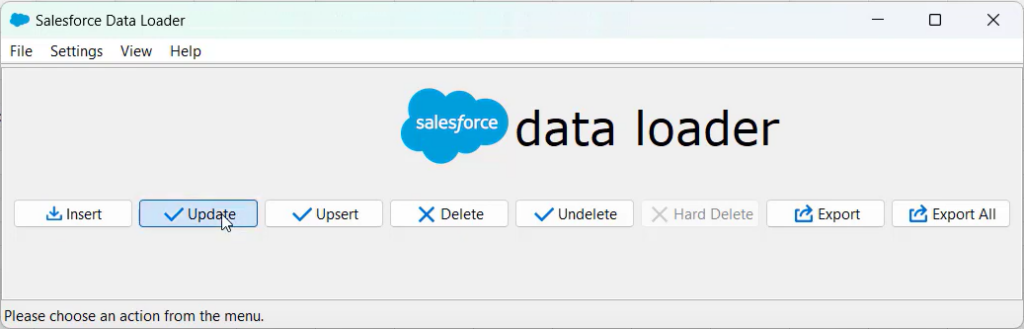
There are two different ways to use it:
- Via UI – a user has to set CSV files and configuration options for import/export and specify the mapping for the field names between the import file and Salesforce.
- Via command line (for Windows only) – a user has to set up configuration, data sources, mappings, and actions to automate the process.
Pros
- Enables custom field mapping. Users can define how Salesforce fields align with Google Sheets columns.
- Works without additional add-ons. Since Data Loader is an official Salesforce tool, it doesn’t require third-party connectors or apps to extract data for Google Sheets.
- Allows selecting data. Users can apply filters to transfer only relevant Salesforce information to Google Sheets.
Cons
- No built-in automatic schedule for data synchronization. It requires additional scripting with another automation tool.
- No cloud version. You have to install the tool on your PC.
- It’s not the end user’s tool. It requires some technical expertise.
Best for
Users with technical expertise who are comfortable with manual imports/exports.
Method 2. Add-ons
Add-ons are lightweight extensions available in marketplaces like Google Workspace Marketplace. They provide a direct data exchange between Salesforce and Google Sheets. After installing an add-on to the browser, the user can pull data from Salesforce, update it, and push it back to Salesforce without leaving Google Sheets.
Among the various add-ons available, some of the most widely used ones are Salesforce Connector for Google Sheets and Skyvia Query Google Sheets Add-on. Let’s explore them in detail.
Salesforce Connector
Salesforce Connector is a popular tool for data transferring between Salesforce and Google Sheets. It’s free for Enterprise, Performance, Unlimited, or Developer subscriptions. For the Professional plan, you will need API access for an extra fee.
With this tool, you can create, read, update, and delete Google Sheets data in SF and import reports on a schedule.
Pros
- Direct integration. It seamlessly connects Salesforce with Google Sheets without additional software.
- Auto refresh. Allows automatic updates every 4, 8, or 24 hours.
- Query-based data extraction. Users can filter and pull only the needed records using SOQL (Salesforce Object Query Language) queries.
- Free to use. Available for Salesforce users with appropriate permissions at no extra cost.
Cons
- The schedule options are cut. The recurring sync intervals are limited, and all reports share the same schedule.
- Complex Setup for Beginners. Requires some knowledge of Salesforce queries (SOQL) for advanced use.
- The Salesforce and Google Sheets connect only. It cannot be integrated with other data sources or BI tools.
Best for
- Salesforce admins looking for a simple, no-code solution to handle data transfers for small to mid-sized datasets (around 50,000 rows).
Step-by-step guide
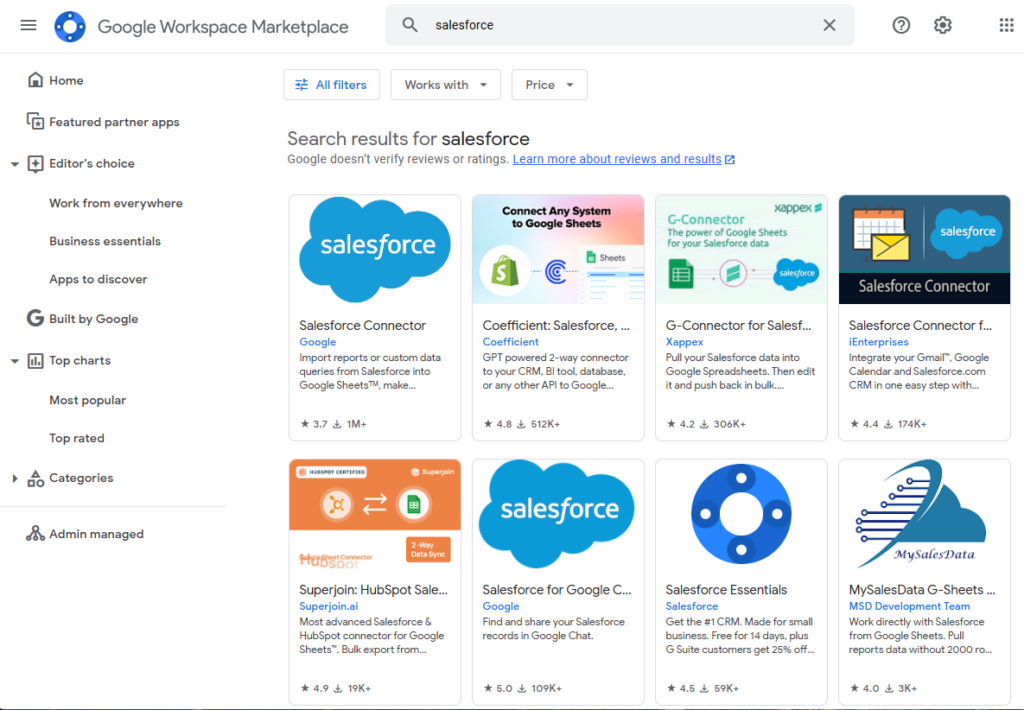
To start working with the Salesforce connector, download it from Google Workspace Marketplace in a few simple steps.
Step 1
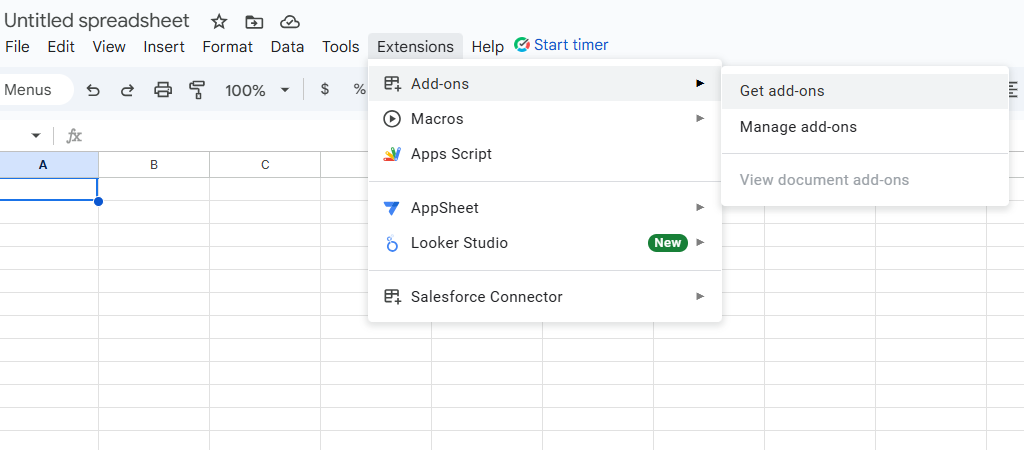
- Go to your Google Sheets.
- Select Extensions in the top menu bar.
- Click Get add-ons.
Step 2
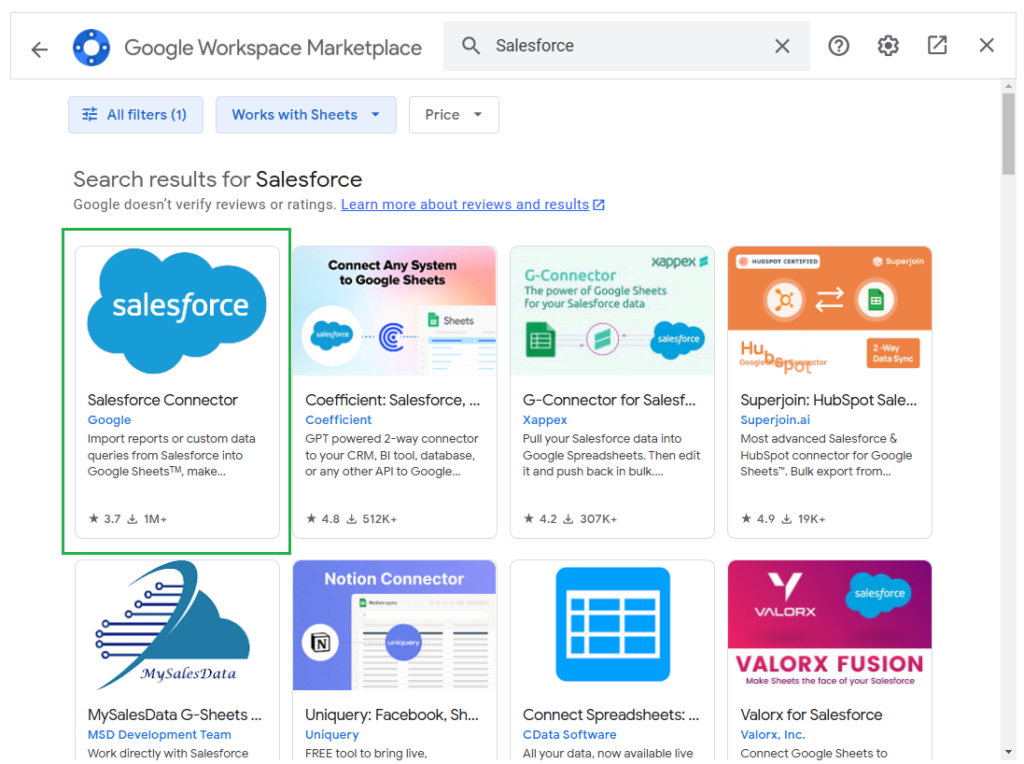
Type Salesforce Connector in the Google Workspace Marketplace search bar and choose the add-on.
Step 3
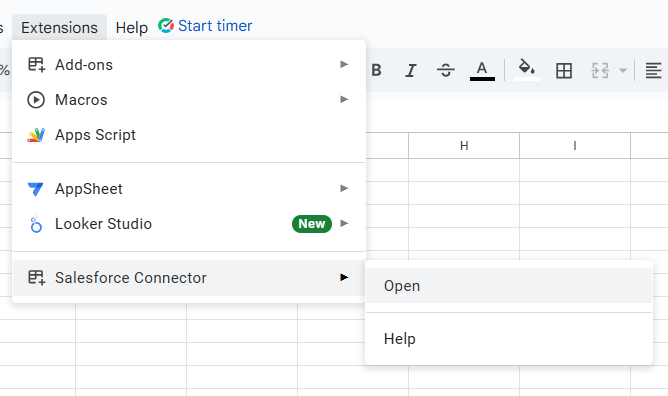
- Open Add-on and click Install.
- Follow the installation prompts to finish the process.
- Now, you can open it from the list of installed extensions.
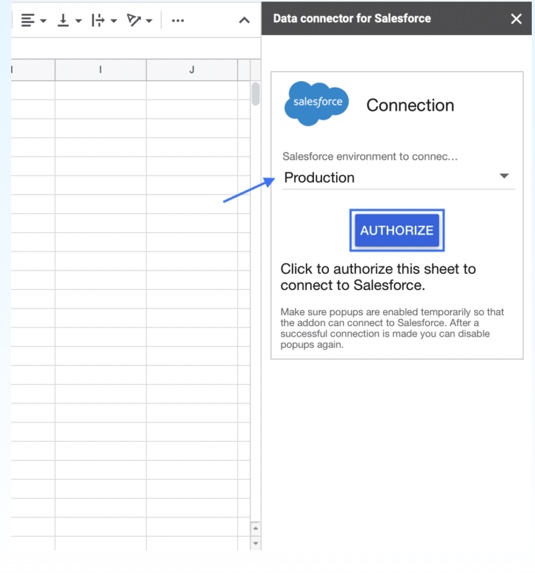
- It will appear on the top right section of the screen. It’s ready to work after selecting the Salesforce environment and clicking Authorize.
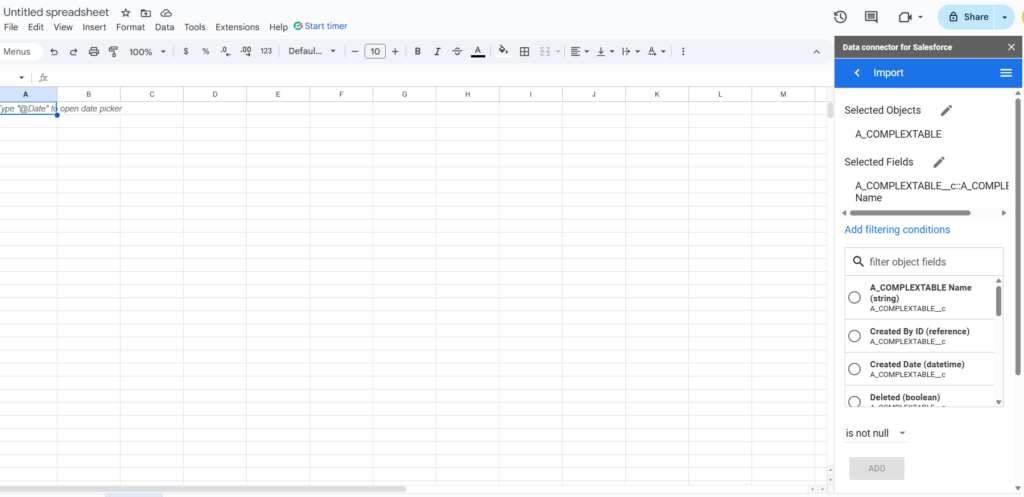
Let’s look at a real-life example to see how it works. Suppose you need to import report data from Salesforce to Google Sheets.
To do it:
- Go to the Data connector for Salesforce > Select an operation > Reports.
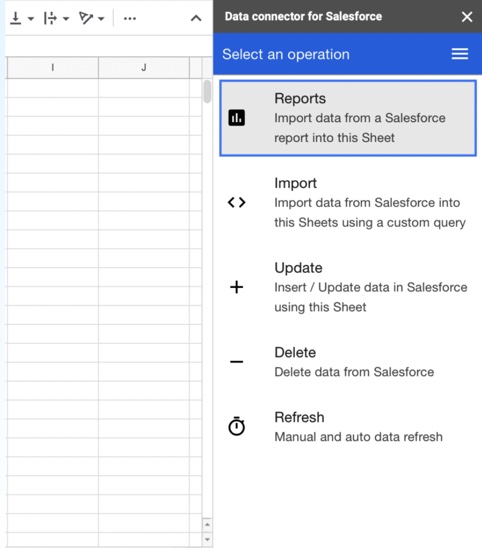
- Select Import to active sheet to import your report data.
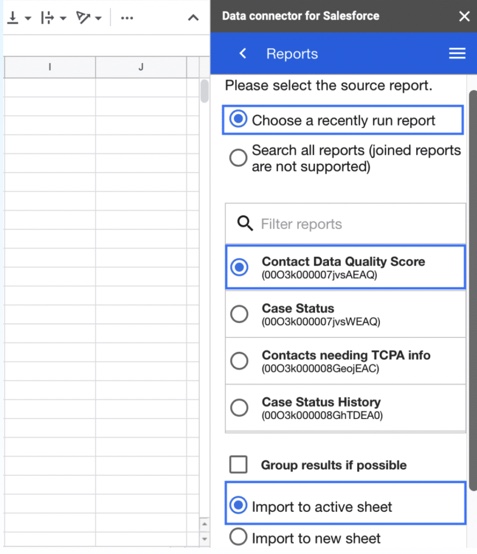
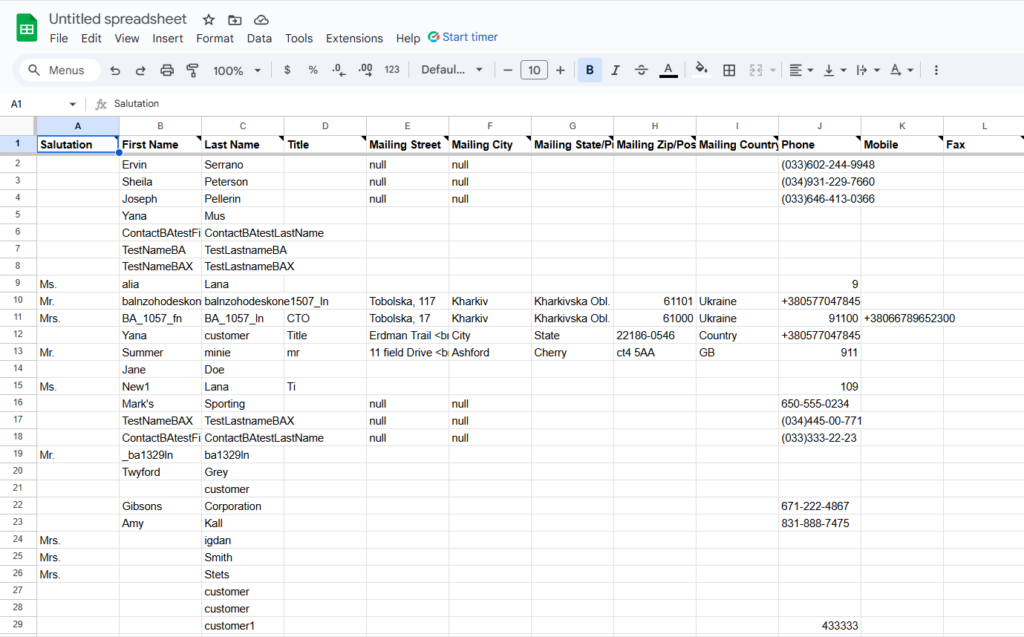
When your report is ready, you will see its rows and columns in your spreadsheet.
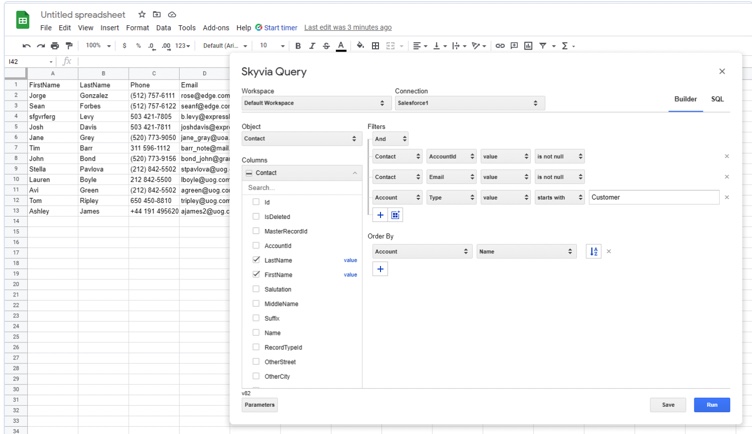
Skyvia Query Google Sheets Add-on
Skyvia Query Add-on is a tool for smooth data transfer to Google Sheets reports. With it, you can import data from various cloud applications and relational DBs to Google Sheets through Skyvia Query. The add-on is cloud-based, has no code, and is easy to use even for non-tech people, allowing them to create and run queries without knowing SQL language.
Pros
- Integration with other systems. Users can import data from various cloud applications and relational databases like Google Analytics, MySQL, Looker, etc.
- Advanced Filtering. Allows users to apply filters and run SQL-based queries for data extraction.
- Automatic Data Updates. Can schedule queries to refresh data in near real-time, keeping reports up to date.
- No Coding Required. A user-friendly interface makes it accessible to non-technical users.
- Saved Query Gallery. Users can store queries for future use.
Cons
- Limited Free Tier. Some advanced features require a paid plan.
- Google Sheets Limitations. Large datasets may slow down or exceed Google Sheets’ row limitations.
Best for
Users who need advanced query-based data extraction with filtering, scheduled updates, and other tools integration.
Step-by-step guide
Let’s see how it works in three steps.
- Register on a Skyvia account for free.
- Create connections to Salesforce and Google Sheets.
- Install the Skyvia Query Google Sheets add-on from G-Suite Marketplace and create reports from Salesforce anytime.
Visit the Skyvia documentation Portal to learn more about the setup process.
Method 3. Third-Party Integration Platforms
As we discussed before, manual exports and add-ons often lack scalability, automation, and integration with other business tools. In this case, integration platforms can do the job. They can automate data syncs using complex transformations and integrate Google Sheets with other platforms and databases.
Popular integration platforms like Skyvia, Zapier, and Coupler.io provide a no-code approach to managing Salesforce data without complex scripting.
Skyvia allows you to integrate Salesforce and Google Sheets data without any limitations on data and file size. As a bonus, it’s intuitive, so you don’t need additional technical knowledge.
Skyvia is cloud-based and doesn’t need installation and coding to set the export/import data as CSV files. You just open your laptop, connect, and start working.
Pros
- Simplicity. Skyvia is user-friendly, transparent, and convenient, even for non-tech people.
- Flexible Data Selection. Export/import specific objects, fields, or filtered records.
- Rich functionality. Supports a set of integration scenarios of any complexity like ETL, ELT, reverse ETL, data migration, one-way and bi-directional data sync, workflow automation, data sharing via REST API, backups for cloud apps, etc.
- Easy Automation. Enables scheduled automated exports/imports without manual effort.
Cons
- Limited Free Plan. While Skyvia offers a free tier, advanced features, higher data volumes, and more frequent syncs require a paid subscription.
Best for
Businesses of any size looking for scalability and automation with advanced transformations, bidirectional sync, and multi-platform connectivity.
Let’s take a closer look at how Skyvia simplifies Salesforce to Google Sheets integration in two real-life examples.
Export data from Salesforce to Google Sheets using CSV
Suppose you need to export your Account data as a CSV file from Salesforce to Google Sheets.
To do it, you must create connections to the source and target and configure export in Skyvia.
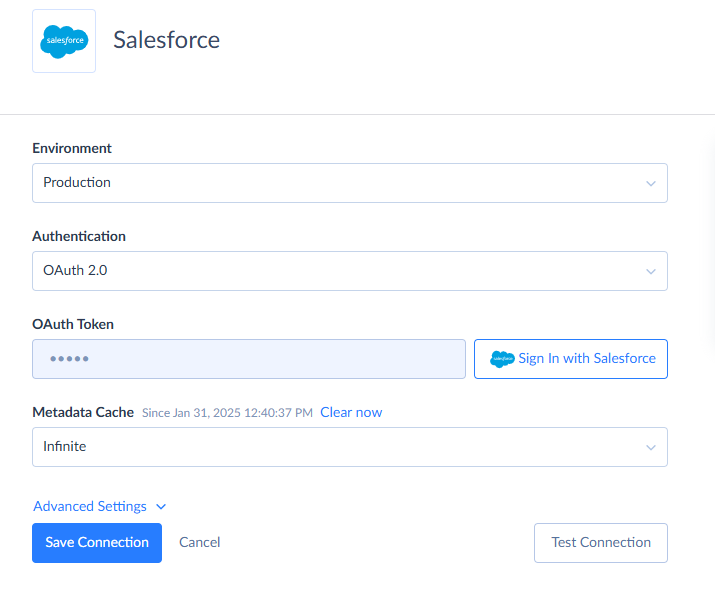
Step 1. Create connections to Salesforce and Google Drive:
- Register on a Skyvia account for free.
- Click +Create New > Connection.
- Select the Salesforce connector.
- Select the Authentication Type and Environment and set the appropriate parameters. Learn more about connecting Google Sheets in Skyvia documentation.
Similarly, set up a Google Drive connection. Find additional details in the Skyvia documentation.
Step 2. Set up the export scenario:
- Click +Create New in the upper menu.
- Click Export in the Integration column.
- Select Salesforce as a source and CSV to storage service > Google Drive as a target.
Note. You can also download the CSV file manually.
- Click Add new in the Task Editor.
- Select the Account object in the Source Definition tab and click Next step.
- Select the data for export in the Object filter, specify the Target File Name, and click Next step.
- Check the data in the Output Columns tab and click Save.

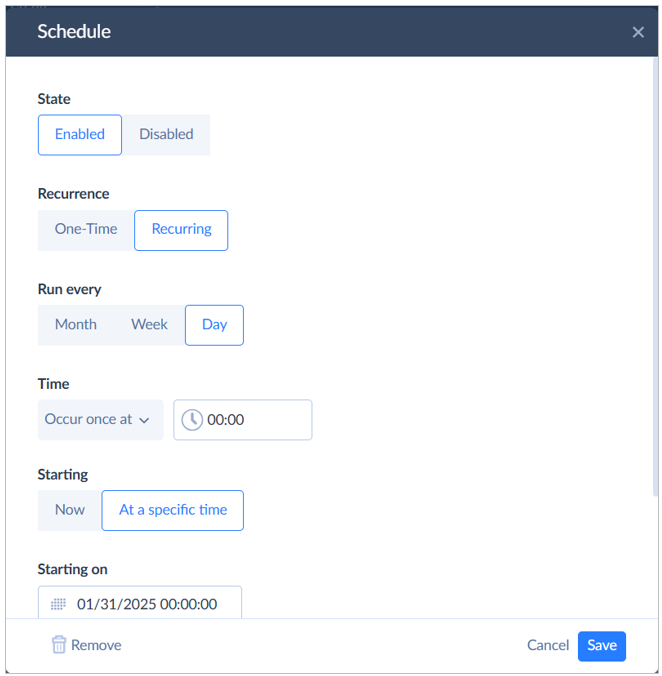
- Click Create and Save to finish the component creation. Now, the component is ready to run by the schedule or manually:
- Click Run in the upper right section of the screen to start the export.
- Set your schedule in the upper left menu.
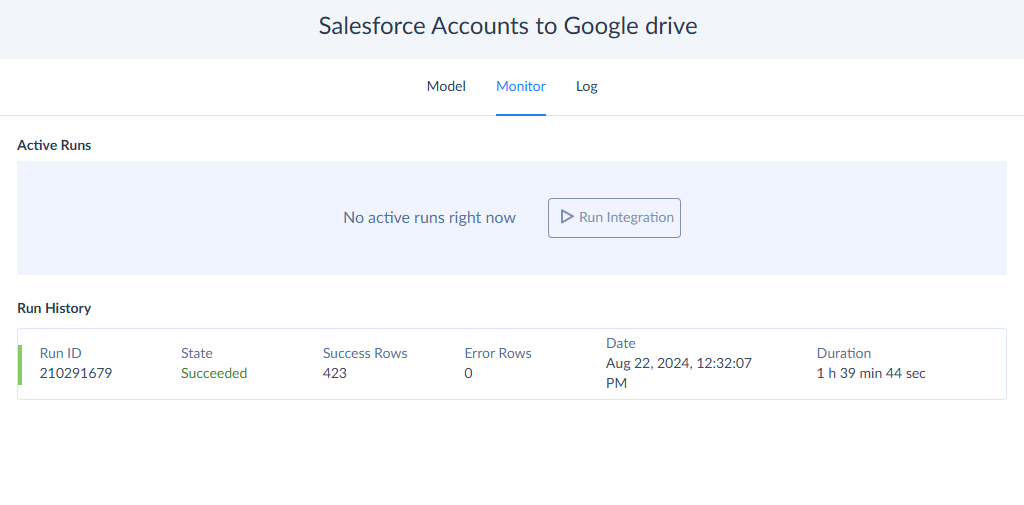
When the export is ready, pay attention to the Model, Monitor, and Log tabs.
- Model allows editing the existing connections and tasks, adding new ones, and rescheduling.
- Monitor allows reviewing the current component’s status and the five most recent components run.
- Log provides a record of executed runs.
Moving data from Salesforce to Google Sheets directly
In contrast to the CSV method via Skyvia, now we will show the direct synchronization of Salesforce and Google Sheets.
Let’s consider importing SF account data to Google Sheets. We might need it for various reasons, like reporting, analysis, or integration with other systems.
To do it, create connections to the source, target and configure import in Skyvia.
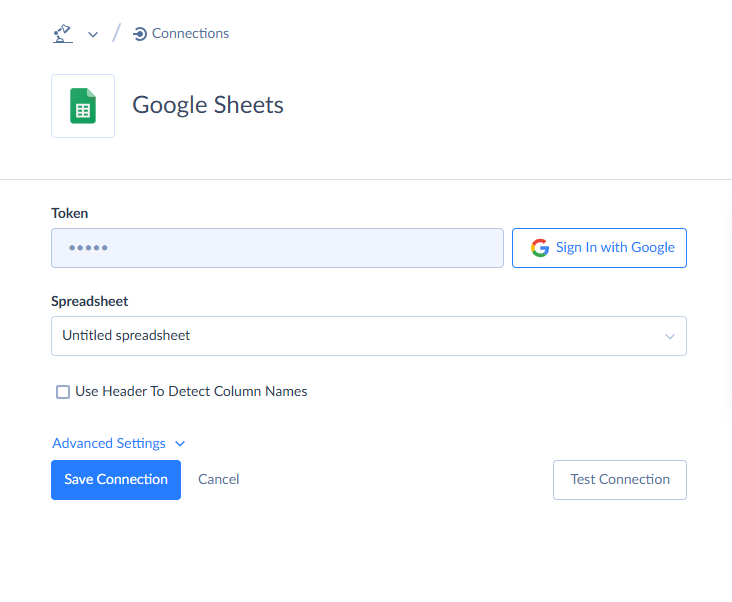
Step 1. Create connections
- Register on a Skyvia account for free.
- Click +Create New > Connection.
- Select the Google Sheets connector.
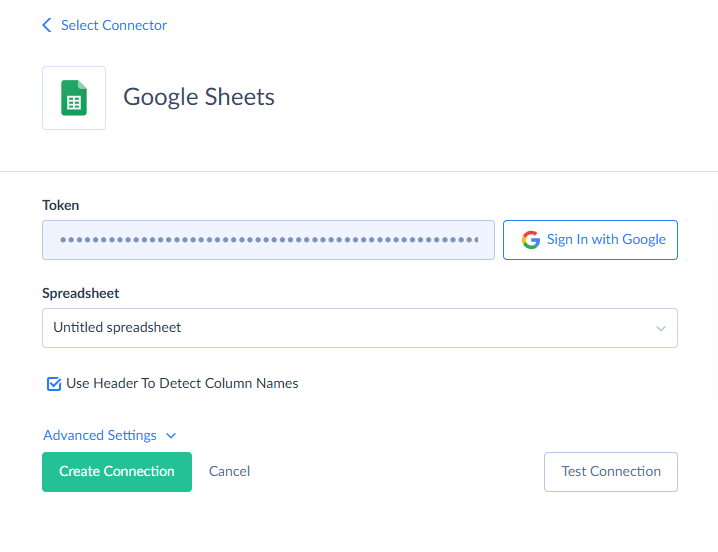
- Sign in with your Gmail account to receive the access token. To learn more about connecting Google Sheets, visit Skyvia documentation.
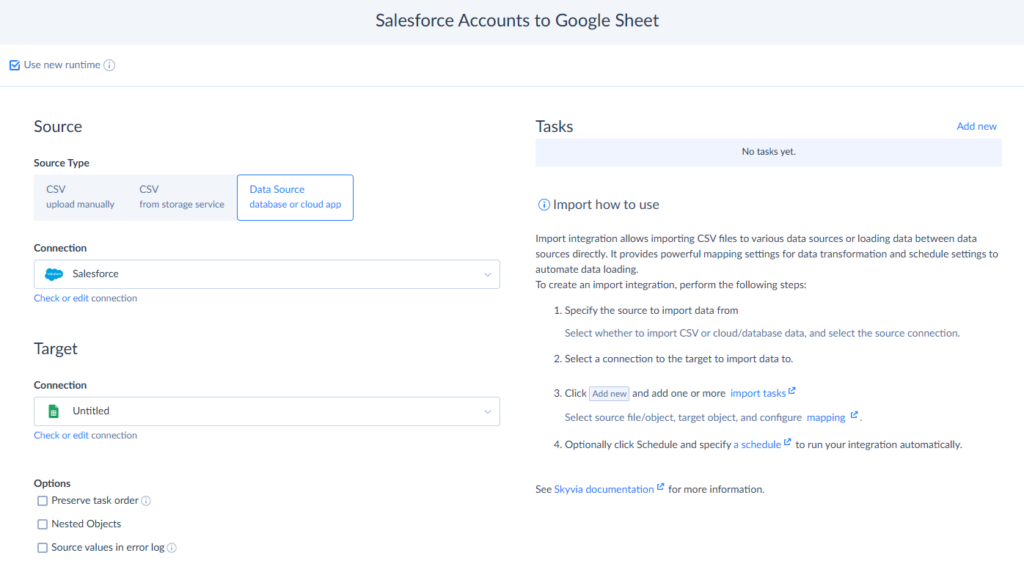
Step 2. Configure import
- Click +Create New, select Import in the Integration section, and set the component name.
- Choose Database or cloud app as a Source Type.
- Choose Salesforce as the Source.
- Choose Google Sheets as a Target.
- On the upper right side of the screen, click Add new to open the Task Editor and set up the import component task.
- Select the Source (Account) in the Source Definition tab, state the filter, and click Next Step.
- Select the Target and operation type in the Target Definition tab, and click Next Step.
- Map the fields in the Mapping Definition tab and click Save.
- Click Create and Save to finish the component creation. You can run it manually by clicking Run or automatically by the Schedule.
- After the Import is complete, check the error logs and fix the necessary issues.
Note. Similarly, you can set up the import to automate moving Google Sheets to Salesforce data for reporting or analysis.
Conclusion
Salesforce and Google Sheets integration should be simple, automated, and scalable. We’ve looked at various options to “make friends” on Salesforce and Google Sheets.
- If you need a quick, one-time transfer, a CSV export might be enough.
- If you want direct integration without coding, an add-on could work.
- For long-term automation, flexible data transformations, and seamless synchronization, an integration platform like Skyvia is a good choice.
F.A.Q.
Salesforce can be integrated with Google services in multiple ways, depending on your needs:
– Native tools like Salesforce’s built-in Google integrations.
– Add-ons like the Salesforce Connector for Google Sheets for simple data transfers.
– Integration platforms like Skyvia for advanced automation and more.
Yes, Google Sheets has an API that allows developers to read, write, and modify data in spreadsheets. The Google Sheets API supports integration with third-party platforms, automation tools, and custom applications. However, using the API requires coding and knowledge of authentication processes.
You can link Salesforce to Google Sheets using different methods:
– Google Sheets Add-ons – install a connector from the Google Workspace Marketplace.
– Integration Platforms – use tools like Skyvia to automate data import/export without coding.
– Salesforce API – if you have developer skills, you can use the API to build a custom integration.
