

The use of CRM systems in modern enterprises is a rule of thumb. Microsoft Dynamics 365 CRM is one of the most popular systems for managing customer records these days.
Since client data makes value for most organizational departments, it usually needs to be available even to those employees who don’t interact with customers directly. How to implement that? For instance, customer details can be transferred to SQL Server, one of the most commonly used and highly-rated databases.
This article presents five core methods for integrating Microsoft Dynamics CRM and SQL Server and compares them.
Table of Contents
- What Is Dynamics CRM?
- What Is SQL Server?
- Dynamics CRM and SQL Server Integration Options
- SQL Server Integration Services (SSIS)
- ODBC (Open Database Connectivity) Driver
- Power Automate (Flow)
- Third-Party Integration Tools
- Dynamics 365 API
- Benefits of Dynamics CRM and SQL Server Connection
- Conclusion
What Is Dynamics CRM?
Dynamics CRM, also known as Dynamics 365 CRM, is a sophisticated compound solution that comprises diverse modules for customer relationship management. This tool is often used by enterprise-level organizations to help them manage client-related interactions and align those with sales, marketing, and project automation activities.
What Is SQL Server?
Microsoft SQL Server is a relational database management system (RDBMS). Similar to other RDBMS systems, this solution uses Structured Query Language (SQL) that enables smooth interaction with relational databases. Since SQL Server has been on the market for 20+ years, there are multiple editions and versions of this system.
Dynamics CRM and SQL Server Integration Options
In this article, we discuss five principal methods to connect Dynamics CRM and SQL Server together:
- SQL Server Integration Services (SSIS)
- ODBC (Open Database Connectivity) Driver
- Power Automate (Flow)
- Third-Party Integration Tools: Skyvia
- Dynamics 365 API
We have prepared a table to introduce each approach and its principal characteristics briefly. All these methods differ in difficulty and in the use of instruments for integration implementation.
| Evaluation criteria | Direct API | SSIS | ODBC Driver | Power Automate | Skyvia |
|---|---|---|---|---|---|
| Installation and Setup | Involves developers and IT specialists for configuration and setup. | Requires basic programming and technical knowledge. | Requires some time to install and configure the driver, though programming knowledge isn’t needed. | Can be installed as a desktop app or can be accessed via a web browser as a SaaS app. | Can be used both by technical and non-technical audiences with no coding experience. |
| Key benefits | – High level of customization – Cross-platform and multi-language support | – Bi-directional integration – GUI and no coding | -GUI with no coding – Advanced security, reporting, and analysis – Integration monitoring | – Optimizing business workflow – Human error elimination – Pre-defined templates | – Web access- Ample list of integration options – 200+ connectors- GUI and no coding |
| Limitations | – Deep technical knowledge required – Translation to SQL needed | – Oriented on the Microsoft ecosystem – Limitations associated with on-premises systems | – One-way integration only- SQL knowledge is required | – Limitations on API calls and items for connectors – Slow performance – Limited information on run history | – No phone support- Daily data refreshes on a freemium plan |
| Cost | Depends on the development and implementation costs. | Free. | Starts from $129. | Free, but there are premium connectors that cost extra. | Paid plans start from $79. There’s also a freemium plan. |
SQL Server Integration Services (SSIS)
When thinking of how Dynamics CRM connects to the SQL Server, native integration comes to mind first. Both tools are produced by the same corporation – Microsoft.
SQL Server Integration Services (SSIS) is one of the Microsoft tools that could be a good option for connecting Dynamics CRM and SQL Server. With SSIS, you can design ETL pipelines for data transfer and transformation.
Best for
This Dynamics CRM integration with SQL Server using SSIS suits companies with multiple Microsoft tools and appliances in their data infrastructures.
Prerequisites
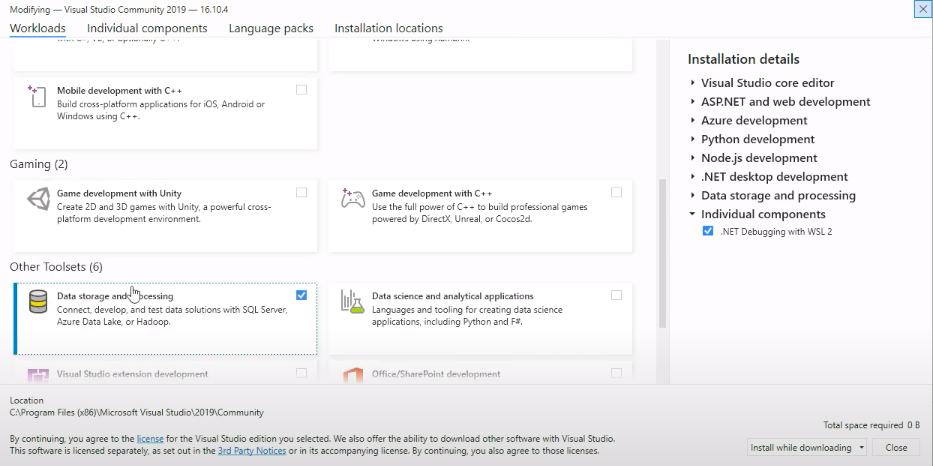
- Download Microsoft Visual Studio from the Microsoft Store. Make sure that the Data storage and processing toolset option is selected upon installation.
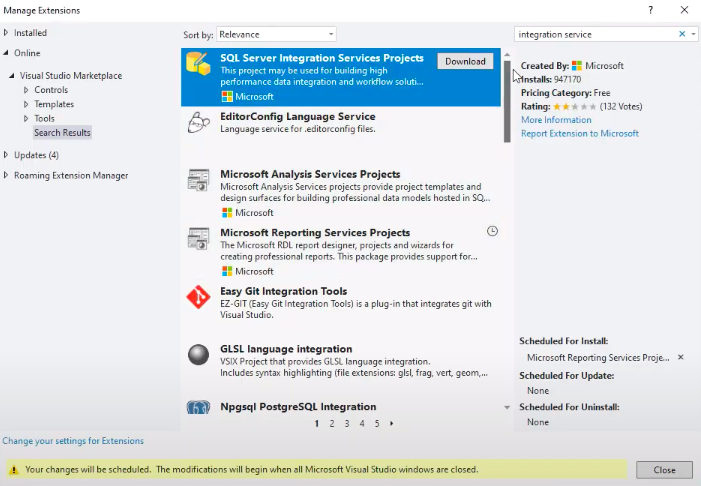
- In Visual Studio, download the SQL Server Integration Services Projects extension.
Step-by-step instructions for integration using SSIS
- Open Visual Studio and click Create a New Project.
- Select the Integration Services Project type and click Next.
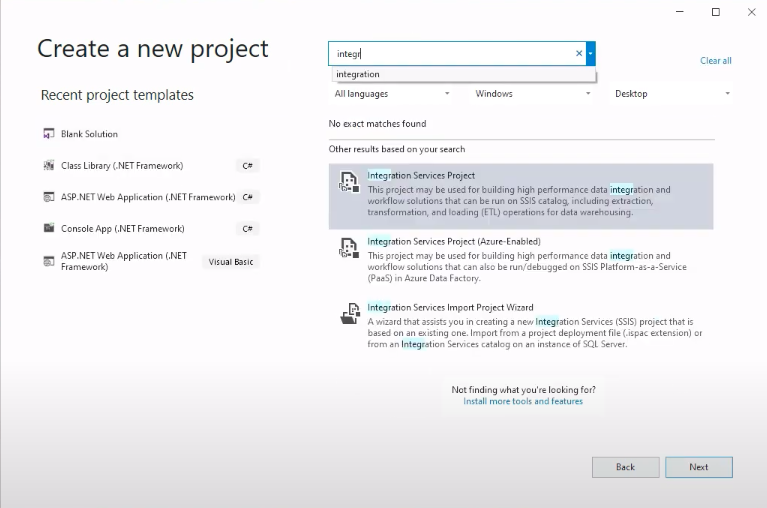
- Configure the project settings and click Create.
- Select the Data Flow task.
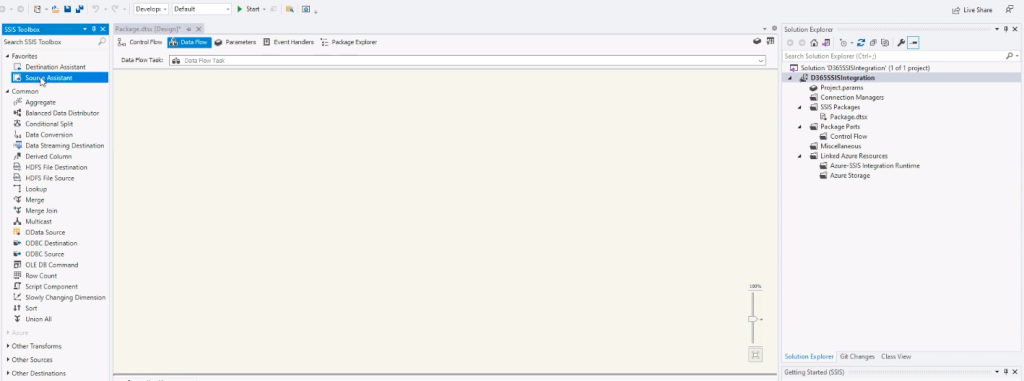
- Click Source Assistant and select SQL Server. Apply other configuration settings if needed.

- From the left panel of the project, under Sources, select SQL Server and drag it to the central task area.
- In the Solution Explorer panel on the right of the main project window, right-click on the Connection Manager and select New Connection.
- Select Dynamics CRM and click Add.
- Click Test Connection.
- From the left panel of the project, under Destinations, select Microsoft CRM and drag it to the central task area.
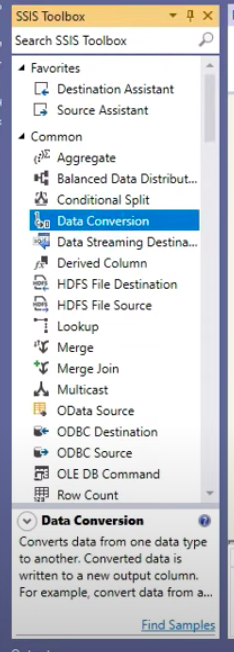
- Connect source and destination blocks as follows. If there’s a need to transform data, select them from the SSIS Toolbox panel and put them between the source and destination.
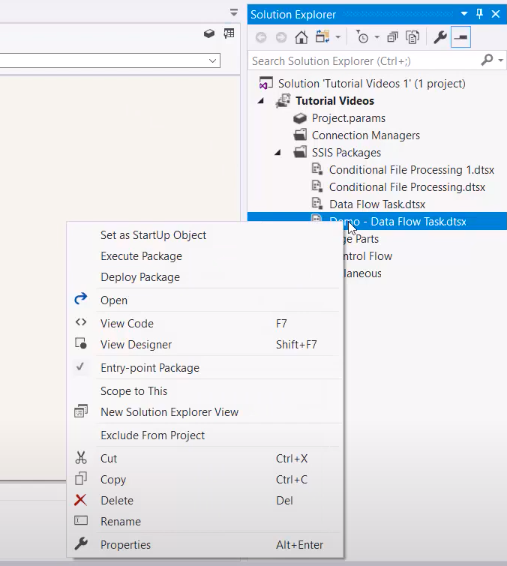
- In the Solution Explorer panel, find the task and right-click on it. Select Execute Package.
A similar procedure can be done reversely – with Dynamics CRM as a source and SQL Server as a destination.
Pros
- There is a possibility of executing integration in both directions: from SQL Server to Dynamics CRM and vice versa.
- A user-friendly graphical interface that doesn’t require any coding.
Cons
- Suitable only for tools within the Microsoft ecosystem.
- Limitations associated with integration include systems deployed on-premises.
ODBC (Open Database Connectivity) Driver
Another way to connect both instances is to use the Devart ODBC Driver for Dynamics 365. It allows the creation of a linked server in SQL Server Management Studio that provides permission to execute SQL commands and read data from Dynamics 365. In this case, only mono-directional data transfer is expected, obviously.
Best For
This method would be suitable for IT specialists who interact with databases on a daily basis and are proficient in SQL.
Prerequisites
Step-by-step instructions for integration with ODBC driver
To create a linked server for Dynamics 365 in SQL Server Management Studio, proceed with the following steps:
- Launch SSMS and select the required SQL Server instance.
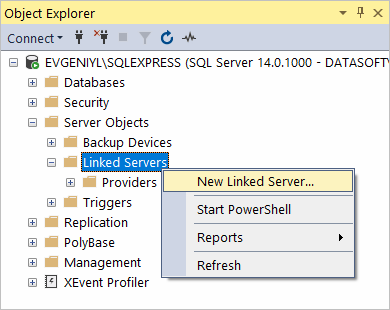
- In Object Explorer, expand the Server Objects section. Then, right-click on Linked Server and select New Linked Server.
- Configure a newly created linked server:
- In the Linked server field, type the name of the server.
- Select Other data source from the Server type drop-down list.
- Select Microsoft OLE DB Provider for ODBC drivers from the Provider drop-down list.
- In the Data source field, type the DSN name (e.g., Devart ODBC Driver for Dynamics 365). Alternatively, it’s possible to type the ODBC Driver connection string in the Provider field.
The linked server appears under Linked Servers in Object Explorer. Executing distributed queries and accessing Dynamics 365 databases via the SQL Server is now possible.
Pros
- An intuitive GUI for managing and interacting with SQL Server databases and objects.
- Advanced security, reporting, and analysis services.
- Integration monitoring.
Cons
- Only one-way integration – data can be extracted from Dynamics CRM to SQL Server.
- Extensive knowledge of SQL language is required.
- Available only on Windows.
Power Automate (Flow)
Power Automate is another Microsoft-based product of the new generation. It extensively uses AI to optimize your business processes and automate repetitive tasks.
This tool primarily works with other cloud-based sources. However, it also supports desktop-based applications and systems, such as SQL Server.
Best for
Power Automate mostly includes connectors for cloud-based tools, so it would be suitable for companies that heavily implement SaaS applications within their data infrastructures. This solution also supports a number of on-premises tools, including SQL Server.
Prerequisites
Create an account on the official Power Automate platform and explore the list of supported browsers if you plan to use this tool only for cloud flows.
In case you need to create a desktop flow, download Power Automate from Microsoft Store or download the .msi file and perform installation based on it.
Step-by-step guide
In this example, we show how to create a cloud flow using the web-based version of Power Automate. To start the SQL Server to Dynamics CRM integration using this tool, follow these steps:
- On the Power Automate (Flow) main page, log in with your Microsoft credentials.
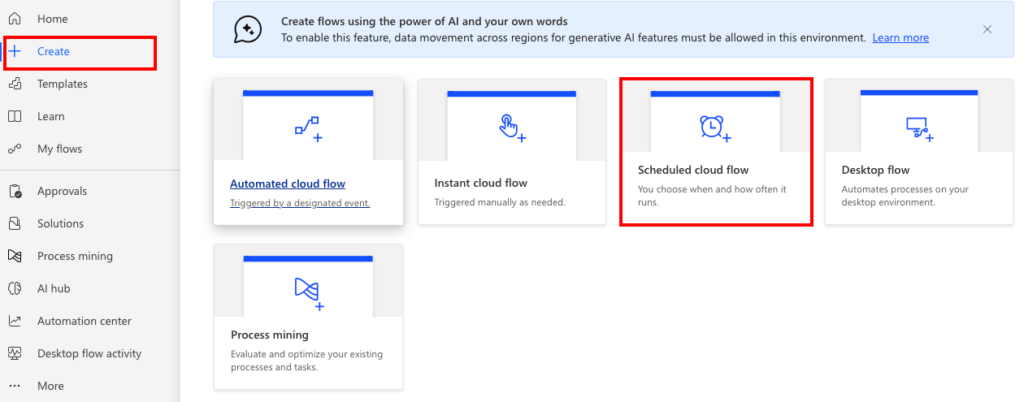
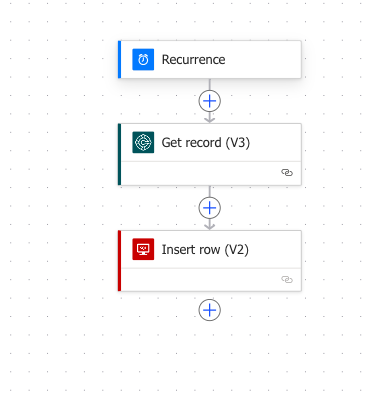
- Click Create on the left panel and select the type of flow that interests you. In our case, we use the Scheduled cloud flow option.
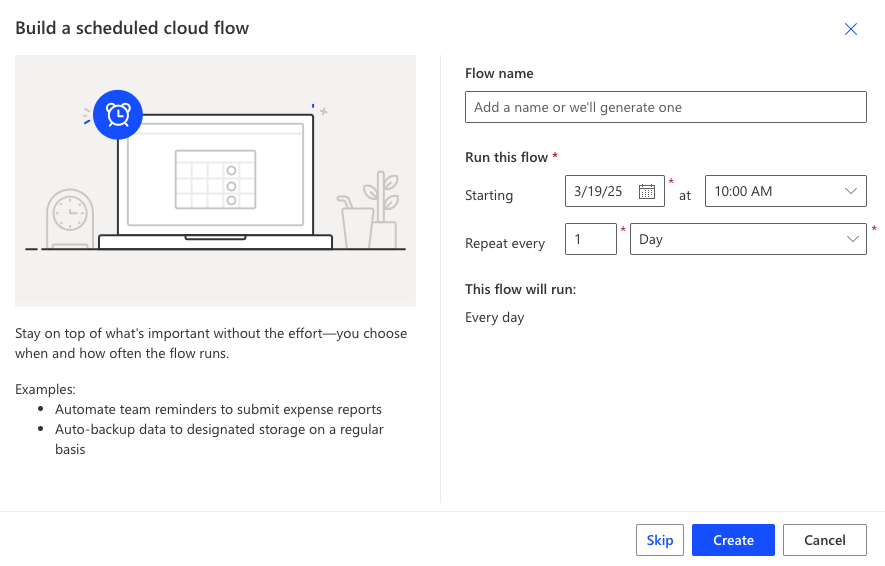
- Specify the scheduling options for automated data extraction. You can skip this step for now and configure it later. Click Create.
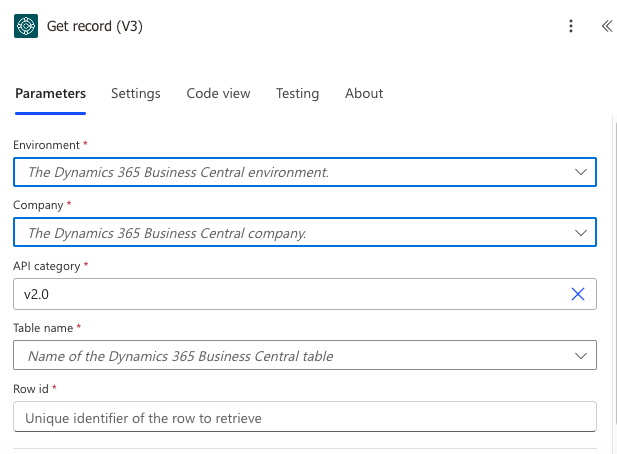
- Click + and select Dynamics 365 Business Central desired action from the list.
- Establish a connection with your Dynamics 365 Business Central account.
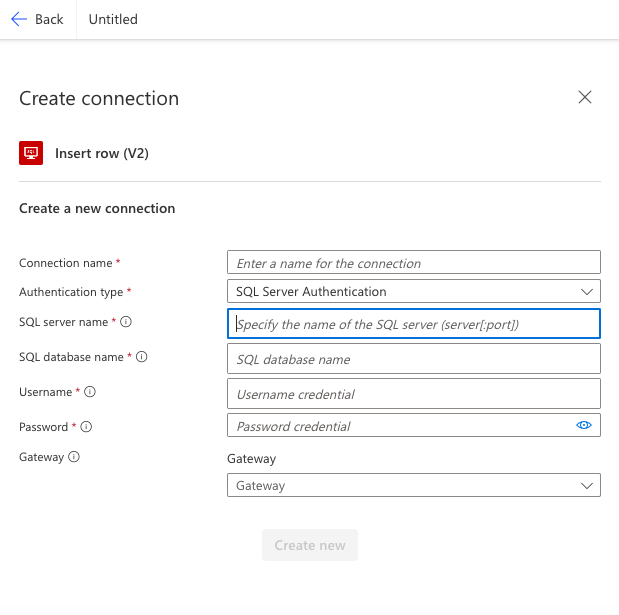
- Click + and select the desired action for SQL Server.
- Establish a connection with your SQL Server database.
- Click Save to save the flow.
- Go to the list of your flows and start the one that corresponds to the SQL Server to Dynamics CRM integration.
Pros
- Automation of routine processes and repetitive manual tasks.
- Elimination of occasional human errors.
- Pre-defined templates for data flows.
Cons
- Even though Power Automate has many connectors, most of them offer a small number of items that can be retrieved.
- A limited number of API calls for most connectors.
- Slow performance, especially for large flows.
- Limited information on integration run history.
Third-Party Integration Tools
To overcome the limitations of all the above-mentioned approaches and decrease the degree of difficulty, we’d like to introduce a third-party data integration solution. Skyvia is a cloud-based platform that offers several ways to integrate Dynamics and SQL Server data.
Best for
Skyvia is seen as a reliable integration platform for any kind of business. In fact, it’s a multifaceted solution that can be used in various use cases.
When it comes to SQL Server Dynamics CRM integration, Skyvia offers several tools for smooth data exchange between the systems.
In this section, we mainly focus on:
- Import component (ETL solution)
- Replication component (ELT solution)
- Synchronization (bi-directional sync solution)
However, this platform can also be suitable for complex data flows involving several sources and complex transformations with the Data Flow component.

Prerequisites
Before going through the details of integration scenarios, take some preparatory actions:
- Open Skyvia and log into the system or sign up to create an account.
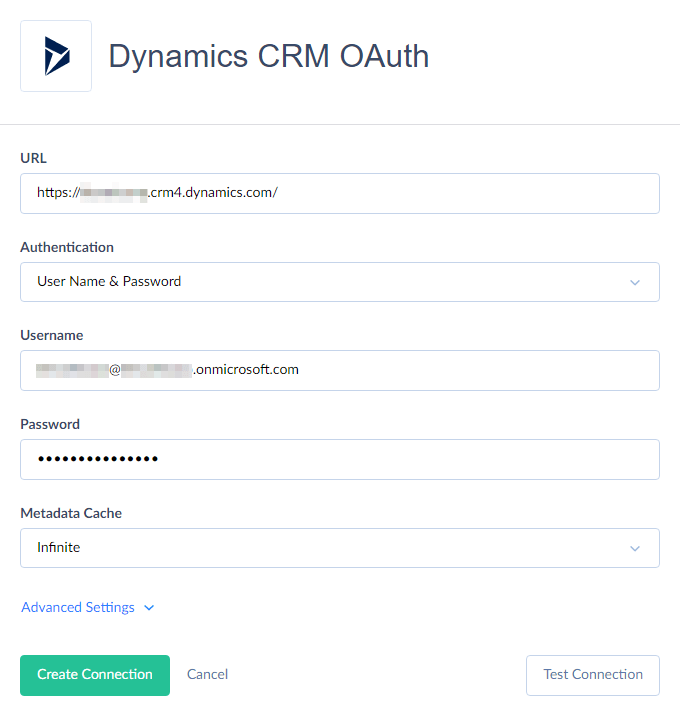
- Connect to Microsoft Dynamics from Skyvia – see detailed step-by-step instructions.
- Connect to the SQL Server from Skyvia – see detailed step-by-step instructions.
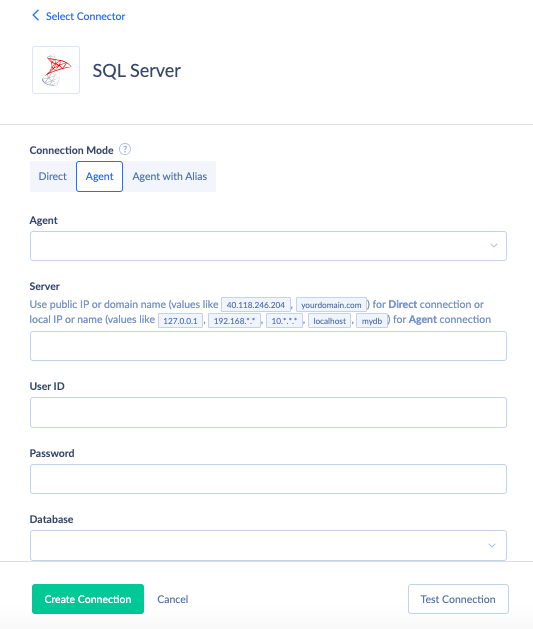
NOTE: Select the Agent connection mode for SQL Server to establish a secure channel. Make sure to download SQL Server Agent, install it, and run it as Administrator beforehand.
Replicate Data (ELT)
Skyvia’s Replication scenario helps users copy data from one source to another. Here, we’ll explore the case of data replication from Microsoft Dynamics 365 to SQL Server. Note that there’s no need to create tables in the SQL Server, as Skyvia will do that automatically. Moreover, the replication scenario doesn’t allow any data transformation to be performed.
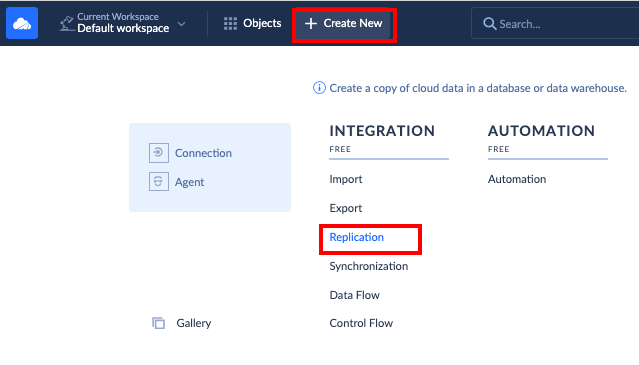
- Click +NEW in the top menu and select Replication in the Integration column.
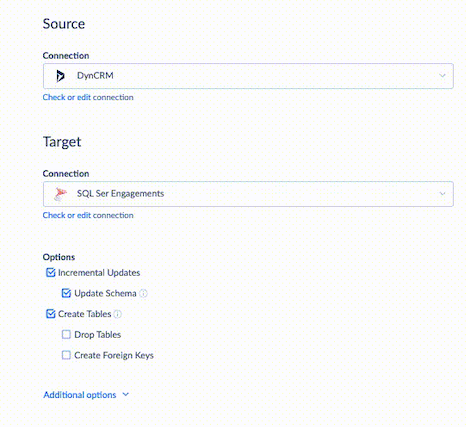
- Select Dynamics connection as a source and SQL Server as a target.
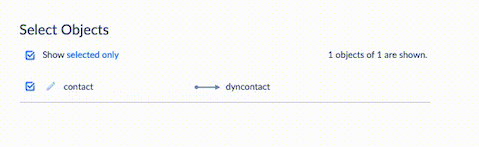
- Select the objects to replicate.
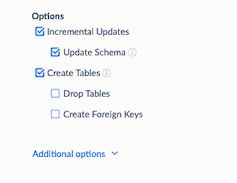
- Select Incremental Updates under Options. That way, Skyvia copies all data only when the replication procedure is executed for the first time. During subsequent replication procedures, the system checks which Dynamics data was updated and then will apply these changes to the SQL Server tables.
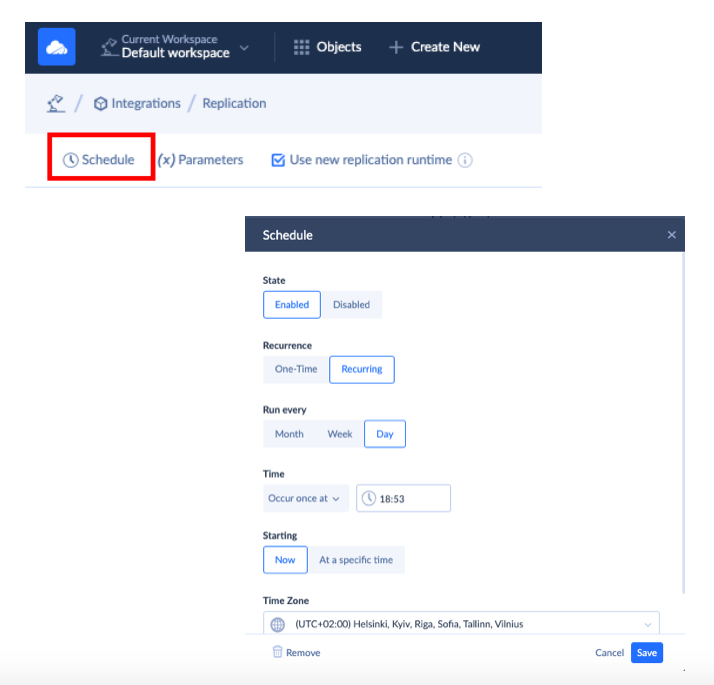
- To run the task on a regular basis, click Schedule to define parameters for its automatic execution.
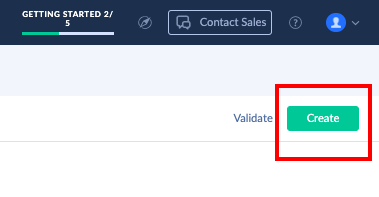
- Click Create.
Import Data (ETL)
Skyvia’s Import is a flexible ETL tool for data migration between different platforms. It permits data load data from CSV files, cloud apps, or relational databases to other cloud apps or relational databases.
In contrast to Replication, the Import integration offers data transformation and mapping capabilities along with other advanced features for working with data.
With Skyvia, you can easily configure data migration between Microsoft Dynamics CRM and SQL Server in any direction. Here, we mainly review how to load data from RDBMS to CRM. This case allows complementing the client data with financial or contact details, for instance, which greatly simplifies the work of sales teams.
- Click +Create New in the top menu and select Import in the Integration column.
- Under the Source type section, select Database or cloud app and find SQL Server in the Connection drop-down list.
- Under the Target section, select Microsoft Dynamics CRM from the Connection drop-down list.
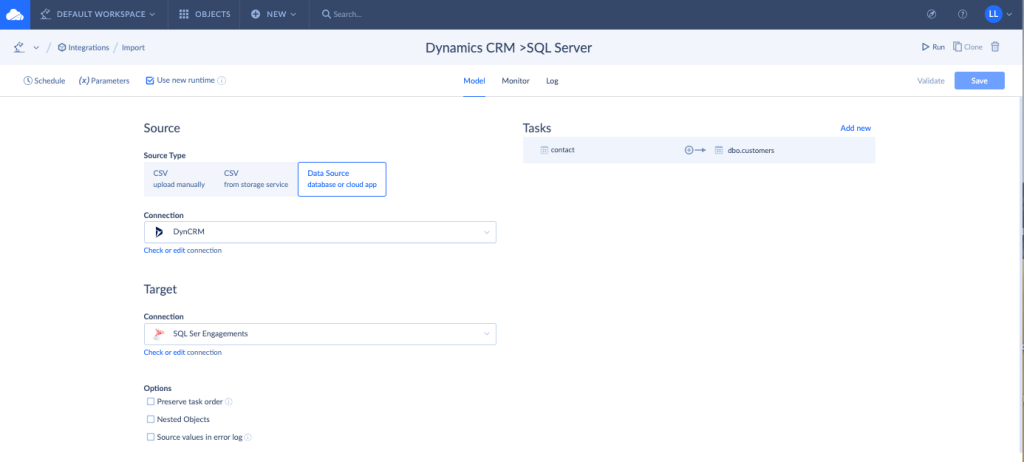
- Click Add new in the Tasks section on the right.
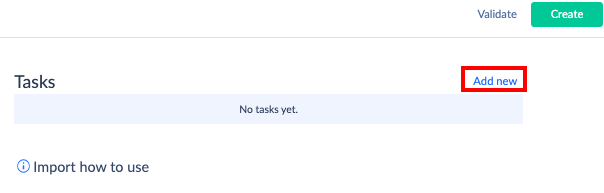
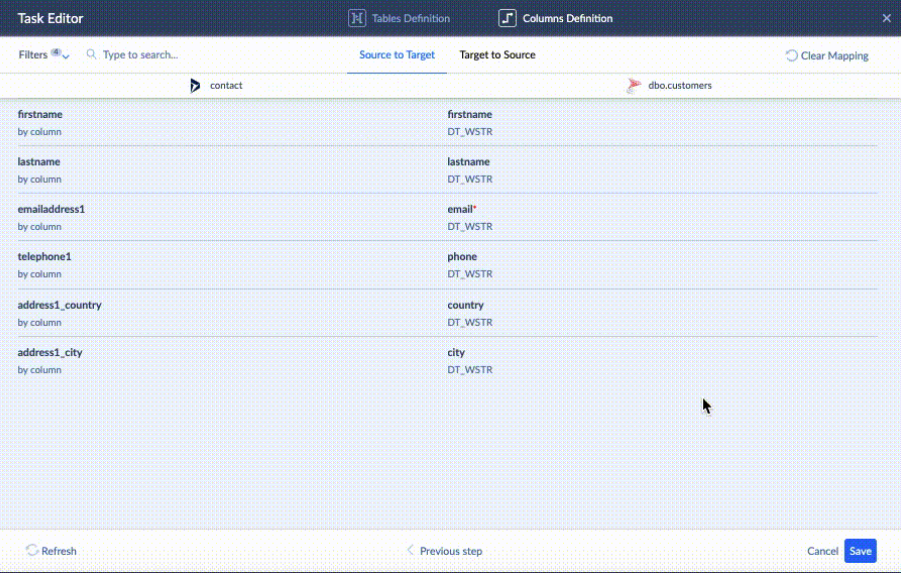
- In the task editor, it’s possible to define filters, select data import operations (INSERT, UPSERT, UPDATE, or DELETE), and define mapping types (Column, Expression, Lookup, Constant, Relation, External ID, etc.).
- After all configuration settings are ready, click Save.
- Click Create.
- To run the task on a regular basis, click Schedule to define parameters for its automatic execution.
Note that it’s also possible to transfer data in the opposite direction. Moreover, After uploading/transferring data with the help of Skyvia to SQL Server, users can then load the prepared data into BI/AI etc tools.
Synchronize Data
Skyvia’s Synchronization component aims to sync data between cloud applications (Microsoft Dynamics 365) and relational databases (SQL Server) in both directions. It allows synchronizing data even of a different structure, preserving all data relations and providing powerful mapping settings configuration.
When the synchronization task runs for the first time, the system doesn’t check whether the records in data sources are identical but simply copies data from one side to another. This may cause duplicate records in the destination system, so it’s crucial to ensure it has no records yet. During subsequent sync operations, if a record is modified or deleted in one source, the system modifies or deletes the data mapped to this record in another source, and vice versa.
- Click +NEW in the top menu and select Synchronization in the Integration column.
- Select Dynamics connection as a source and SQL Server as a target.
- Click Add new in the Tasks section on the right. In the task editor, select an object from the Source drop-down list and the corresponding data field on the target side.
- Define data mapping settings in the Column Definition tab for both directions and save the task.
- Click Schedule to define the parameters for its automatic execution.
- Click Create.
To start synching right away, click Run and go to the Monitor tab to check the progress.
Pros
- Web-based access with no extra downloads and desktop installations required.
- Support of 200+ data sources, including SaaS apps, flat files, databases, storage systems, and data warehouses.
- An ample set of integration scenarios and data processing capabilities.
- Possibility to start with a freemium plan with all basic features included.
Cons
- No phone support is available.
- The maximum data update frequency on a freemium plan is once a day.
Dynamics 365 API
Microsoft provides the API (V2.0) for connecting Dynamics 365 CRM with other applications and services. This is typically done with so-called Connect apps that establish point-to-point connections between services. Such applications rely on standard REST API for data exchange.
Best for
Integration via API is suitable for seasoned developers with multi-year experience in coding and with a solid technical background. Such professionals are capable of creating complex solutions to connect Dynamics CRM and SQL Server. Even though this approach is rather demanding, it offers unlimited customization, so it will be suitable for companies that need specific settings in their CRM system.
Prerequisites
Before starting integration with the method, you need to enable the APIs for Business Central.
If you already have such APIs enabled, use the latest version. If not, check how to perform the transition from API v1.0 to API v2.0.
Step-by-step guide
One possible solution to connecting Microsoft Dynamics 365 CRM with SQL Server is to create a Connect app using standard REST API for data exchange. A Connect app establishes a point-to-point connection between Dynamics 365 Business Central and a third-party solution (SQL Server, in this case).
Feel free to check the detailed Microsoft guidelines on how to create a Connect app and authenticate against API endpoints.
Pros
Here are the main benefits of using APIs:
- High level of customization
- Cross-platform and multi-language support
Cons
- Deep technical knowledge is required.
- An additional step is needed to translate API calls to SQL.
Benefits of Dynamics CRM and SQL Server Connection
Businesses need to consider Dynamics 365 & SQL Server integration because of its tangible and intangible benefits. Some of the most significant ones are provided below.
- Data visibility. As SQL Server is usually seen as an enterprise ERP system, companies can take data from there to complement Dynamics CRM. Thus, Dynamics contains all the data needed for departments working with customers, which enhances the overall data visibility.
- Enhanced collaboration. Having integration tools in place makes the collaboration between departments more fruitful.
- Informed decision-making. Loading data from one source to another and keeping it up-to-date provides a strong basis for analysis. As SQL Server as well as Dynamics easily connect to another Microsoft product named Power BI, driving analytics becomes easier, and thus makes decisions weighted.
Conclusion
In this article, we have reviewed five fundamental approaches to connecting the SQL Server to Microsoft Dynamics CRM. Some offer bidirectional data transfer, while others can only execute unidirectional integration.
The most complex to implement is the API-based connection since it requires deep technical expertise but offers the highest level of customization at the same time. Integration with SSIS also requires technical knowledge and SQL language skills. ODBC driver, Power Automate, and Skyvia rely heavily on the user interface, which makes them really convenient and fast to use.
Of course, each way of connecting SQL Server to Dynamics CRM is suitable for a set of use cases. However, among all of them, Skyvia provides a universal approach to integration. It allows businesses to select both simple and complex scenarios for data exchange between a database and a CRM.
Don’t hesitate to try Skyvia today!

FAQ for Dynamics CRM with SQL Server

Can I integrate Dynamics 365 (online) with an on-premises SQL Server database?
Connecting web-based Dynamics CRM to an on-premises SQL Server is possible. You can do it with Skyvia by configuring pre-built connectors to each of these tools and selecting the integration scenario.
Is performing a one-time data migration from Dynamics CRM to SQL Server possible?
Yes. You can copy data from Dynamics CRM to SQL Server as a single operation. It’s also possible to set up a data flow from SQL Server to Dynamics CRM and execute a one-time data migration.
Which integration method is best for real-time data synchronization between Dynamics 365 and SQL Server?
Consider using the Skyvia Synchronization tool for that purpose, but make sure that one of the systems is empty before the synchronization starts. Otherwise, there might be duplicate records and inconsistencies in both systems.
