

Managing a Shopify store while trying to keep track of customer relationships in Salesforce can feel like trying to keep a dozen plates spinning. When data is stuck in silos, the inefficiencies quickly pile up, leading to:
- Inconsistent customer records
- Delayed reporting and insights
- Wasted hours on manual exports
- Poor customer experiences
- Missed sales opportunities
- Decreased trust with customers
These challenges slow down your business and hinder the ability to provide a seamless, personalized experience. The solution is simple: integrating Shopify with Salesforce. But with options ranging from manual CSV files to custom APIs or no-code tools, which method is best for you?
In this article, we’ll explore the top ways to integrate Shopify and Salesforce, showing how to eliminate your data pain points and make data work.
Table of contents
- Why Integrate Shopify with Salesforce?
- Best Methods for Shopify Salesforce Integration
- Method 1: Using Built-In Connectors
- Method 2: Using Manual Data Import into Salesforce
- Method 3: Using API for Custom Integration
- Method 4: No-Code Integration with Skyvia
- Best Practices for Shopify-Salesforce Integration
- Conclusion
Why Integrate Shopify with Salesforce?
Running an e-commerce business is like managing a busy kitchen. Shopify is the chef cooking up orders, Salesforce keeps track of customer preferences, and other tools handle inventory and order management. But when these systems don’t communicate, it leads to inefficiencies and missed opportunities.
Integrating Shopify with Salesforce solves this problem. With seamless data sync between the two, you get a 360-degree view of your business, streamline operations, and make more informed decisions.
Key Benefits of Shopify Salesforce Integration
360-Degree Customer View
Benefit: Sync Shopify data such as customer profiles, purchase history, and preferences with Salesforce for a unified customer record.
Impact: With a holistic view of customer interactions, you can personalize services, tailor marketing campaigns, and boost engagement. For instance, Shopify customers can be converted into contacts automatically, enabling more effective lead nurturing.
Automation of Repetitive Tasks
Benefit: Automate tasks like order processing, inventory management, and customer data entry.
Impact: Save time and reduce errors significantly. For example, automatic syncing of orders from Shopify to Salesforce means fewer manual updates and fewer mistakes.
Enhanced Customer Experience and Engagement
Benefit: Create personalized campaigns based on Shopify’s purchase history and Salesforce CRM data.
Impact: Engaging customers with relevant offers improves retention and lifetime value.
Common Challenges of Integration
Data Synchronization Issues
Large data volumes, like historical orders, often lead to slow systems or incomplete transfers. Additionally, guest checkouts in Shopify can create duplicate customer records in Salesforce, causing further inconsistencies.
Data discrepancies disrupt reporting, inventory management, and customer service. Imagine Shopify showing “fulfilled” while Salesforce has not been updated — this can cause fulfillment errors that impact customer satisfaction and operational efficiency.
Data Mapping and Field Discrepancies
Misaligned data fields between Shopify (like product SKUs, customer names) and Salesforce (e.g., contact fields, order IDs) often lead to inaccurate data transfers. Shopify’s CSV exports lack fields like “Title”, making mapping to Salesforce’s Contact object more complex.
Incorrect mappings mess with data consistency, affecting analytics and customer management. It’s particularly problematic when syncing across platforms with different schemas.
Security and Privacy Concerns
Improper security configurations could expose sensitive customer data, leading to potential breaches or compliance violations. Data breaches compromise customer trust, and businesses may face severe penalties for non-compliance with privacy regulations like GDPR or CCPA.
Cost and Resource Constraints
Integration costs (e.g., agency fees, third-party tool subscriptions) and resource demands (e.g., time, technical expertise) can be a burden for SMBs. Custom API integrations are particularly expensive and slow. High costs or prolonged setup also delay businesses from enjoying the efficiency benefits that integration can provide.

What to Consider Before Integration
Before jumping into the Shopify-Salesforce integration, take a moment to think through a few important factors. It’s like getting ready for a trip — you want to ensure everything’s set before you hit the road.
1. Data Sync: Real-Time or Batch?
Decide whether you need real-time updates or if batch processing will work. Real-time syncing gives you up-to-the-minute data but can be more resource-heavy. Batch processing is less demanding but adds a slight delay. Choose what fits your business needs best.
2. Compatibility: Are They Compatible?
Make sure Shopify and Salesforce can communicate effectively. If the data formats don’t align, you’ll run into issues. Use integration tools like Skyvia to bridge any gaps and ensure smooth data flow between the platforms.
3. Automation: Save Time and Reduce Errors
Automate repetitive tasks like syncing data between platforms to save time and reduce human error. Automation helps keep things running smoothly and frees your team to focus on more valuable work.
4. Scaling – Can It Grow with You?
Ensure your integration is scalable as your business grows. If your system can’t handle increased data or traffic, you’ll hit roadblocks down the line. Plan ahead to keep everything running smoothly as you expand.
Best Methods for Shopify Salesforce Integration
When it comes to integrating Shopify with Salesforce, there are several methods to choose from, each catering to different needs and expertise levels. Here’s a brief overview of the options we’ll cover in this article:
- Method 1: Using Built-In Connectors. Explore a range of third-party apps available on Salesforce AppExchange or Shopify App Store, designed to streamline integration with added features and flexibility.
- Method 2: Using Manual Data Import into Salesforce. Connecting Salesforce to Shopify is also possible with the Shopify Data Export Wizard and the Salesforce Data Import Wizard. However, it’s worth noting that this method requires a manual file export from Shopify to Salesforce.
- Method 3: Using API for Custom Integration. For businesses with specific needs, custom API integration enables more control over data flow and provides flexibility for complex workflows.
- Method 4: No-Code Integration with Skyvia. Skyvia offers a no-code integration that simplifies data syncing, making it accessible for non-technical users while providing robust features and automation.
Each method comes with its own strengths, costs, and limitations, just like how a hammer, screwdriver, or wrench each has its ideal use. Whether you’re looking for a quick fix, a highly customizable solution, or something in between, the right choice depends on your business size, complexity, and budget.
To help you decide, we’ve put together a comparison table that breaks down each method’s key features and considerations. This will provide you with a clearer picture of which integration approach best suits your needs, saving you time and effort in the long run.
| Feature | Method 1: Using Built-In Connectors | Method 2: Using Manual Data Import into Salesforce | Method 3: Using API for Custom Integration | Method 4: No-Code Integration with Skyvia |
|---|---|---|---|---|
| Ease of Use | Easy plug-and-play setup, no coding required | Simple setup with user-friendly wizards | High technical expertise required for API integration | Intuitive design with a user-friendly, drag-and-drop interface, no coding necessary |
| Cost | Free or low-cost options, but some advanced features require paid plans | No additional cost, uses native Shopify and Salesforce tools | High upfront cost for development and maintenance | Free plan available for up to 10,000 records/month; paid plans start at $79/month |
| Real-Time Sync | Yes, both real-time and scheduled syncing options available | No real-time sync | Yes, real-time updates possible with webhooks or API | Yes, bi-directional real-time sync |
| Scalability | Suitable for small-to-medium businesses, struggles with high volumes or frequent updates | Works best for small datasets or one-off imports | Highly scalable, ideal for large datasets and growing businesses | Scalable to handle large datasets and multiple stores, integrates seamlessly with over 200 apps |
Method 1: Using Built-In Connectors
When you’re looking for a simple, no-fuss way to integrate Shopify with Salesforce, built-in connectors from the Shopify App Store and Salesforce AppExchange offer an excellent solution. These pre-built integrations bridge the gap between your Shopify store and Salesforce CRM, enabling automatic synchronization of your e-commerce and customer relationship data with minimal setup or coding required.
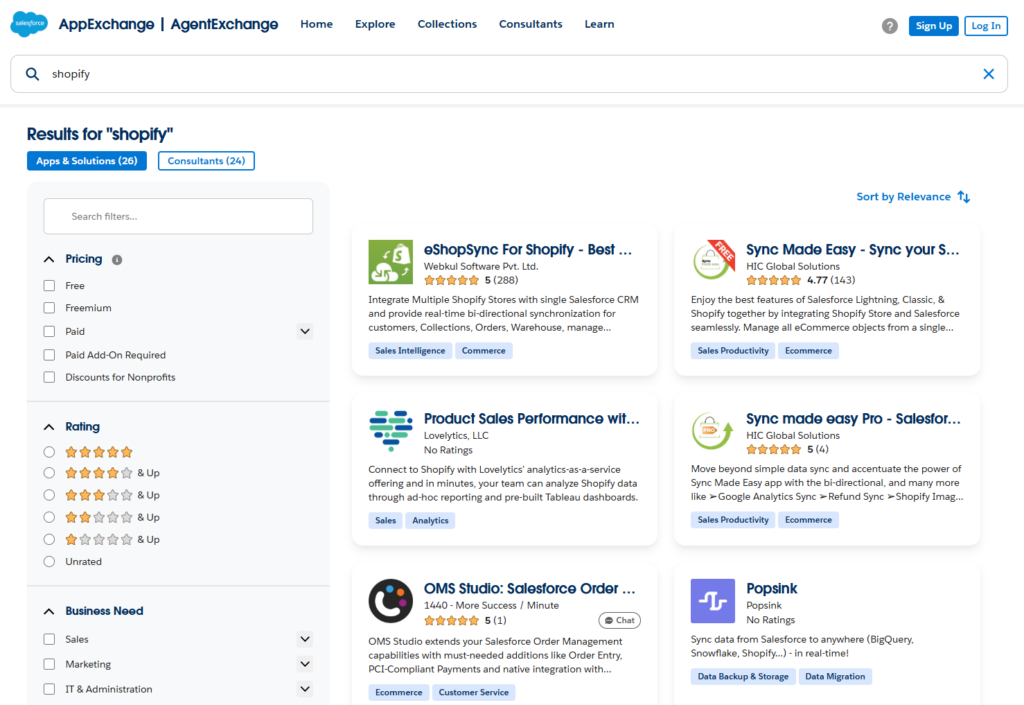
Popular apps like CRM Perks: Salesforce Sync, eShopSync for Shopify, and Sync Made Easy provide a seamless way to sync vital data such as customers, orders, products, and inventory between the two platforms.
Key Features
- Data Synchronization: These apps support both real-time and scheduled syncing of Shopify customers, orders, products, and collections into Salesforce, with some offering bi-directional sync for updates in both directions.
- Multi-Store Management: You can manage data from multiple Shopify stores within a single Salesforce instance, which is perfect for businesses running several storefronts under one roof.
- Historical Data Import: Bring in legacy Shopify data, such as past orders, into Salesforce for deeper analytics and reporting.
Pros
- Ease of Use: These connectors are plug-and-play, making them an excellent choice for users with minimal technical expertise. Whether you’re a small business owner or a marketing manager, you’ll appreciate how quickly you can get up and running.
- Quick Deployment: With setup taking just minutes, you can integrate Shopify and Salesforce with ease. Both AppStore and AppExchange provide clear, step-by-step guidance.
- Cost-Effective Options: Many of these apps come with free plans or low-cost options (e.g., CRM Perks starts at $19/month), making them accessible for SMBs.
Cons
- Limited Customization: While these connectors work great for basic needs, they don’t offer the level of flexibility that a custom API integration would. If your business has unique workflows or complex requirements, these may fall short.
- Sync Challenges: While generally reliable, occasional syncing issues may arise, such as incomplete data transfers or delays. Some users have reported post-launch issues with apps like CRM Perks that require manual fixes or additional support.
- Cost for Advanced Features: While free or basic versions exist, more advanced functionality (e.g., multi-store sync, historical data import) may require paid plans, which can add up over time.
- Dependence on Maintenance: The reliability of these connectors depends on third-party app updates, as well as Salesforce’s API limits. If either of these changes, it could disrupt your data sync.
- Performance Constraints: For businesses with high transaction volumes or large data sets, these apps may struggle to keep up, especially when syncing frequently or dealing with large batches of data.
Step-by-Step Setup Guide
To set up built-in connectors from the Shopify App Store or Salesforce AppExchange (e.g., CRM Perks: Salesforce Sync, eShopSync for Shopify), follow these steps:
- Choose a Connector
- Visit the Shopify App Store or Salesforce AppExchange and search for “Salesforce” or specific apps like CRM Perks, eShopSync, or Sync Made Easy.
- Review app features, pricing, and user feedback (e.g., CRM Perks praised for detailed logs, Sync Made Easy for multi-currency support).

- Install the App
- For Shopify App Store: Click “Install” on the app page (e.g., CRM Perks), log into your Shopify account, and grant permissions.
- For AppExchange: Click “Get It Now,” log into your Salesforce account, and select the org (e.g., production or sandbox) to install (e.g., eShopSync).
- Follow the wizard to connect both platforms.
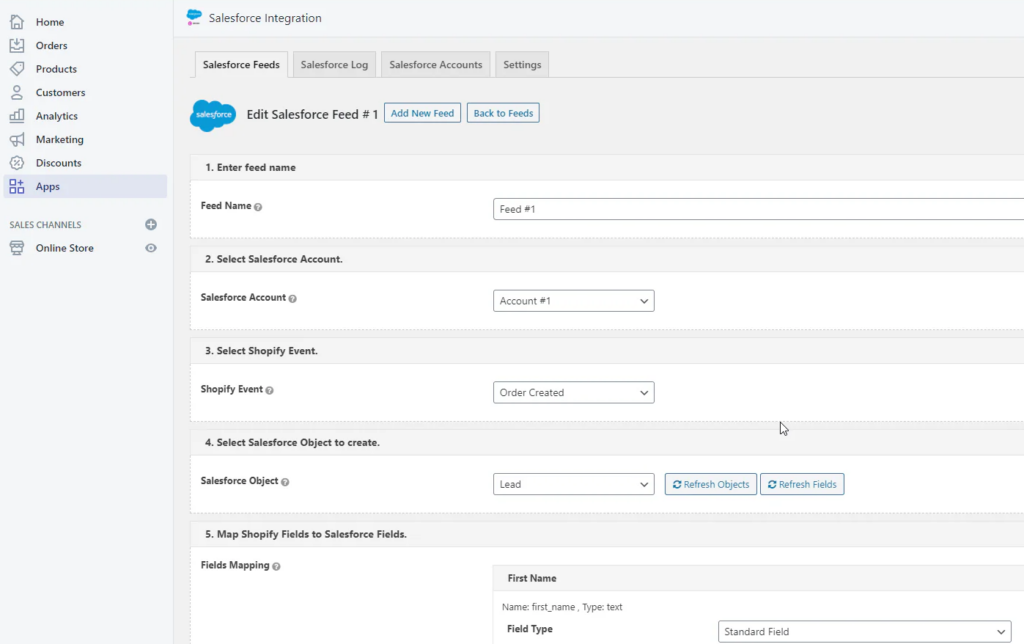
- Configure the Connection
- In the app’s dashboard (e.g., CRM Perks’ Salesforce Feeds tab), add your Salesforce account and link your Shopify store.
- Map fields (e.g., Shopify “Order ID” to Salesforce “Sales Order”) using the app’s configuration interface.
- Set Up Sync Preferences
- Choose real-time or scheduled sync for data types (e.g., customers, orders).
- For historical data, use the “Manually Sync Now” option (e.g., Sync Made Easy’s legacy import feature).
- Configure error handling (e.g., sync logs) to track issues.
- Adjust Permissions (AppExchange-Specific)
- For apps like eShopSync, go to Salesforce Setup > Manage Assignments, add users, and assign permission sets (e.g., “eShopSync User”).
- Enable order settings in Salesforce (e.g., tick “Enable Orders” and “Enable Reduction Orders”) if required.
- Test the Integration
- Sync a small batch (e.g., 10 orders) to verify data accuracy and field mappings.
- Check Salesforce and Shopify for synced records, resolving errors using app logs or support.
Method 2: Using Manual Data Import into Salesforce
Connecting Shopify to Salesforce via manual data import is a simple, no-frills method that leverages the built-in tools available within both platforms. Shopify’s Data Export Wizard enables you to export essential data, including customers, orders, and products, into a CSV file. Once the data is in CSV format, you can use Salesforce’s Data Import Wizard to manually import that file into Salesforce, mapping the fields as needed.
This approach works best for businesses that only need to perform occasional data transfers or for smaller-scale operations with limited technical resources. However, it’s important to note that this method lacks the automation and real-time sync capabilities that are crucial for businesses with larger datasets or frequent updates.
Key Features
- Data Export from Shopify: Easily export customer data, product listings, and order details into CSV files, with the option to filter records by specific criteria. Shopify allows you to export up to 50 products at once, or larger datasets can be emailed to you.
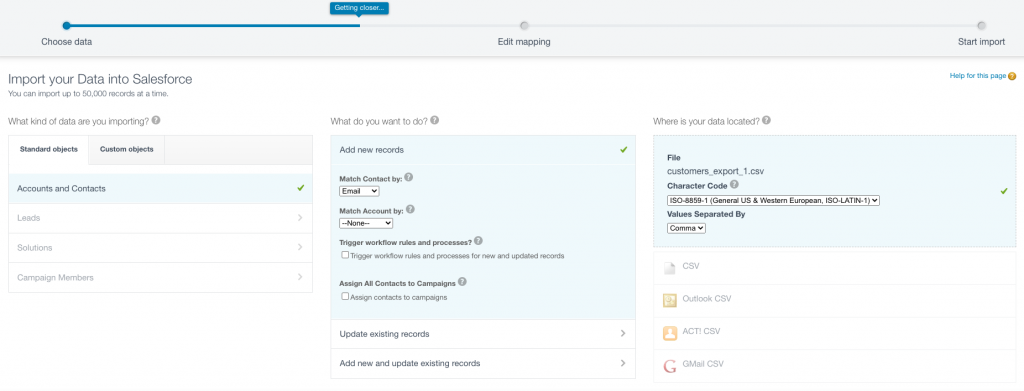
- Data Import into Salesforce: With the Salesforce Data Import Wizard, you can import up to 50,000 records at a time into standard or custom Salesforce objects (e.g., contacts, leads, accounts). You can choose to add, update, or upsert records to ensure data consistency.
- Field Mapping: Manual field mapping ensures that the imported data aligns with Salesforce’s existing data structures, giving you control over how data is transferred.
- No Coding Required: This method is entirely accessible via the Shopify and Salesforce admin interfaces — no programming knowledge is necessary.
- Basic Data Management: Ideal for one-time data migrations or periodic updates when real-time integration isn’t a requirement.
Pros
- No Additional Cost: Since this method uses native tools available in both Shopify and Salesforce subscriptions, there are no additional costs for third-party apps or integration services.
- Ease of Access: Both tools are available directly within the Shopify and Salesforce admin panels, making them easy to access for users with administrative permissions.
- Simple for Small Datasets: This approach is perfect for small datasets or one-off imports (up to 50,000 records in Salesforce) and is efficient when the data volume is manageable.
Cons
- Manual Process: The primary drawback of this method is its manual nature, which can be time-consuming and prone to human error.
- No Real-Time Sync: This method does not support real-time data updates, making it unsuitable for businesses that require continuous data synchronization.
- Data Limits: Shopify exports are capped at 15 MB per file, and Salesforce imports are limited to 50,000 records or 100 MB per file, which may not be sufficient for businesses with larger datasets.
- Error-Prone Mapping: Manual mapping can be tricky, especially for businesses with complex data structures. If not done carefully, you may end up with incomplete or mismatched data.
- Time-Consuming: For businesses with frequent updates or large datasets, this method can become labor-intensive, requiring repeated exports and imports.
Step-by-Step Setup Guide
- Export Data from Shopify
- Log into your Shopify admin panel and navigate to Products (or Customers/Orders).
- Apply filters if needed (e.g., specific products) and click Export.
- Choose the export scope (e.g., current page up to 50 products or all products via email).
- Download the CSV file (for up to 50 products) or wait for the email with the file (for larger exports).
- Import Data into Salesforce
- Log into Salesforce and go to Setup, then search for Data Import Wizard in the Quick Find box.

- Click Launch Wizard! and select the data type (e.g., Accounts and Contacts, Leads).
- Choose the action: Add New Records, Update Existing Records, or Add and Update (upsert).
- Upload the prepared CSV file by dragging it into the upload area or browsing to select it.
- Map Fields
- Review automatic field mappings by Salesforce; manually map unmapped fields by clicking Map next to each.
- Match CSV columns (e.g., “Email”) to Salesforce fields (e.g., “Contact Email”) and save mappings.
- Ensure required fields (e.g., “Last Name” for Contacts) are mapped to avoid import failures.
- Start and Verify Import
- Click Next, review the import summary, and click Start Import.
- Monitor the Import Status page and wait for a notification email when complete.
- Check Salesforce for imported records (e.g., under Contacts or Orders) and resolve any errors using import logs.
Note: For large datasets exceeding 50,000 records, split the CSV into multiple files or consider alternative tools, as the Data Import Wizard has strict limits.
Method 3: Using API for Custom Integration
When your business has unique needs that go beyond the capabilities of pre-built connectors or manual import methods, custom API integration offers a powerful solution. By leveraging the Shopify and Salesforce APIs, businesses gain full control over their data and workflows, enabling them to tailor the integration to fit complex processes.
Shopify provides GraphQL APIs, Webhooks, etc., while Salesforce offers a range of API options, including REST, SOAP, and Bulk, etc. Using these APIs, businesses can integrate Shopify’s e-commerce data (such as orders, products, and customer profiles) with Salesforce’s CRM system (including leads, opportunities, and accounts). This method allows for seamless data flow, highly customized workflows, and enhanced automation across platforms.
Custom API integration is particularly ideal for enterprises that require:
- Advanced automation,
- Complex custom field mappings,
- Integration with multiple systems beyond just Shopify and Salesforce (e.g., ERP, marketing platforms).
Key Features
- Custom Data Flow: Get precise control over the data, ensuring that the right fields and records are synced exactly as needed.
- Complex Workflow Automation: Enable sophisticated processes, such as triggering Salesforce marketing campaigns based on Shopify purchase events, or syncing inventory in real-time between the platforms.
- Multi-System Integration: Connect Shopify and Salesforce with additional tools (e.g., ERP, marketing automation platforms), enabling a more unified system that meets all business needs.
- Real-Time Updates: Leverage Streaming API or webhooks to trigger instant data synchronization, ensuring that any updates or changes are reflected across systems without delay.
Pros
- Full Customization: With API integration, you can tailor the connection to match exactly how your business operates, including custom fields, complex workflows, and triggers specific to your needs.
- Flexibility: API integration is adaptable to many different scenarios, whether you need multi-currency support, industry-specific features, or just a more granular control over your data.
- Advanced Automation: You can automate workflows (e.g., end-to-end order fulfillment) with custom logic, saving time and reducing the need for manual intervention.
- Control: API integration gives you complete control over data security, mapping, and synchronization rules, ensuring that everything runs exactly as you want.
Cons
- High Technical Expertise Required: This method demands skilled developers who are familiar with API protocols (e.g., REST, OAuth) and programming languages (e.g., Apex, Java). It’s not a plug-and-play solution, so you’ll need experienced tech resources.
- Time-Intensive: Development and testing of custom API integrations can take weeks or even months, depending on the complexity of your needs. This delay can make this method less attractive for businesses looking for quick implementation.
- Costly: Building and maintaining custom API integrations requires a significant upfront investment in development resources. You may also encounter ongoing costs for API usage and maintenance.
- Maintenance Overhead: Custom code is an ongoing commitment. With frequent updates and changes to both Shopify and Salesforce APIs, you’ll need to keep your integration updated to avoid disruptions.
- API Limits: Both Shopify and Salesforce have API rate limits (e.g., 15,000 API calls per 24 hours for Salesforce). These limits can restrict high-volume syncs or cause delays if you exceed the daily cap.
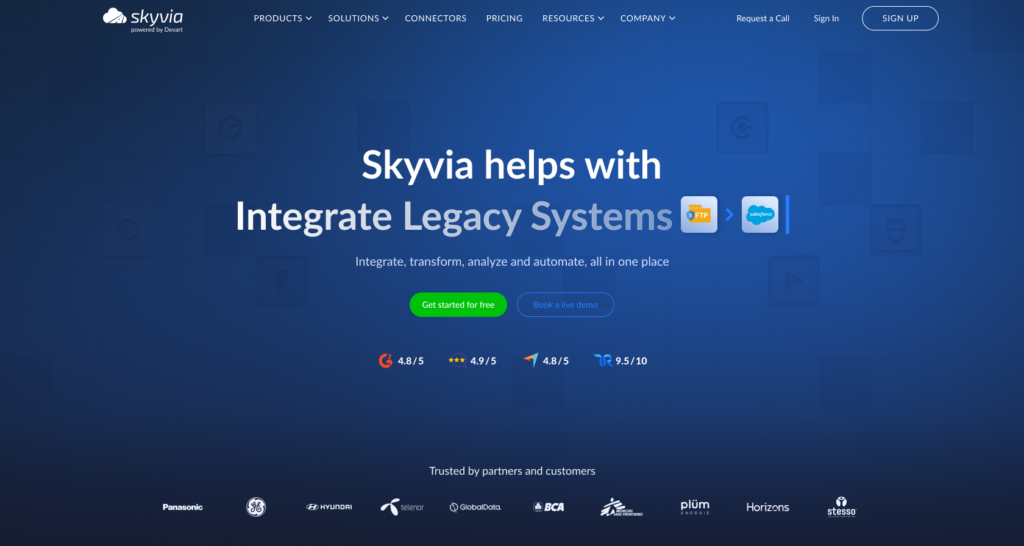
Method 4: No-Code Integration with Skyvia
Skyvia offers a no-code, cloud-based solution that simplifies syncing between Shopify and Salesforce, eliminating the need for technical expertise while delivering robust automation and flexibility. Hosted on Microsoft Azure, Skyvia seamlessly connects Shopify’s e-commerce data (orders, customers, products) with Salesforce’s CRM capabilities (leads, contacts, opportunities). It’s designed for businesses of all sizes, offering an intuitive, user-friendly interface that makes setting up integrations a breeze without the complexity of APIs or manual processes.
Key Features
- No-Code Interface: Drag-and-drop wizards and visual editors simplify the setup process, requiring no coding skills for users to create and configure integrations.
- Advanced Mapping: Supports complex transformations, lookups, and constant value assignments to ensure accurate data alignment between Shopify and Salesforce.
- Automation: Automates critical workflows like creating Salesforce leads from Shopify customers, with flexible scheduling options ranging from daily to minute-level intervals.
- Scalability: Handles large datasets and multiple stores, seamlessly integrating with over 200 apps and databases, including all major options (MySQL, Oracle, SQL Server, etc.).
Pros
- User-Friendly: Designed with simplicity in mind, allowing non-technical users to set up integrations quickly and easily.
- Cost-Effective: Offers a free plan for up to 10,000 records per month and flexible pricing starting at $79/month, which scales as your usage grows.
- Powerful Automation: Automates repetitive tasks, such as syncing data or triggering workflows, reducing manual effort and improving efficiency.
- High Reliability: Hosted on Azure with 99.9% uptime, ensuring that your integrations run smoothly and consistently.
- Broad Compatibility: Integrates Shopify and Salesforce with a wide variety of other apps and databases, providing flexibility for growing businesses.
Cons
- Performance for Massive Datasets: Skyvia may experience slowdowns with extremely large datasets, though performance optimizations are available through support.
- Learning Curve for Features: Some of the more advanced features (such as lookups and transformations) may require an initial learning curve, especially for new users.
- Dependency on Internet: As a cloud-based solution, Skyvia requires a stable internet connection for real-time operations to function properly.
Step-by-Step Setup Guide
- Sign Up and Access Skyvia
- Create a free account, or sign in with an existing one.
- Navigate to the dashboard and select Connections.
- Create Connections
- Click Create New+, then Connection, choose Shopify, and authenticate with your Shopify admin credentials.
- Add a Salesforce connection, logging in with your Salesforce account, and granting permissions.
- Configure Integration
- Go to the Integration table, click Import.
- Choose Shopify as the source and Salesforce as the target (or vice versa for bi-directional sync).
- Map Data Fields
- Use the visual editor to map Shopify fields to Salesforce fields.
- Apply transformations and filter data if needed.
- Set Scheduling
- Define sync frequency (e.g., hourly, daily) or enable real-time updates via triggers.
- Save the configuration and activate the integration.
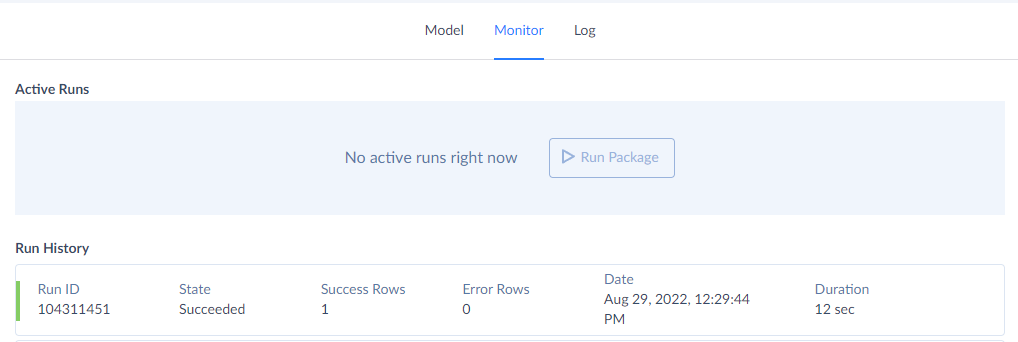
- Test and Monitor
- Run a test sync with a small dataset (e.g., 10 orders) to verify accuracy.
- Check the Monitor tab for results and error logs, adjusting mappings if necessary.
Best Practices for Shopify-Salesforce Integration
Ensuring Data Accuracy & Syncing Frequency
- Data Preparation: Clean and organize data in Shopify and Salesforce. Remove duplicates and standardize formats to avoid syncing issues.
- Field Matching: Align fields like “Customer Name” in Shopify to “Contact Name” in Salesforce. Use custom mappings for complex data structures.
- Sync Frequency: Choose real-time sync for high transaction volumes and scheduled sync for quieter operations. Balance between performance and data freshness.
- Regular Monitoring: Check sync logs regularly to catch issues like missing orders or mismatched inventory, adjusting settings as needed.
Avoiding Duplicate Customer & Order Data
- Deduplication Rules: Set up deduplication logic (e.g., by email or order ID) to merge or flag duplicates automatically.
- Unique Identifiers: Use unique keys like Shopify’s customer ID to prevent multiple records for the same customer.
- Account Creation Policies: Configure Shopify to require account creation for orders to reduce unlinked purchases.
- Custom Field Mapping: Map Shopify metafields to Salesforce custom objects to avoid duplication while preserving data.
- Post-Sync Review: Regularly audit synced data to identify and resolve duplicates, especially after bulk imports.
Automating Workflow for Order Management
- Order Processing: Automate order creation in Salesforce based on Shopify events (e.g., “Order Paid”).
- Inventory Sync: Keep inventory levels updated across both systems to prevent overselling.
- Customer Follow-Ups: Trigger automated emails or tasks in Salesforce based on key order milestones.
- Workflow Triggers: Set up triggers for actions like new customer signups to initiate workflows such as lead generation.
- Scalable Automation: Ensure your automation platform can handle increased order volumes efficiently.
Conclusion
In this article, we’ve explored four ways to integrate Shopify with Salesforce. By automating integration, you can solve critical business problems and drive growth, including:
- Streamlining data sync between Shopify and Salesforce to eliminate manual tasks and reduce errors.
- Improving order and inventory management by automating updates and syncing across systems.
- Enhancing customer experience through real-time data and personalized interactions.
Automation empowers your team to focus on strategic goals rather than data management, ultimately increasing efficiency and profitability.
Want to make this happen? Try Skyvia today with a full free trial: test the integration and automate your business processes with ease!

