Are you planning to use Power BI on a PostgreSQL data warehouse? Then part of your task is to connect Power BI to PostgreSQL.
PostgreSQL is the most loved and wanted database, according to the 2022 StackOverflow Developer Survey. So, developing your next data warehouse in PostgreSQL is a good choice. Also, afterward, you can build reports and dashboards in Power BI.
But how do you connect Power BI to PostgreSQL? Let’s dive in.
Table of contents
- About PostgreSQL
- About Power BI
- Benefits of PostgreSQL and Power BI Connection
- Connection via Power BI and PostgreSQL Configuration
- Connection via ODBC
- Connection via Skyvia
About PostgreSQL
PostgreSQL is a powerful open-source object-relational database. PostgreSQL has earned a high reputation for reliability, performance, and robust features. That’s why it has been known as the world’s most advanced open-source relational database.
It supports a large part of the SQL standard. And it has the modern features of a relational database that includes:
- more data types
- table inheritance
- multi-version concurrency control
- and more
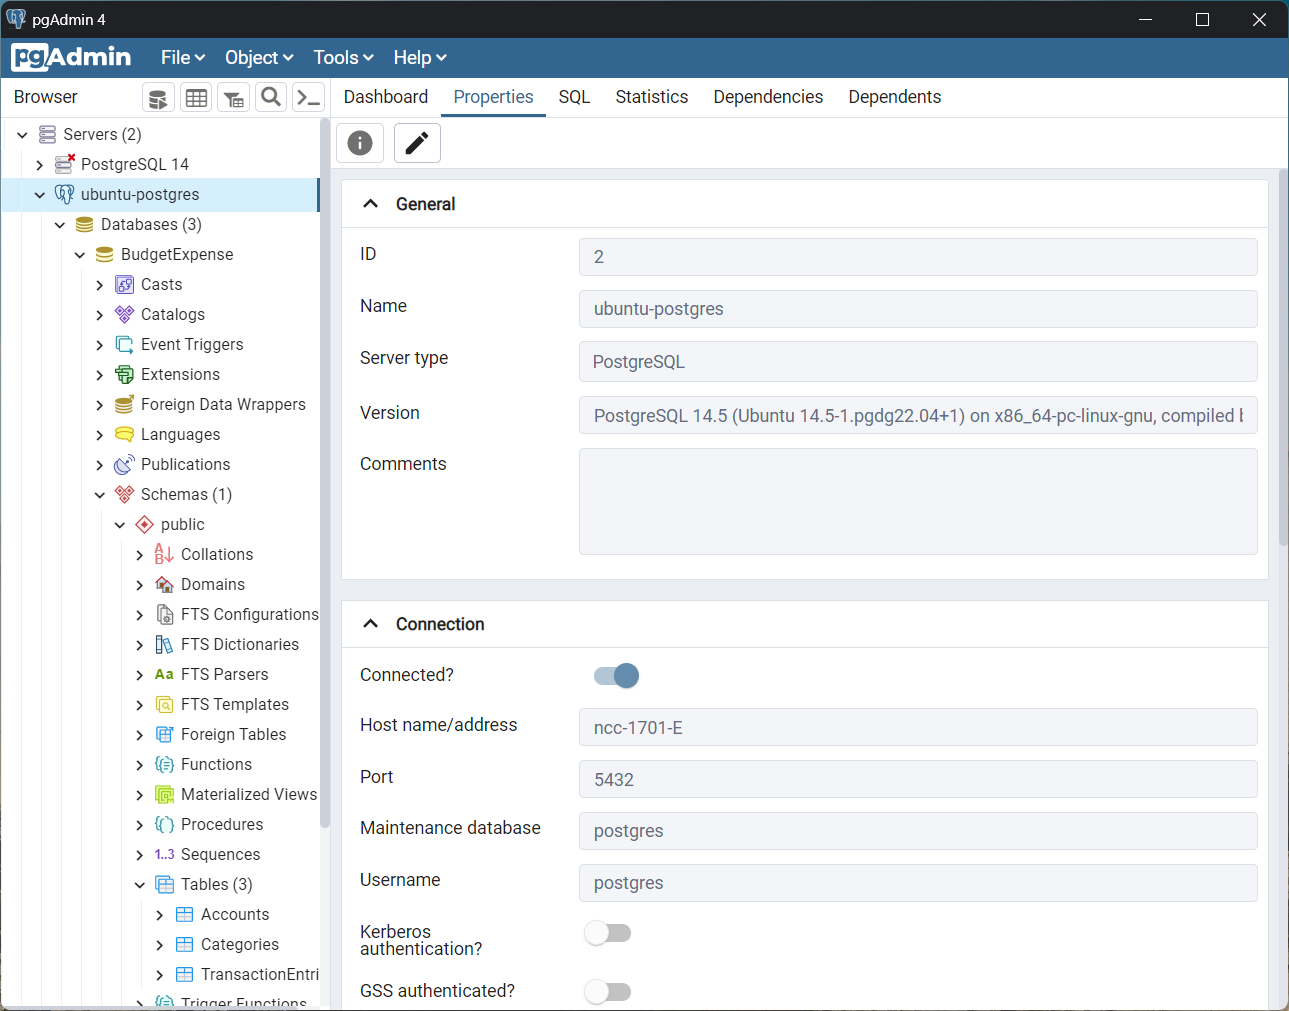
The image below shows the PostgreSQL version, credentials, and database used in this article.
About Power BI
According to Microsoft, Power BI is “a collection of software services, apps, and connectors.” This collection works together to visualize your data interactively. It has three working parts:
- Power BI Desktop, where you can design your interactive reports
- Power BI Service, where you can deploy your reports and share them with your stakeholders
- And Power BI Mobile, where you can take your reports wherever you go. It works on iOS, Android, and Windows devices.
PostgreSQL is one of the many data sources where Power BI can connect and work on your data.
In short, Power BI helps you visualize your data in PostgreSQL. Then, view it on your favorite device.
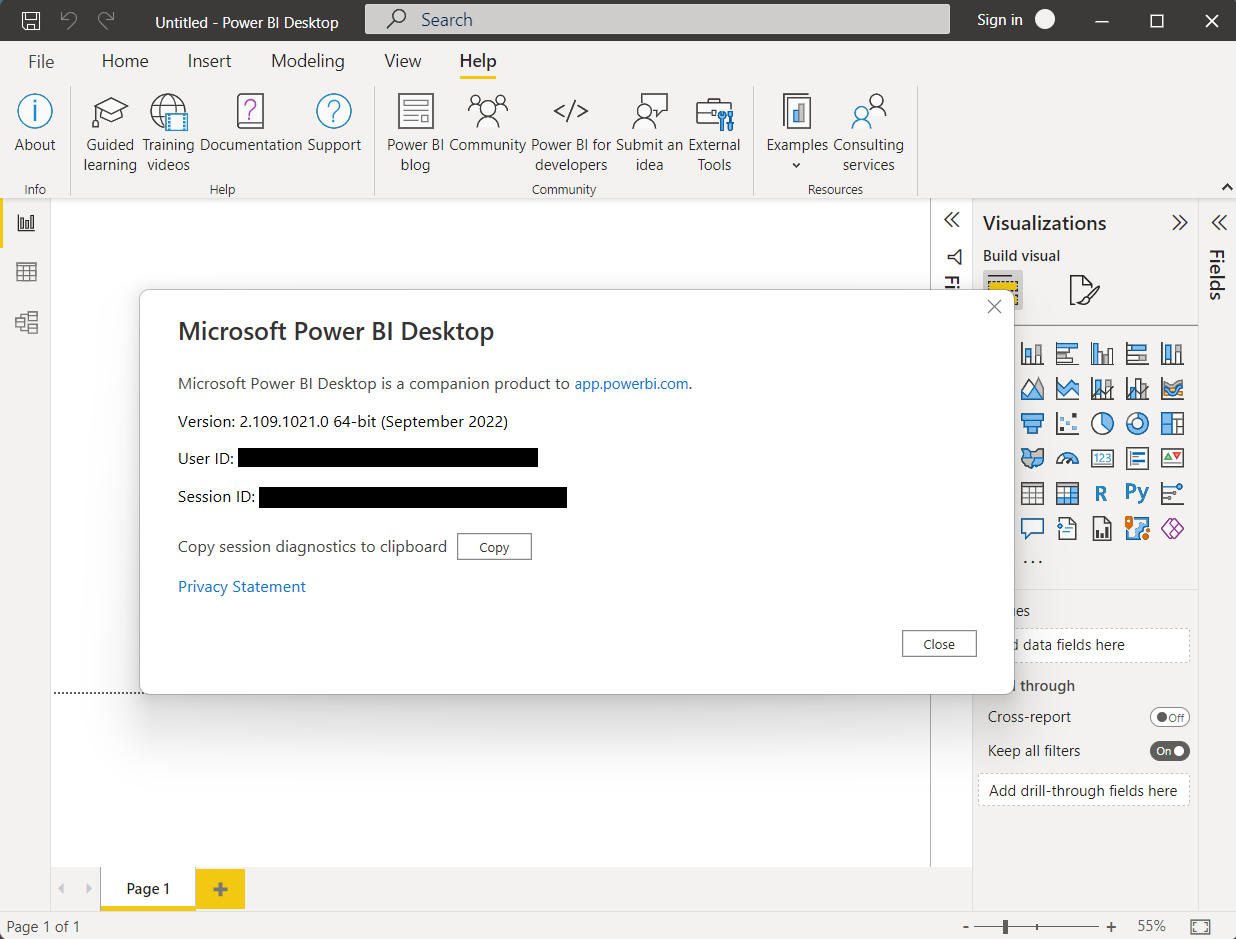
In this article, the Power BI Desktop version used is shown below.
Benefits of PostgreSQL and Power BI Connection
Visually interacting with your data to get business insights will help you make sound business decisions. So, what makes a combination of Power BI and PostgreSQL a good fit for this scenario?
First, PostgreSQL is a top-of-the-line database that is:
- fast and scalable
- easy to learn
- reliable and fault-tolerant
- free and open-source
- supported by a large community of experts
- with robust features
PostgreSQL is a good candidate for a large data warehouse deployed in the cloud or on-premise.
Meanwhile, Power BI is a good data visualization tool that:
- has easy integration with PostgreSQL via default connector or ODBC
- includes a free visualization and report designer (Power BI Desktop)
- you can easily publish to the cloud through the Power BI Service
- you can extend through formulas and queries
Power BI is also rated 4.4 in Gartner Peer Insights under Analytics and Business Intelligent Platforms.
In short, connecting Power BI to PostgreSQL is a good combination for data analysis.

Connection via Power BI and PostgreSQL Configuration
It’s easy to connect Power BI to PostgreSQL using the default connector. See the following steps.
Step 1. Open Power BI and Click Get Data
Run Power BI Desktop on your Windows computer through the Start menu or Search. Then, the Power BI splash screen will open. So, click Get Data. Then, a new window will appear.
Step 2. Click Database and Select PostgreSQL Database
First, click Database in the left pane. Then, select PostgreSQL database.
Finally, click Connect.
Step 3. Enter the Server and Database Name
First, you need to get this information from your administrator:
- Server name or IP address
- Port number if it’s different from the default 5432
- Database name
- Username and password
Then, in Power BI, enter the server name or IP address. And the port number if it’s not 5432 in the Server box. Use the format <server name or IP address>:<port>. Then, enter the database name.
Finally, click OK. Enter the Username and Password if required. If your PostgreSQL server has SSL disabled, a prompt will appear. Just click OK to continue.
Check how it is done from steps 1 to 3 below.

Connection via ODBC
Another easy way to connect Power BI to PostgreSQL is to use Open Database Connectivity (ODBC). You need the same server, port, database name, username, and password. But the steps are a bit different.
Before you continue, you need an ODBC driver for PostgreSQL. Your best choice is to download the default ODBC driver for PostgreSQL or Devart’s ODBC driver for PostgreSQL. In this article, we will use the default ODBC driver for PostgreSQL.
Step 1. Create an ODBC Data Source Name or Connection String
You have two choices for the first step: an ODBC Data Source Name or a Connection String.
Creating a Data Source Name (DSN)
In this option, you need to have a PostgreSQL ODBC driver installed. So, here are the steps:
1. In Windows, open the ODBC Data Sources (64-bit).
2. Click the System DSN tab.
3. Click Add and select the PostgreSQL ANSI(x64) or PostgreSQL Unicode(x64). Which of these fits depends on your database. Your administrator should know if the database uses Unicode or not. Or you can also use the Devart ODBC Driver for PostgreSQL if this is the one you installed.
4. Enter your desired Data Source Name and connection details (server, port, database name, username, and password).
5. Click Test to test the connection.
6. If the test connection is successful, click Save.
Check how to do it from steps 1 to 6 below.

Forming the Connection String
This section will discuss the connection string to connect to PostgreSQL using ODBC. The Username and password are not included in the following connection string. Power BI will prompt you for these credentials if required.
For ANSI:
Driver={PostgreSQL ANSI(x64)};Server=<IP address or server name>;Port=<port number>;Database=<database name>;And here’s an example:
Driver={PostgreSQL ANSI(x64)};Server=ncc-1701-E;Port=5432;Database=BudgetExpense;For Unicode:
Driver={PostgreSQL Unicode(x64)};Server=<IP address or server name>;Port=<port number>;Database=<database name>;And here’s an example:
Driver={PostgreSQL Unicode(x64)};Server=DBSERVER1;Port=5432;Database=HumanResources;Step 2. Open Power BI and Click Get Data
This is the same as Step 1 of the default connector.
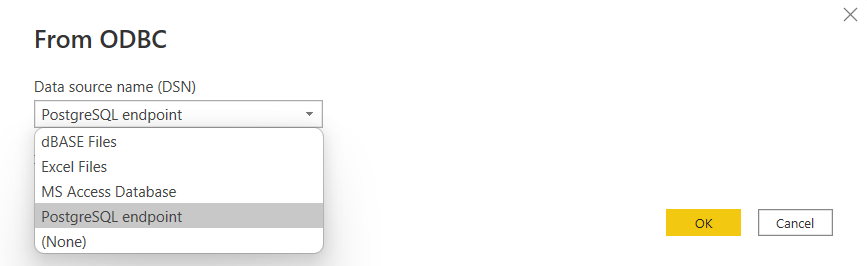
Step 3. Click Other and Select ODBC
In the left pane, click Other. Then, select ODBC.
Finally, click Connect.
Step 4. Select the Data Source Name or Type the Connection String
This depends on what you did in Step 1.
If you created a Data Source Name (DSN), select the DSN from the dropdown list of DSNs. We used BudgetExpense DSN as our example. Then, click OK.
Here’s how to do it from steps 1 to 4.
If you created a connection string, select (None) in the list of DSNs. Then, click Advanced Options. Paste your connection string in the Connection String textbox. Finally, click OK.
Here’s how to do it from steps 1 to 4 using a Connection String.
Connection via Skyvia
Skyvia offers another method to connect the PostgreSQL database to Power BI. The main advantage of this way of integration between PostgreSQL and Power BI is an additional security layer.
Skyvia is a cloud platform providing solutions for various data-related tasks: data integration, cloud services data backup, data management with SQL, CSV files import/export, creating OData services, etc. It’s also perfect for business users, as you don’t need specific technical skills or extra effort to build data integration.

Skyvia connects to the database via the Agent application, which acts as a security bridge between Skyvia and your local server. You can connect to your PostgreSQL database with Agent, create the SQL endpoint, and use it as the source in Power BI with the help of ODBC Driver for Skyvia Connect.
Let’s see what steps we should perform to establish the connection between the PostgreSQL database and PowerBI using Skyvia:
Important! First, you should register in Skyvia.
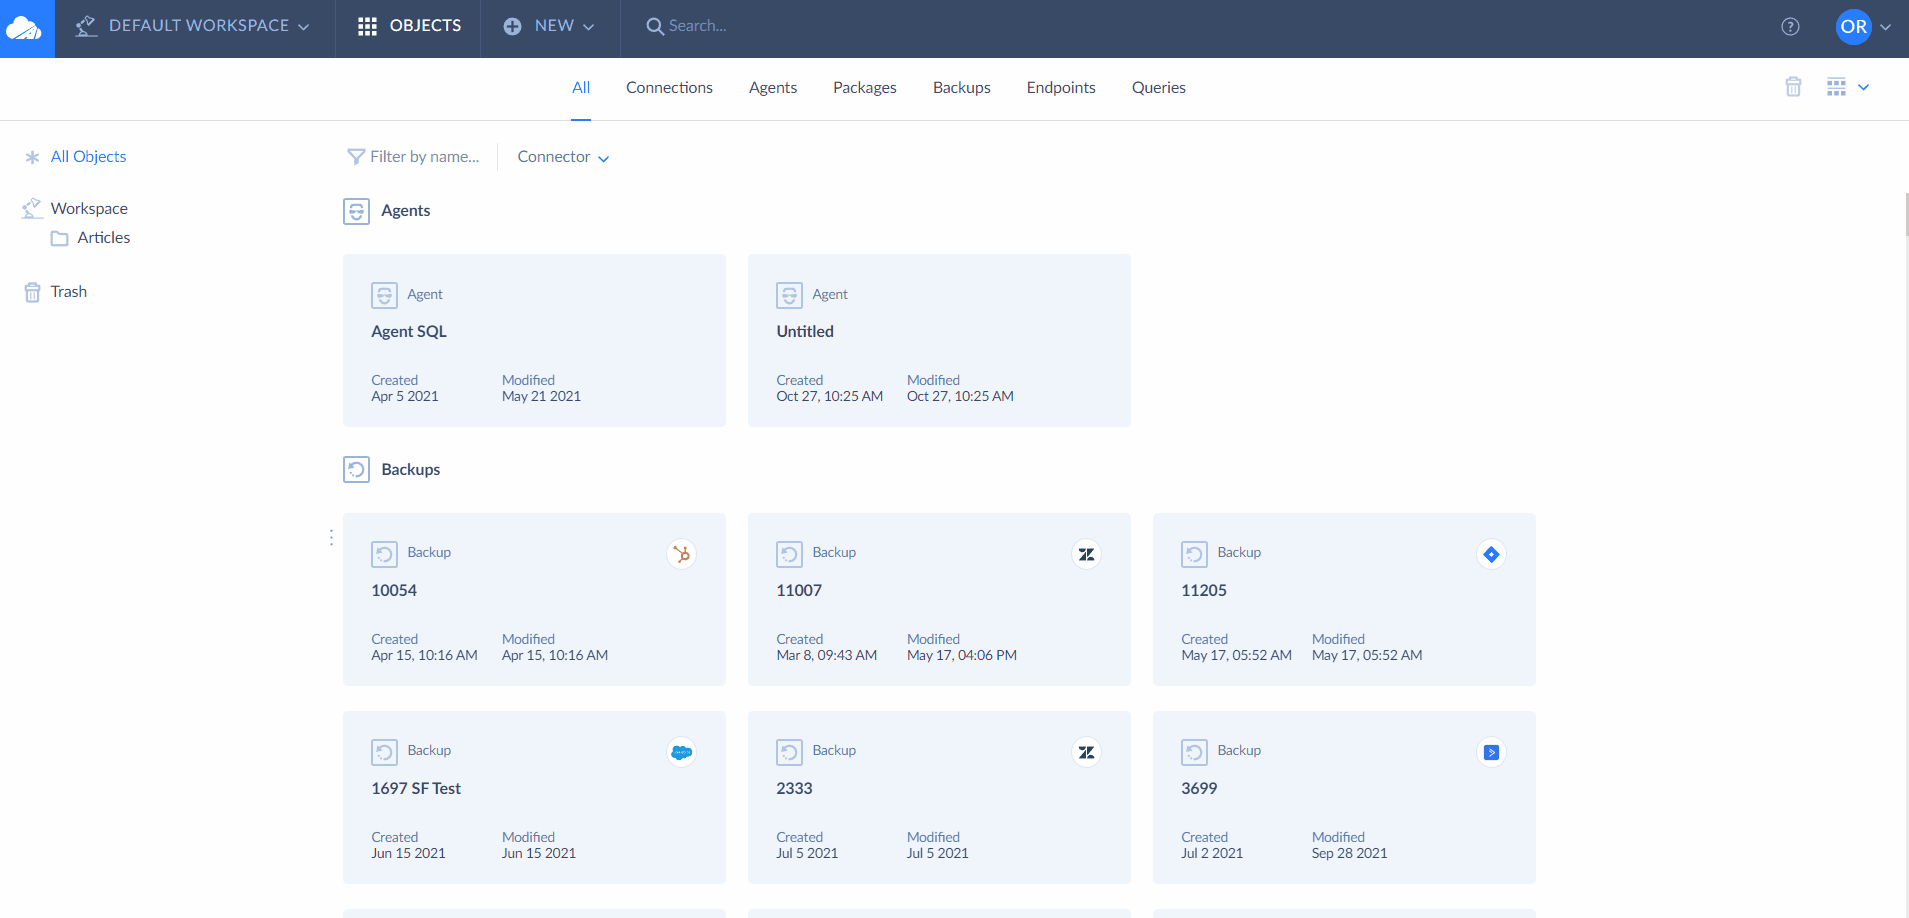
Step 1. Create Agent
- Sign in to your Skyvia account and create a new Agent; follow the instructions on the page.
- Download the Agent key file.
- Install the Agent application on the local server, where your PostgreSQL database is located.
Note! Find more details on how to use Agent in the documentation.
Step 2. Create the Agent Connection
After creating and installing the Agent application on the server, you should create the Agent connection in Skyvia.
- In the connection editor, create an Agent connection: select the Agent connection mode, select the Agent from the drop-down list, and specify the required connection parameters like hostname or IP address, user Id, password, database name, and schema.
Note! You can also optionally specify the additional connection parameters, such as protocol and timeout values.
Step 3. Create SQL Endpoint
- Download the ODBC Driver for the Skyvia Connect installer.
- Launch the ODBC Driver installer and follow the setup instructions.
- Register your SQL endpoint as an ODBC data source.
Step 4. Connect the database to Power BI
- In Power BI, select the ODBC data source type in the Get Data window.
- Select the data source added to the ODBC Driver in the previous step.
Now you have a secure integration between Power BI and PostgreSQL! Once it’s ready, Power BI can connect to it, and you can start visualizing your data. Why not try Skyvia today with your PostgreSQL database? You’ll find it easy to use with its drag-and-drop designer, scheduler, and more.

Conclusion
This article shows two ways of integrating data between Power BI and PostgreSQL. Both methods are very easy, and you can’t go wrong if you follow the steps outlined here. You can choose the native integration or a seamless and double-secure integration by Skyvia. Moreover, as well as integrating databases with Power BI, Skyvia allows getting data for Power BI from the data sources, which are not supported directly by integrating cloud sources with Power BI. If you want to discover what other integrations Skyvia can offer, sign up for a demo!