

Snowflake is one of the leading data warehousing solutions in the market today. Being a cloud-native solution and relying on a single elastic performance engineer makes it a high-speed and scalable solution. What’s more, it can handle concurrent workloads and high volumes of data.
To take full advantage of Snowflake, you need to be aware of all the capabilities it offers to users. In this article, in particular, we explore five principal methods to put data into Snowflake. We will explain for which use cases each approach is suitable and which pitfalls it conceals.
Table of Contents
- More Details about Snowflake
- Data Ingestion Techniques in Snowflake
- Method 1: Data Loading to Snowflake Using Web Interface
- Method 2: Data Ingestion Using the SnowSQL Client
- Method 3: Getting Data Into Snowflake Using Snowpipe
- Method 4: Bulk Loading with SQL Commands
- Method 5: Using Skyvia for Loading Data to Snowflake
- Conclusion
More Details about Snowflake
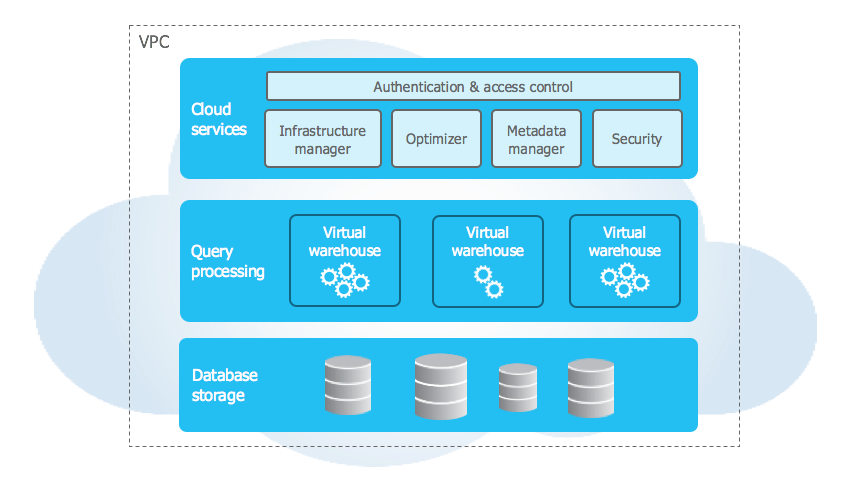
Snowflake is a cloud-based data warehousing tool using a three-layered architecture:
- Database storage layer.
- Computing layer.
- Cloud services layer.
This DWH has gained popularity due to its universality and support of the following:
- File formats: CSV, JSON, and Parquet
- Data types: structured and semi-structured.
- Load methods: Snowpipe, SnowSQL Client, COPY command, etc.
At the moment, 10,000+ organizations use Snowflake daily for their data-related tasks. This platform is not only popular as a DWH but also as a powerful analytics engine, which allows users to extract value from data and use it for business development.
To help you decide whether this platform suits your needs, let’s review its main advantages and pitfalls.
Advantages
- Cloud-first approach boosts cost optimization, so you only pay for the storage and computing time used.
- Scalability assures resource allocation according to the current workloads and performance benchmarks.
- Security and compliance help to protect your information of any volume and type.
- Data caching improves query performance and facilitates hardware upgrades.
- Cloud-agnostic nature of Snowflake enables it to run in public clouds e.g. Google, Microsoft, and Amazon.
Pitfalls
- Loading times can sometimes take longer than expected.
- Unpredictable spending in case your business experiences unpredictable operational spikes.
- Unstructured data support still needs enhancement.
Data Ingestion Techniques in Snowflake
It’s possible to send data to Snowflake in several different ways. When deciding on the most suitable option, consider your specific use case and dataset volumes to be operated.
Here, we explore several ingestion methods along with their benefits and drawbacks to help you select the most suitable one.
Before diving deeper into each data ingestion technique, let’s have a quick look at each of them.
| Method | Short description | Advantages | Drawbacks |
|---|---|---|---|
| Web interface | Extraction of information from your preferred sources via Snowflake-native graphic UI. | -Simple and user-friendly approach that is suitable even for non-techs | -Limitations on the number of files to be uploaded and their size |
| SnowSQL client | Bulk data extraction (both structured and unstructured) from any delimited text file. | -Powerful transformation and data manipulation options | -No real-time information exchange isn’t guaranteed |
| Snowpipe | Information retrieval from stages and loading it into DWH with Snowpipe’s units called pipes. | -Support of high-frequency or streaming data | -Insufficient permissions and incorrect formatting |
| SQL queries | Bulk data extraction using SQL commands. | – Loading large data amounts in a short time | – Considering the efficient use of virtual DWH |
| Skyvia | Universal cloud data platform that can integrate Snowflake with 200+ other sources. | -Various integration scenarios-No-code interface-Budget-friendly-Powerful data management options | -24-hour data refresh on a free tier-Steep learning curve for advanced features |
Method 1: Data Loading to Snowflake Using Web Interface
Manual ingestion via the web interface is the simplest method for uploading data into Snowflake. It’s done with the help of Classic Console, also known as Snowsight.
With a manual approach, you can use the following:
- Files in CSV and TSV formats.
- Semi-structured data from JSON, Avro, ORC, Parquet, and XML file formats.
Classic Console accepts data from such locations:
- Local computer
- An existing stage
- An existing cloud storage location on Snowflake, Amazon S3, Google Cloud Storage, or Microsoft Azure.
Step 1. Select Tables
NOTE: First of all, you need to click on the drop-down menu under your loging name and select Switch Role > ACCOUNTADMIN. Check whether you have the USAGE privilege for the database and table you are going to use. Verify that you also have CREATE STAGE and CREATE FILE FORMAT privileges on the selected database schema.
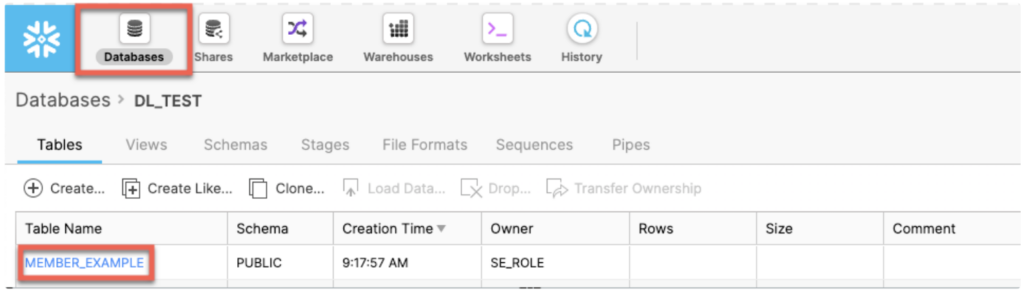
- In your Snowflake account, use the Classic Console to select the specific database from Databases.
- Click Tables to select the appropriate table.
- On the Table details page, click the Load Table button.
Step 2. Select Files
- Check the Load Data wizard that opens.
- Select the warehouse from the drop-down list. It includes each warehouse on which you have the USAGE privilege.
- Use one of the following options:
- Click Load files from your computer and browse directories on your local machine. Select the required files and click Open.
- Click Load files from external stage and choose a cloud storage location like Amazon S3, Microsoft Azure, Google Cloud Platform, etc.
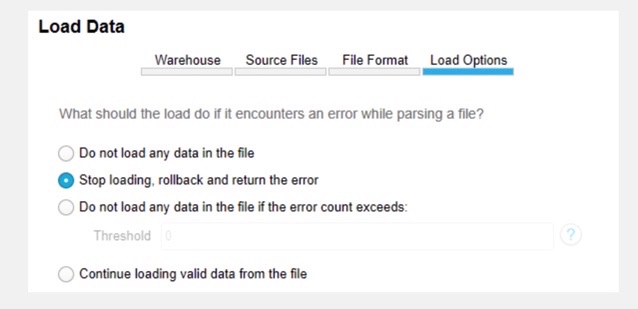
Step 3. Finish Process
- Set the error handling options.
- Click the Load button to enable Snowflake to ingest data and put it into the selected table.
Advantages
Obviously, this approach is rather simple but efficient at the same time.
Pitfalls
At the same time, manual operation is associated with several limitations:
- The maximum number of files to process is 250 at a time.
- The maximum size of a file mustn’t exceed 250 MB.
Aspects of cost and efficiency
This approach doesn’t impose any additional costs since it goes along with the Snowflake web interface itself.
Skills Needed
Uploading data into Snowflake with a web interface is the most user-friendly method. In general, you should only be acquainted with the Snowflake UI and the overall structure of this DWH. Deep technical knowledge is not required to use this scheme.
Method 2: Data Ingestion Using the SnowSQL Client
It’s possible to bulk load data with SQL queries using SnowSQL from any delimited text file, including comma-delimited CSV files. Additionally, this tool allows users to bulk upload semi-structured data from JSON, AVRO, Parquet, or ORC files. Compared to the manual method, this one suits more advanced users.
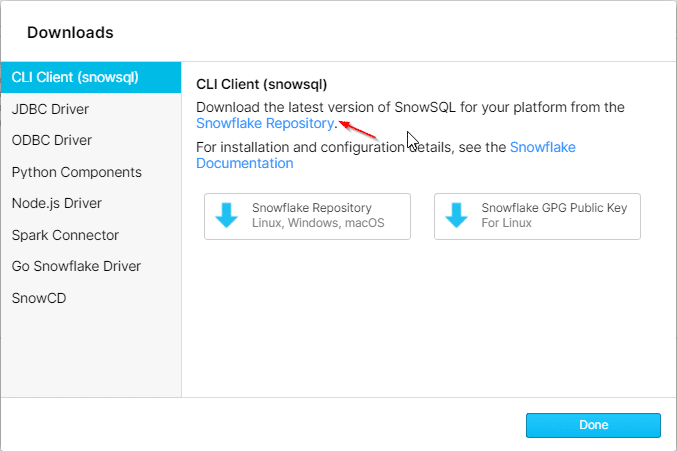
First of all, download and install SnowSQL on your computer. It’s supported on all major OS, including Windows, macOS, and Linux.
To put data into Snowflake with this tool, proceed as follows:
Step 1. Prepare Data
- Ensure that the file comes in a compatible format file (CSV, JSON, Parque, etc.).
- Prepare data before sending it into Snowflake. Apply the necessary transformations or cleaning beforehand.
Step 2. Create a Stage
- In Snowflake, the stage is a temporary location for file storage. It’s necessary as an intermediary step before data transfer into a table. By default, there is an internal stage associated with each table for file hosting. It’s also possible to create customer stages or named locations to obtain granular control.
Step 3. Get Data
- Execute the PUT command to upload data from local or cloud storage into the selected stage.
- Use the COPY command to transfer it into the table.
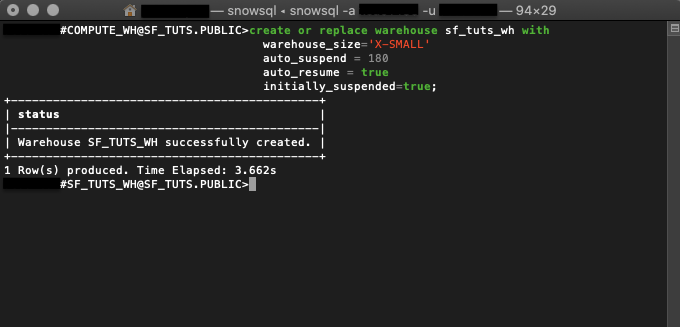
Example:
CREATE OR REPLACE TABLE mytable (
  id VARCHAR,
  registration_date VARCHAR,
  first_name VARCHAR,
  last_name VARCHAR);

COPY INTO mytable (
  id,
  registration_date,
  first_name,
  last_name
) FROM (
    SELECT
      $1:ID,
      $1:CustomerDetails::OBJECT:RegistrationDate::VARCHAR,
      $1:CustomerDetails::OBJECT:FirstName::VARCHAR,
      $1:CustomerDetails::OBJECT:LastName::VARCHAR
    FROM @mystage
);
Advantages
One of the most significant advantages of the SnowSQL client is its COPY feature. It’s particularly beneficial when you need to load data into a Snowflake table since:
- It supports many options for transformation and manipulation, including reordering and indenting columns.
- The COPY INTO command enables data package download from files already available in the cloud storage or data copying from a named stage.
Pitfalls
This method supports large file formats but cannot guarantee real-time information exchange. Note that Snowflake’s STREAM command supports continuous loading if you need such an option. It allows you to receive real-time data from external systems.
Aspects of Cost and Efficiency
The SnowSQL Client tool is free to download from the official website. Since it supports large information volumes, its performance can sometimes be degraded due to that.
Skills Needed
To use this solution, you will need to possess a proficient understanding and practical use of SQL.
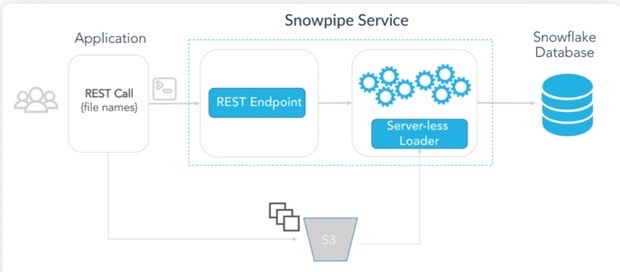
Method 3: Getting Data Into Snowflake Using Snowpipe
Another way to load data into Snowflake is to use the Snowpipe tool. It can extract information from the stage and then put it into DWH. Snowpipe has pipes as the basic unit items, and each of them is the first-class object containing Snowflake’s COPY instructions.
Snowpipe Configuration
Make sure you fully comprehend the entire architecture and processes since a Snowpipe object doesn’t rub in the isolated environment. Storage integration, stage, and file format need to be defined in advance.
To create and configure a Snowpipe object, follow the steps below:
- Configure a separate database and schema for source data holding.
- Create a table for storing data.
- Specify the needed file format.
- Create a Snowpipe object.
Example:
CREATE OR REPLACE PIPE mypipe
   AUTO_INGEST = TRUE AS
   COPY INTO snowpipe_landing_table
       FROM @my_s3_stage/snowpipe/
FILE_FORMAT = csv_file_format;- Configure cloud storage event notifications. If you have created a Snowpipe object with the property AUTO_INGEST=TRUE, Snowflake automatically assigns a notification channel to it.
This step-by-step procedure enables users to extract information from files in micro-butches. Such an approach allows users to keep their DWH locations always up-to-date.
Advantages
Snowpipe would be ideal if you work with high-frequency or streaming data.
With continuous upload, latency is lower, as new data is constantly being transferred as soon as it becomes available.
Pitfalls
- Incomplete or incorrect formatting. As a workaround, use the VALIDATE command right after the COPY INTO command execution to retrieve the list of errors.
- Insufficient permissions or credentials. To avoid this, run the CREATE THREAD request with the privileged user OWNERSHIP and ensure that the role is granted access rights.
- Network connectivity and latency issues on transfer.
Aspects of Cost and Efficiency
The more significant factors that impact Snowpipe’s cost are the amount of data and file size. When sending it with the COPY INTO command, you pay for each second the virtual warehouse is active. Therefore, the loading process with your own virtual warehouse can be the most cost-effective option.
Skills Needed
You will need to access your cloud provider to create the event notifications. All other operations can be done with SQL commands, so strong experience with this programming language is highly desired.
Method 4: Bulk Loading with SQL Commands
Before extracting data from files, you should first consider preparing and organizing them. The first thing to do is to locate files in the right order – it should correspond to their upload sequence into Snowflake. Note that the correct organization of files determines how long Snowflake will take to scan the cloud storage.
Step 1. Staging Files
Define the File Format object. It’s recommended to define File Format as a standalone object, which enables it to be reused for multiple data operations.
CREATE OR REPLACE FILE FORMAT my_csv
TYPE = csv
FIELD_DELIMITER = ‘,’
SKIP_HEADER = 1
NULL_IF = ''
Step 2. Configure Stage
The Stage object describes where the files for ingestion are located and how to access them. There are internal and external Stages, but the latter is highly recommended for use in bulk loading operations. This is obvious since most of Snowflake’s data already exists in the cloud storage.
Step 3. Load Data
The COPY command is used for both information loading and unloading in Snowflake. It’s important to indicate all the related parameters to send it correctly.
Note that the COPY command also requires an active virtual warehouse to run and ingest the files. To efficiently use the virtual warehouse, you need to organize your files in batches (recommended size 100MB-250MB). Also, consider using the smallest possible warehouse size that fits your SLA.
COPY INTO mytable

FROM @my_s3_stage
Advantages
The main benefit of this method is that you can perform bulk loading of data in a short time.
Pitfalls
You need to consider the efficient use of virtual DWH in order not to pay extra for unused resources.
Aspects of cost and efficiency
Note that serverless tasks are billed per second at the cost of $0.00125/sec. The smallest warehouse charges one credit per hour, though it’s billed for a minimum of 60 seconds.
(1 credit/hour * 1.5 * $3/credit) / 3600 seconds
Skills needed
For this method, strong SQL knowledge is required. You should also understand the overall architecture of Snowflake and how external cloud resources connect to it.
Method 5: Using Skyvia for Loading Data to Snowflake
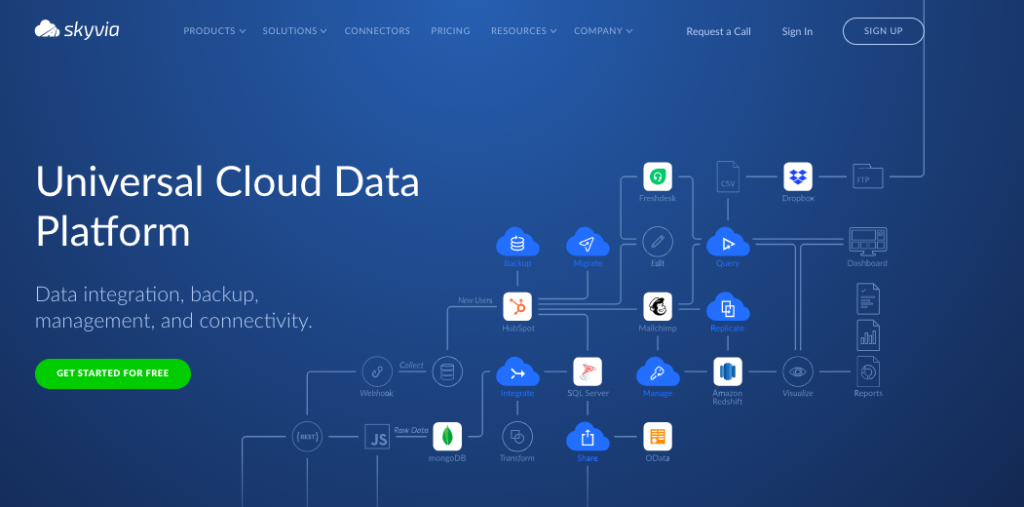
Skyvia is a cloud-based, no-code ETL, ELT, and Reverse ETL non-technical user-friendly platform. The data loading and processing here are automated and highly secured.
Using Skyvia Cloud Data Platform, you can successfully upload data into the Snowflake data warehouse from 200+ ready-made data connectors, including SQL Server, Amazon S3, Oracle, Azure Blob, and vice versa.
Skyvia is a flexible solution that provides you with the best experience. You can select the data-related scenarios that suit your business case best.
Extra Capabilities
At the same time, Skyvia is also a popular solution among IT engineers from tech-related spheres. Apart from the Data Integration product, this tool comprises other solutions:
- Automation for streamlining repetitive tasks and workflows.
- Backup for SaaS backups and restorations.
- Query for data retrieval from various sources with SQL commands.
- Connect for creating OData and SQL endpoints to extract information from your preferred sources.
Aspects of cost and efficiency
Skyvia is a universal solution suitable for any kind of company operating in any industry. It offers five different pricing plans, starting from a free tier with limited data volume for operation to complex enterprise solutions with all possible features included.
Note that Skyvia doesn’t have any hidden costs, as each plan has a predefined amount of data to load and process. You can always monitor the usage patterns in your account.
Skills Needed
Skyvia’s significant benefit is that it doesn’t require profound technical knowledge. You can load data into Snowflake without coding skills and programming experience. Compared to other methods that require SQL knowledge, Skyvia could be a real lifesaver for non-technical users and business leaders.
Load Data from CSV to Snowflake with Skyvia
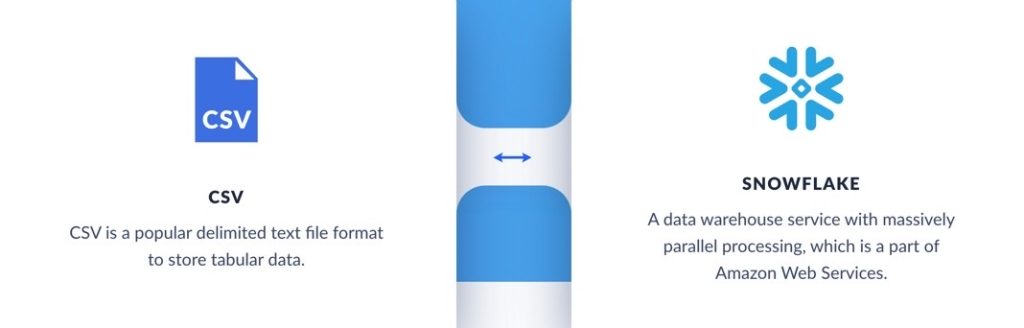
How to load data from CSV to Snowflake with the Skyvia solution?
Step 1
First, sign into your account and select the data integration package using the lmport or Data Flow tool.
Note: If you wish to retrieve data from the file storage, select the From storage service option under CSV source type and choose or create a file storage connection.
Step 2
Set up mapping and transformation. Under the source section, select the source database or cloud app and choose the connection from the drop-down list.
Step 3
Select the CSV file for loading and the table you want to import. Here, you can also combine information from multiple sources and send it to various destinations simultaneously.
Step 4
Run the data integration process to write information into multiple temporary CSV files and upload it into Amazon S3 or Azure. You can use the scheduling option here to save time and costs.
Step 5
Finally, the data is imported into your Snowflake DWH.
Load Data from SQL Server to Snowflake with Skyvia
With Skyvia Cloud Solution, you can also transfer data from SQL Server to Snowflake in three simple steps.
Step 1
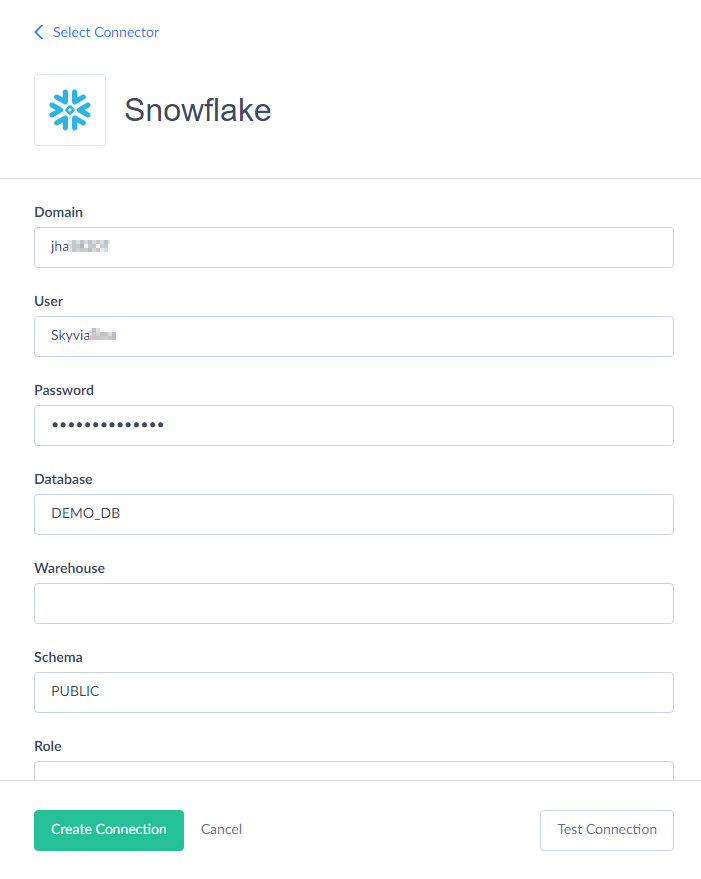
Add SQL Server and Snowflake services to Skyvia using no-code built-in connectors. For that, select + Create New -> Connection from the main menu, find SQL Server on the list, and provide the required parameters (domain, database, user name, and passwords). Then, perform the same procedure for Snowflake if not connected yet.
Step 2
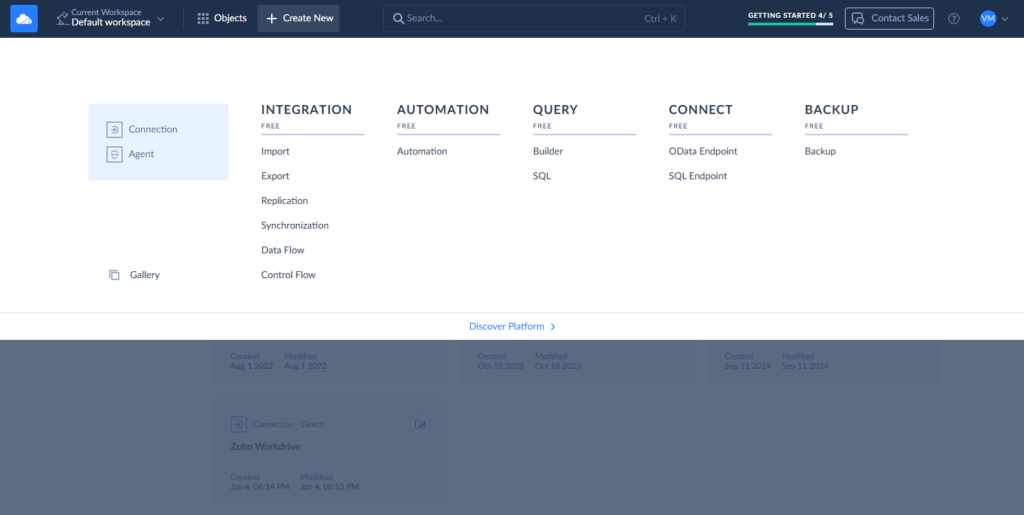
Create the data integration scenario using one of the available Skyvia tools. For that, click +Create New on the main menu and choose the preferred tools under the Data Integration column (Import, Synchronization, or Data Flow).
Step 3
The last step is mapping configuration and data transfer execution.
Load Data from Amazon S3 to Snowflake with Skyvia
With Skyvia, you can manage and automate your import and export of data between Snowflake and Amazon S3 on a schedule by following the step-by-step instructions.
Step 1
Configure Amazon S3 and Snowflake connectors in Skyvia if they have not been added yet. You can set up these connections by specifying the required details. Then, go to + Create New in the main menu and select the preferred integration scenario.
Step 2
In the window that appears, select Amazon S3 and Snowflake as the source target objects, respectively.
Step 3
Map the source and target fields in the next step after selecting the source and target objects. This step is necessary to ensure an accurate transfer from Amazon S3 to Snowflake with all the required formatting and transformation. The solution also allows the data transferring scheduling to provide its automatic loading into Snowflake regularly.
Load Data from Oracle to Snowflake with Skyvia
How to easily upload your data from Oracle to Snowflake with Skyvia Cloud Solution? Just follow the three steps provided in the step-by-step tutorial below.
Step 1
Set up Oracle and Snowflake connectors in Skyvia first if not yet completed. When configuring Oracle, provide the database server hostname or IP address, the service name, and the port to run on for both services. For Snowflake, specify the requested credentials to establish the connection with the DWH.
Step 2
Select the integration scenario of your choice from the main menu. In the Data Integration column, opt for Import, Synchronization, Data Flow, or another tool you choose. Afterward, select Oracle and Snowflake under the appropriate sections of Target and Source on the page.
Step 3
Configure mapping and transformation settings in Skyvia to ensure proper data alignment with the target Snowflake schema. You can load Oracle data directly to/from major cloud and on-premise sources or synchronize it in both directions. Import packages also allow you to load information to a cloud app or database in one direction.
Step 4
Finally, schedule and execute the data transfer process.
Load Data from Microsoft Azure Blob to Snowflake with Skyvia
To easily load your data from Microsoft Azure Blob to Snowflake using the Skyvia platform, follow the three simple setup steps.
Step 1
Connect Microsoft Azure Blob and Snowflake sources in the Skyvia interface.
Step 2
Once all the systems are connected successfully, select the source and destination for the data transfer and the integration scenario (Import, Synchronization, or Data Flow).
Step 3
The last step includes the configuration of transformation options and determining mapping rules to match the source and destination data structures efficiently.
Conclusion
To recap, there are multiple methods for transferring data from your preferred sources to Snowflake. However, the Skyvia platform stands out among all these approaches. It offers the simplest three-step solution that allows you to save time, resources, and effort. What’s more, Skyvia is a solution adopted both for business users with no technical knowledge as well as developers with extensive coding experience.
Skyvia also offers a set of advantages for data loading into Snowflake and other data warehouses:
- Automation
- Safety & security
- Accurate data mapping & transformation
- Scheduling capability
- Timely data refresh
To discover more about Skyvia and its capabilities, feel free to schedule a demo.
FAQ for Load Data Into Snowflake

How can I handle errors encountered during data loading into Snowflake?
Since each data loading method has its own flow, the errors would be different for different cases. A good option is to check the troubleshooting page for the selected method (for instance, Data Loading with Snowpipe Troubleshooting).
What is the difference between bulk loading and continuous data loading in Snowflake?
Bulk loading is also known as batch upload into Snowflake. It means that data is gathered into chunks and sent to a DWH or a database at certain intervals. Meanwhile, with the continuous loading, data arrives in Snowflake as soon as it appears in the source application.
What are the best practices for loading large datasets into Snowflake?
The most effective method to upload large data amounts into Snowflake is to use SnowSQL Client, which is described in this article as Method 2. This tool is particularly dedicated to handling big data.
