")
Summary
- Method 1. Native Integration. It offers synchronization for standard use cases, though it may be limited in customization and scalability.
- Method 2. Marketplace Connectors. They offer ready-made integrations, ideal for users who need quick, out-of-the-box solutions without complex setup.
- Method 3. Integration Using APIs. It provides a highly customizable solution, but requires more technical expertise to set up and maintain.
- Method 4. Third-party Integration Platforms. Platforms like Skyvia simplify integration with no-code solutions, offering flexibility, ease of use, and powerful automation.
With sales and development teams, miscommunication and inefficiencies can quickly arise. It’s difficult to track customer needs, progress on tasks, and overall project success.
Integrating Jira with Salesforce bridges this gap, so teams can collaborate more effectively. By syncing data between the two systems, you can automate workflows, track project progress, and ensure timely updates, leading to a more efficient and coordinated approach across departments.
In this guide, we’ll walk you through the most effective methods for integrating Jira and Salesforce, discussing their key benefits and showing you how to implement a two-way sync that delivers real value to your business.
Table of contents
- What is Jira Salesforce Integration?
- Common Use Cases: Putting Jira Salesforce Integration into Practice
- Integration Benefits for Jira and Salesforce
- Jira and Salesforce Integration Options
- Best Practices for a Successful Jira Salesforce Integration
- Conclusion
What is Jira Salesforce Integration?
Jira-Salesforce integration allows information to flow seamlessly between the two systems, either unidirectionally (one-way sync) or bidirectionally (two-way sync), depending on the business needs.
For example, data like Jira issues, statuses, and comments can sync with Salesforce’s cases, opportunities, and accounts. This enables teams to see real-time updates on tasks and customer issues without manually switching between platforms.
For instance, a customer support team in Salesforce can create a Jira ticket directly from a case, allowing developers to address issues swiftly. Any updates made in Jira, such as issue resolution, can automatically reflect in Salesforce, keeping the support team informed.
The integration ensures that both systems understand and interpret the data correctly, even though Jira and Salesforce operate on different frameworks. This connection enables businesses to:
- maintain up-to-date, accurate data in both platforms,
- ensuring better communication, faster issue resolution, and more efficient workflows.
Common Use Cases: Putting Jira Salesforce Integration into Practice
Use Case 1: From Sales Opportunity to Development Request
When a customer shows interest in a new feature or customization during a sales conversation, the sales team can create an Opportunity in Salesforce.
With integration in place, this feature request automatically triggers the creation of a Jira issue for the development team, complete with relevant details. This ensures that no customer request is missed and allows developers to prioritize features that align with customer needs.
Use Case 2: Syncing Customer Support Cases
When a customer reaches out for support, the customer support team creates a case in Salesforce. With integration, this case automatically generates a corresponding bug report or task in Jira. Any updates in Jira, such as a bug fix or progress update, are instantly reflected in Salesforce, allowing the support team to stay updated on the issue’s resolution status.
This ensures faster response times and better tracking of customer issues, improving overall customer satisfaction and reducing the back-and-forth communication between teams.
Use Case 3: Aligning Product and Sales Teams
When the product development team releases new updates or features in Jira, these updates are automatically shared with the sales team in Salesforce. This keeps the sales team informed about new features they can promote to customers.
By syncing the two platforms, product managers can ensure that the sales team always has the latest product details and that they are ready to sell new features as soon as they are available. This reduces the chance of miscommunication and helps both teams stay aligned on product offerings and customer expectations.
Integration Benefits for Jira and Salesforce
The complexity of modern businesses is constantly growing, and the traditional approaches to working on projects fail to keep up. It’s more important than ever to have tools that can automate the sharing of critical business information between teams and reduce costly errors.
What benefits does JIRA to Salesforce integration bring to your business?
- Improved collaboration: Teams can communicate and collaborate bi-directionally, automatically, and in real-time – without leaving the platform they’re currently operating.
- Controlled data sharing: Each team can define what data from different systems is shared or received.
- Faster response to customer needs: Developers can quickly address new user requests, customer issues, and feedback.
- Deeper business insights: Merging Jira and SF data allows for advanced reporting, helping teams gain a more comprehensive understanding of business operations.
- Elimination of manual work: Automating data synchronization removes the need for manual data entry, reducing duplication and inconsistencies.
- Better customer service: Support teams can track the progress of Jira tasks directly in Salesforce, streamlining customer service and case resolution.
- Scalability and flexibility: As business grows, automated integrations allow systems to scale without requiring additional manual effort.

Jira and Salesforce Integration Options
Without a seamless connection, managing projects across these two platforms can be difficult. Teams risk miscommunication, duplication of work, and inefficiencies.
Fortunately, they have multiple integration options, from built-in solutions to custom APIs. Let’s break down the top four approaches and their benefits.
Jira and Salesforce offer built-in integration with limited customization. These work best for basic use cases but may lack flexibility for complex workflows.
Method 2: Third-Party Marketplace Connectors
Marketplace connectors are pre-built solutions available in Atlassian Marketplace or SF AppExchange. They provide an easy setup with minimal technical effort but may have limitations in customization and pricing.
Method 3: Integration Using APIs
APIs allow direct, custom integration between Jira and Salesforce. This approach is highly flexible, enabling tailored workflows, but it requires development expertise and ongoing maintenance.
Method 4: Third-Party Integration Platforms
Platforms like Skyvia or Zapier provide a no-code or low-code way to connect Jira and Salesforce. They offer more customization than native options and are easier to set up than APIs, making them a balanced solution for many businesses.
Comparative Table of Integration Methods
| Method | Ease of Setup | Customization | Scalability | Maintenance | Best For |
| Native Integration | ⭐⭐⭐⭐⭐ | ⭐⭐ | ⭐⭐⭐ | ⭐⭐⭐ | Basic use cases with minimal setup |
| Marketplace Connectors | ⭐⭐⭐⭐ | ⭐⭐⭐ | ⭐⭐⭐ | ⭐⭐⭐⭐ | Pre-built solutions with moderate customization |
| Integration Using APIs | ⭐ | ⭐⭐⭐⭐⭐ | ⭐⭐⭐⭐⭐ | ⭐ | Full control and tailored workflows |
| Third-Party Integration Platforms | ⭐⭐⭐⭐⭐ | ⭐⭐⭐⭐ | ⭐⭐⭐⭐ | ⭐⭐⭐⭐ | A balance of ease, customization, and scalability |
Method 1. Native Integration
Salesforce and Jira offer a built-in integration between Salesforce Service Cloud and Jira Service Management. Once a case is created in SF Service Cloud, Jira Service Management generates an alert, and any updates to the case status in Salesforce are automatically synchronized with Jira. This enables case routing for support and development collaboration.
To configure the connection, a Salesforce Service Cloud integration must be added in Jira Service Management, and then the integration must be configured in SF Service Cloud.
For broader integration needs, such as connecting SF Sales Cloud to Jira Software consider other methods like third-party connectors, APIs, or integration platforms. To use this method, follow two easy steps:
- Configure the SF Service Cloud – Jira Service Management integration.
- Set up case routing to trigger Jira alerts and automatic status updates.
Best for
- Organizations using SF Service Cloud and Jira Service Management for case resolution.
- Basic case routing and status syncing between platforms.
Prerequisites
- You must be using SF Service Cloud and Jira Service Management (this doesn’t work with Sales Cloud or Jira Software).
- Admin permissions in both Salesforce and Jira are required to configure the integration.
Pros
- Built-in functionality without additional costs.
- Automated case synchronization between platforms.
- No coding is required for setup.
Cons
- Limited to Service Cloud & Jira Service Management (not compatible with Sales Cloud or Jira Software).
- Basic functionality only – no advanced customization or field mapping.
Method 2. Marketplace Connectors
Third-party marketplace connectors are pre-built integration apps available in platforms like Atlassian Marketplace and Salesforce AppExchange. These connectors are designed to seamlessly link Jira and Salesforce without complex coding or API configurations:
- Atlassian Marketplace solutions prioritize Jira-centric workflows for issue tracking and project management.
- SF AppExchange apps focus more on CRM data synchronization and enhancing customer relationship insights.
While third-party integration tools (covered in Method 4) provide a broader range of applications, marketplace connectors focus exclusively on Salesforce and Jira. They offer minimal configuration but have limited customization features. Some of the most rated connectors include:
- Appfire (formerly ServiceRocket) – a widely used solution for syncing Jira issues with Salesforce records.
- Peeklogic – offers bi-directional synchronization with extensive customization options.
- Goldfinger – provides automation features for streamlined workflows.
- zAgile – focuses on deep data visibility and security for enterprise use.
When selecting a Jira-Salesforce connector, consider these features:
- Bi-directional sync – ensure real-time data updates.
- Field mapping – match and transfer different data fields, including custom.
- Automation – schedule or build data flows to eliminate manual updates.
- Security & Compliance – protect sensitive data with user permissions and encryption.
Best for
- A quick and pre-built integration between Salesforce and Jira.
- Automated data sync without custom API configurations.
- Real-time collaboration between support and development teams.
Prerequisites
- Needs admin access to the Jira Cloud instance and technical or billing contact with the Jira Cloud instance.
Appfire stands out as a popular choice in the marketplace. In the following section, we will guide you through its installation process, key benefits, and potential drawbacks.
Step-by-step guide
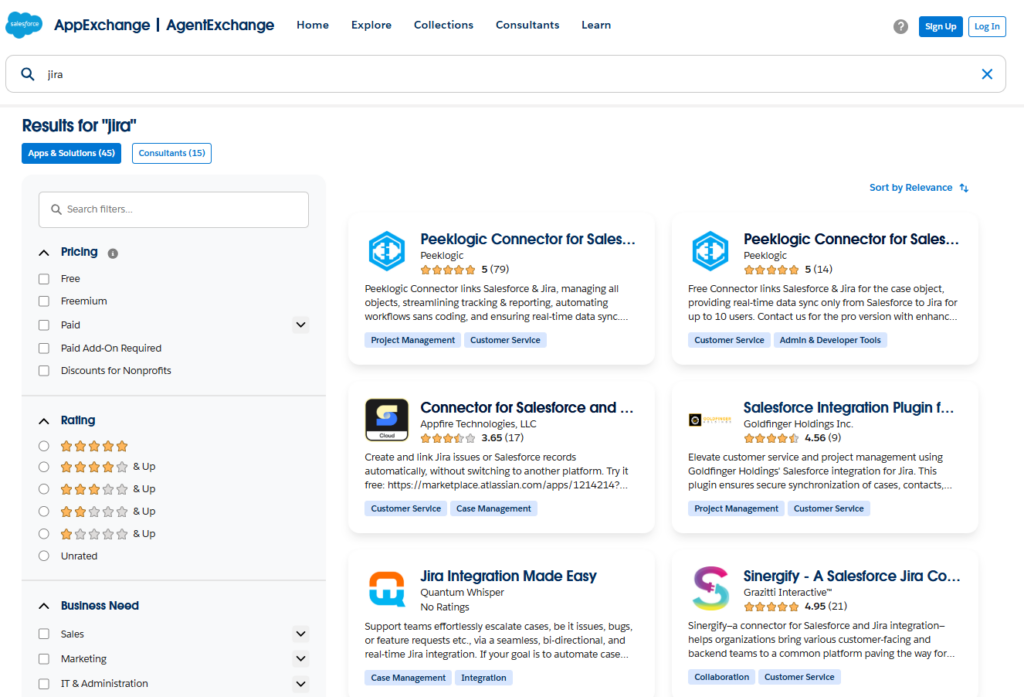
Step 1. Install Appfire connector in Jira
Open the Atlassian Marketplace and search for Connector for Salesforce & Jira by Appfire.
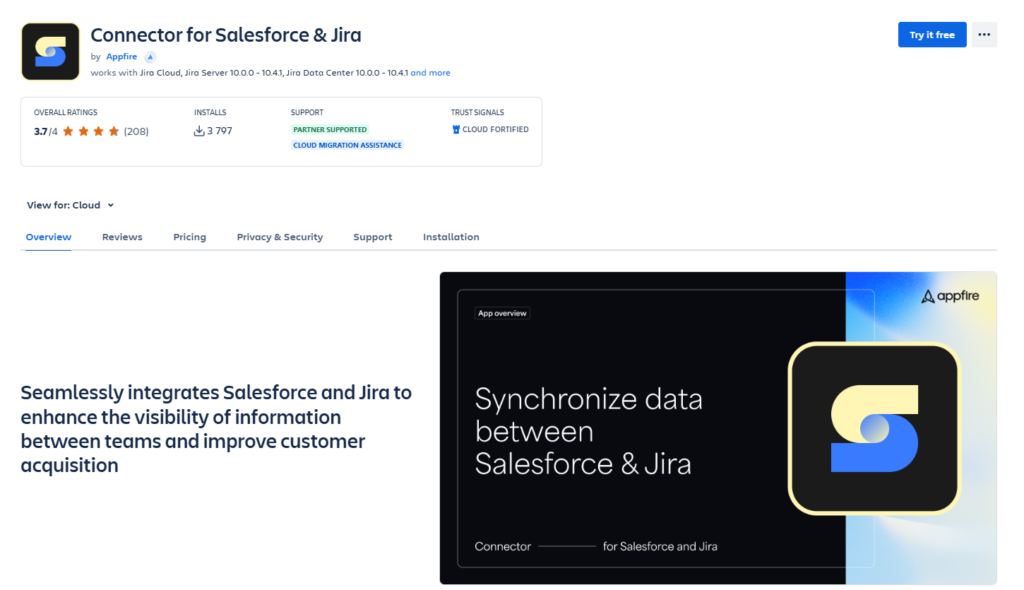
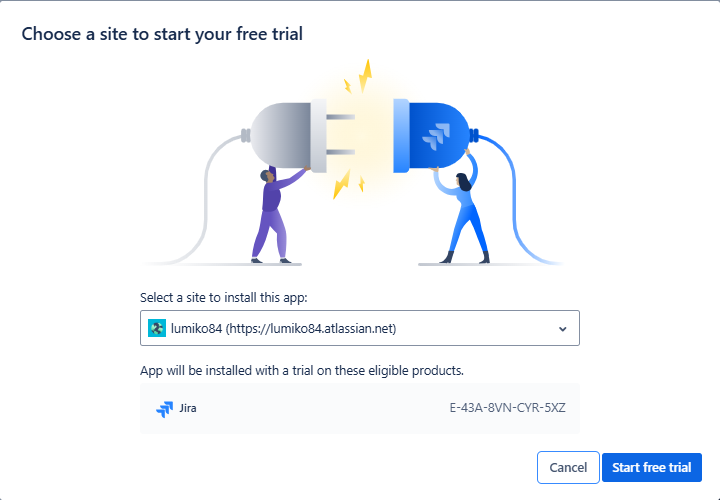
Click Try it free to start downloading the app.
Note. For the installation process to continue, you must log in to the Atlassian account.
After that, the SF connector will appear at the top of the Apps menu.
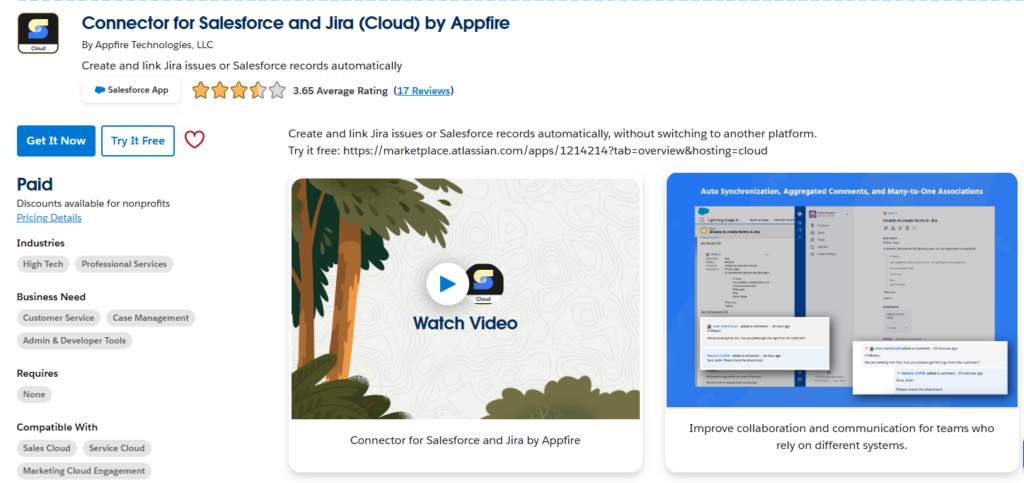
Step 2. Install Appfire connector in Salesforce
Once you’ve installed the connector for Jira, you need to install the Appfire connector package in Salesforce. Open the AppExchange market and search for the Appfire Jira connector.
Click the Get It Now button and log in to your SF account. Choose where to install the app (the Production Org or the Sandbox Org). Then, confirm installation details, tick the agreement on terms and conditions, and click Confirm and Install.
After that, you have to choose the security type of installation and finish the process by clicking the Install button.
Note. If you choose “Install for Admins Only,” consider these limitations:
- Only SF Admins can be used as an integration user for the steps in setting up a connection.
- Only SF Admins can view the content of the lightning components, even when it is added to the Salesforce Object layouts.
Proceed with the installation prompts. After installation, go to Installed Packages to connect with the server. You can find it in the menu Platform Tools/Apps/Packaging.
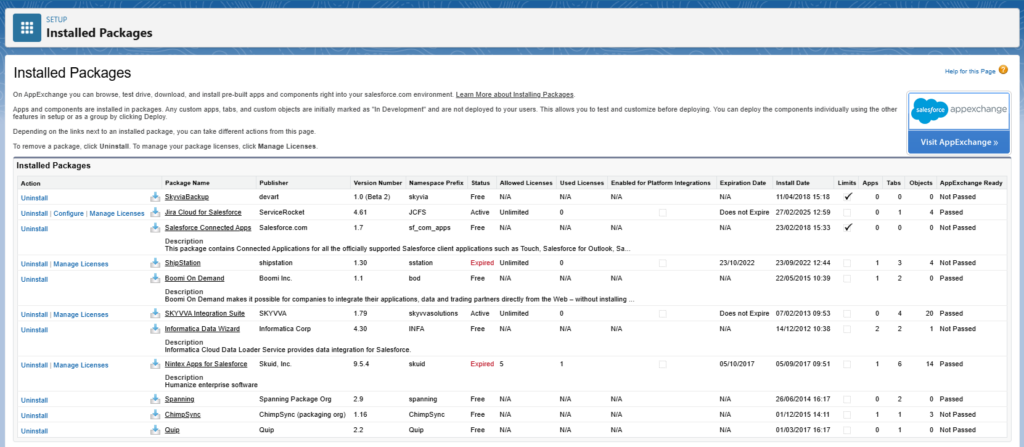
In the Quick Find, type remote site settings to open the setup page and click the New Remote Site button.
Fill in the following details:
- Remote Site Name: Jira
- Remote Site URL: https://sfjc.integration.appfire.app
Click Save to finish the installation of the Salesforce package.
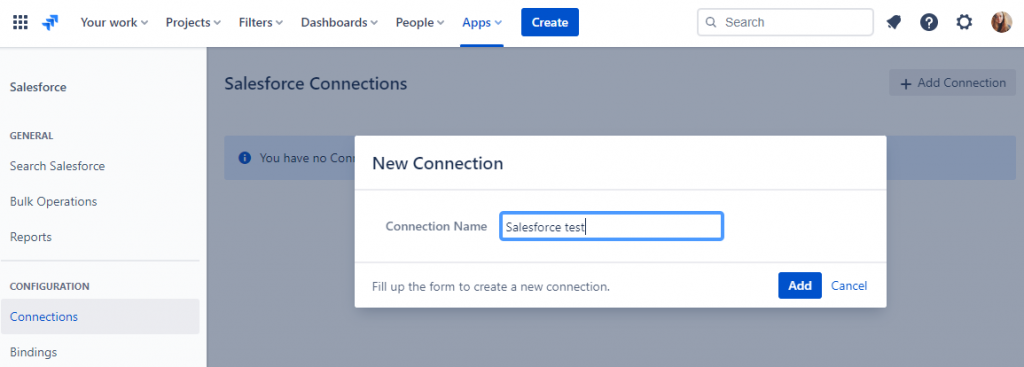
Step 3. Set up Jira to Salesforce connection
In Jira, select the Salesforce application from the Apps dropdown menu at the top. Go to the Connections section, click the +Add Connection button, type the connection name, and add a new connection.
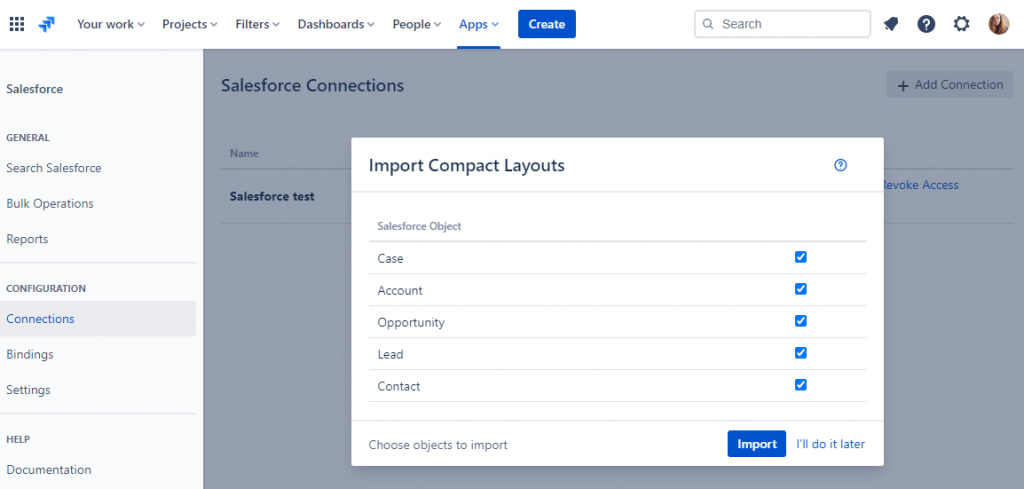
Allow access to your SF account. Select what objects from Salesforce should be imported and finish authorization of the connection.
Step 4: Set up Salesforce to Jira integration
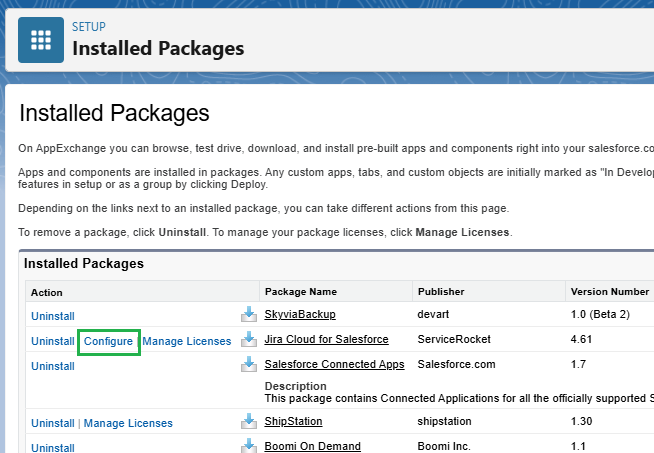
Start from the Installed Packages page, find the Jira for Salesforce package, and click Configure.
Paste the API token for your JIRA instance. You can find the API token in Jira on the page with Salesforce connections under the three dots menu.
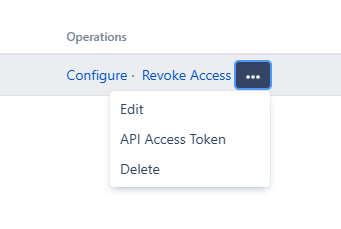
Copy the API Access token and enter it in the Salesforce dialogue window. Now you’ve successfully connected Salesforce to the Jira instance.
For more details, check the Appfire Installation Guide.
Pros
- Out-of-the-box solution – doesn’t need coding or customization
- Detailed documentation and an excellent support team
- Triggers automatic updates and workflows between platforms
Cons
- Requires installation on both Salesforce and Jira
- Limited customization for complex workflows
- A paid license is needed
Method 3. Integration Using APIs
With JIRA APIs, you can fetch and synchronize data with multiple applications. To use the APIs, you need to develop the SF Apex Class and use Triggers to monitor and make updates in JIRA directly from Salesforce.
Best for
- Businesses with the technical resources needing to build custom integrations with advanced automation.
Prerequisites
- Requires technical skills and admin level of access to Salesforce account
- Needs knowledge of REST API.
Step-by-step guide
Step 1. Server Calls Enabling
To call an external server, you have to write a code in the APEX Class in Salesforce. Log in to your Salesforce account, then select the security control option. After that, you have to add a new remote site. To create the remote site, enter your JIRA URL and name.
Note. You need to have an admin level of access to your Salesforce account.
Step 2. Getting Jira Issue Keys
You need to get the JIRA issue key to use the APIs. This key is used to create an outbound map and match it with the text fields.
Create a text field from the setup option, customize it, and select the fields option. Add a custom field and name it JIRA_key.
Once you’ve created the text field, you need to add an outbound map from your key to the text field.
Step 3. Setting Up Salesforce Apex Class
Once you’ve created an outbound map, you must write the code for your Salesforce Apex class. To do this, go to the app setup option, click Develop, and select the Apex Classes option.
You need to write the integration code specifying your parameters and allowing the Salesforce Apex Class to connect with your JIRA instance.
Note. To write the code, refer to the official Salesforce documentation on Apex Rest Code.
Step 4: Setting Up Salesforce Triggers
Salesforce Apex triggers can be configured to automate the JIRA issue creation process as well as to do custom actions before or after changes to Salesforce records, like insertions, updates, or deletions.
You must create and add a trigger code to the Apex Class you wrote earlier. Every time a new case is added in Salesforce, it will automatically be synced to JIRA using the REST APIs.
Note. You can learn more about Salesforce triggers in Salesforce developer docs.
Pros
- Flexibility – allows any data-related operation and integration to be managed according to various needs.
- Advanced automation – enables complex workflows and real-time data synchronization.
- Multi-system connectivity – can integrate SF and Jira with other platforms.
Cons
- Difficult to install and requires administrator permissions
- Needs programming skills and a Developer edition in Salesforce
- Has limitations on user rights, the number of everyday updates to data, etc.
- Ongoing maintenance – custom-built solutions require continuous monitoring and updates.
Method 4. Third-party Integration Platforms
Third-party integration platforms, such as Zapier, Workato, Tray.io, and Skyvia, can connect Jira and SF using prebuilt connectors and workflows.
They balance simplicity and flexibility and eliminate the need for development. Among the various tools on the market, Skyvia stands out for its powerful features and ease of use.
Skyvia data platform offers a no-code way to integrate Salesforce and Jira data. It doesn’t require specific skills. You must take three easy steps to get cloud integration and establish connections with two services in Skyvia.
- Set up a connection with Jira.
- Set up a connection with Salesforce.
- Set up data import between these two platforms.
Best for
- Businesses needing a balanced approach with more scalability and customization without extensive development efforts.
Prerequisites
- To use Skyvia, you need to create a free account, which provides access to its core functionality.
Step-by-step guide
Step 1. Jira connection
Skyvia can connect to both Jira Cloud and Jira Server. In this guide, we will show the cloud scenario.
Sign in with Skyvia and click +Create New in the top menu.
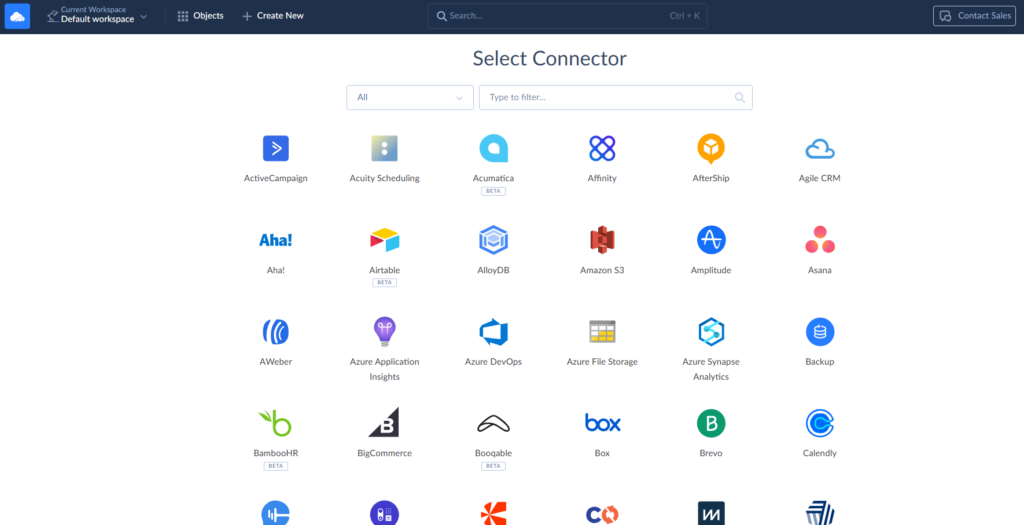
Then, click the Connection button in the menu on the left. In the opened Select Connector page, select Jira service. The default name of a new connection is Untitled, you need to click it to rename the new connection.
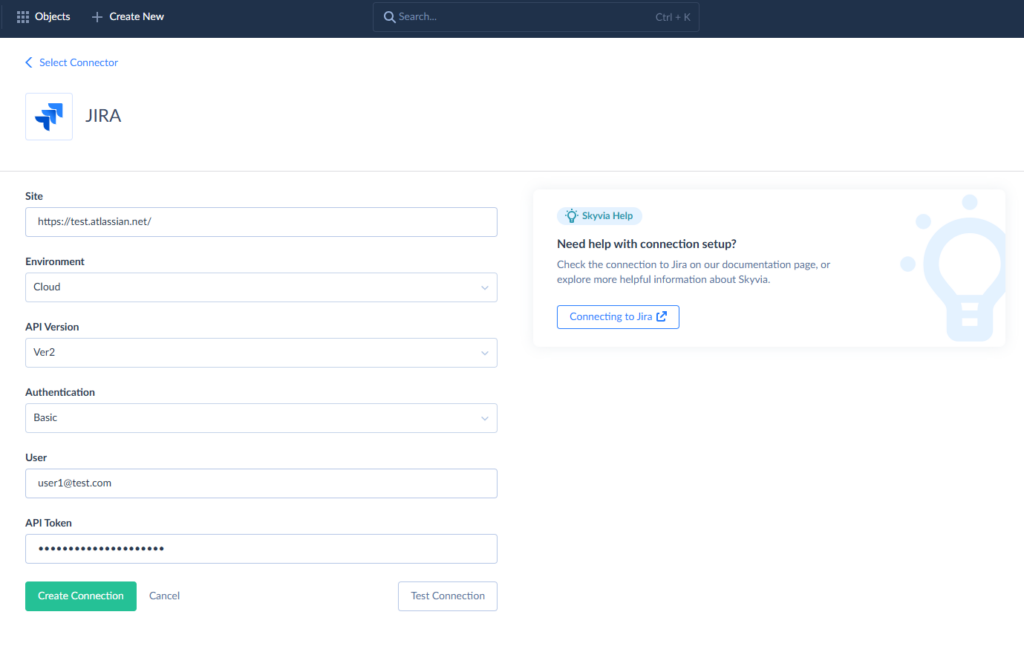
Provide Skyvia access to your Atlassian account by accepting privacy policies. Then, click Create Connection, and Save Connection.
Note. Skyvia doesn’t support custom fields in the default Jira connector. However, if you need to work with custom fields in Jira, you may contact our support team at support@skyvia.com to request custom field additions.
You can also check the Skyvia documentation for more information.
Step 2. Salesforce connection
The same actions as with the Jira connection are required for Salesforce. Click the Connection button, open the Select Connector page, and choose Salesforce service. Change the default name from Untitled by clicking on it. Then, fill in the information required:
- Environment: choose the environment type of Salesforce to export data from.
- Authentication: choose the authentication method for connecting to Salesforce.
Depending on your chosen authentication type, either click the Sing in with Salesforce button or specify your Salesforce account e-mail, password, and security token. Create and save the connection by clicking the corresponding buttons.
Note. For more information, check the connecting to Salesforce Skyvia documentation.
Step 3. Jira and Salesforce data import
To sync Jira and Salesforce, click +Create New in the top menu. In the Integration column, click Import. Rename the import for quick identification later.
Select the Data Source database or cloud app source type. Select your Salesforce connection as a Source and Jira connection as a Target.
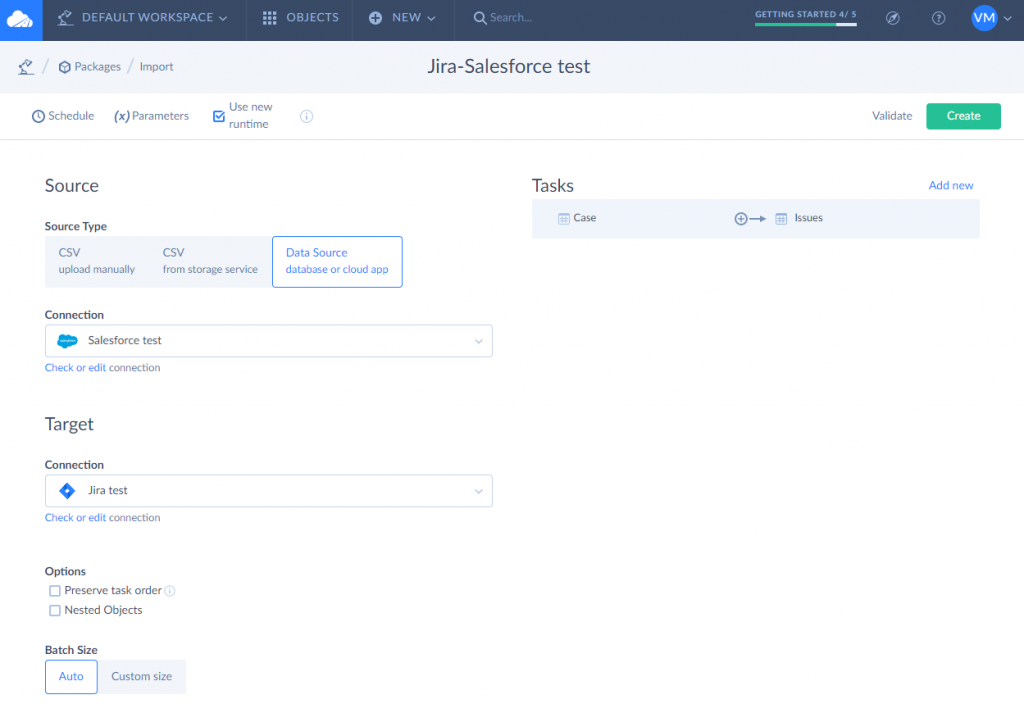
On the right, click Add task to create the Import task. You can use either the Simple or Advanced mode in the Task Editor.
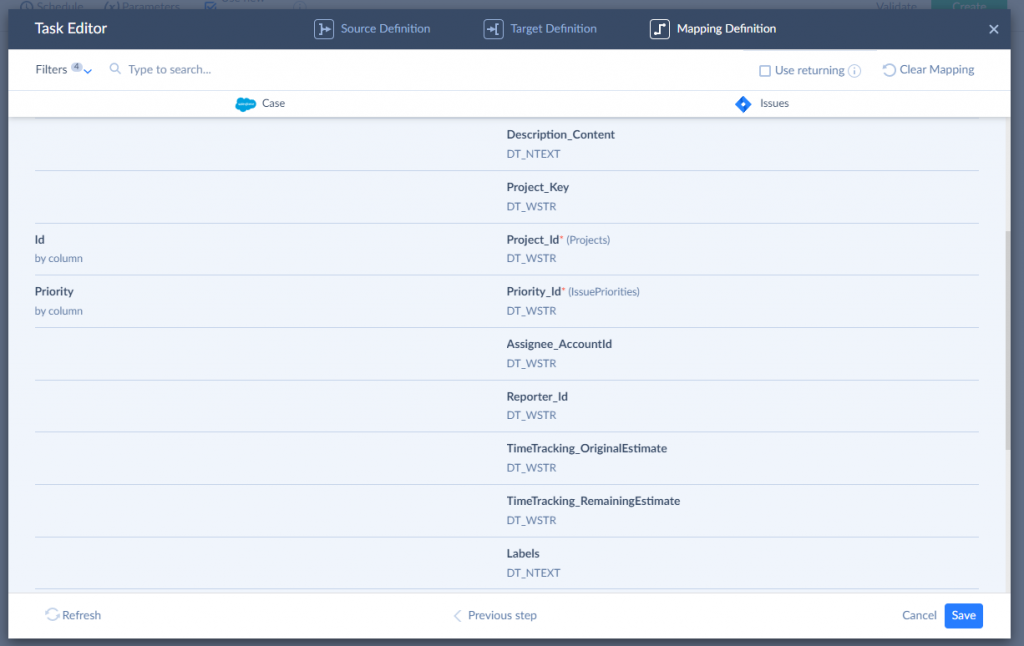
Here, you have to define Source, Target, and configure Mapping. For this, select the source table or object from the Source list, the object to import data to from the Target list, and the type of operation for the task: Insert, Update, Delete, or Upsert.
Then, on the Mapping Definition page, you should configure the mapping of target columns to source columns, expressions, constants, lookups, etc. Columns with the same names in the source and target are mapped automatically.
Note. For more information, read the detailed instructions on creating the Import task and configuring the mapping.
After completing the mapping, save the created task and Import.
You have to create another Import according to the above steps to perform the import data in the opposite way from Jira to Salesforce.
You can perform the import manually or set the schedule to start automatically. The common practice is to schedule runs at different times to avoid data overlapping.
Various business use cases need different integration scenarios, and Skyvia provides options for any. In addition to data import, Skyvia Integration includes:
- A Synchronization for bi-directional data sync,
- A more advanced Data Flow and Control Flow.
For creating complicated data flows with multiple sources, multistage transformations, and error handling, these tools are the best options.
Pros
- No coding required – easily set up integrations without technical expertise
- Flexible data mapping – Skyvia allows you to map data with the help of output schema, functions, properties, and variables
- Automated workflows – schedule data updates and ensure seamless synchronization
- Detailed logging and email notifications.
Cons
- Feature limitations on the free plan – advanced automation features require a paid subscription.
You can find out more about Skyvia on Atlassian Marketplace.

Best Practices for a Successful Jira Salesforce Integration
Integrating Jira and Salesforce can significantly boost collaboration and streamline workflows between your sales and development teams. To ensure that the integration is smooth and effective, follow these key best practices:
Start with a Clear Plan
Before diving into the integration process, define what success looks like. Take time to ask these key questions:
- What specific problems are you solving?
- What do you want to automate or improve?
- How will success be measured?
Establishing a clear set of objectives will guide your decisions and help you align the integration with business goals. For example, are you trying to streamline support ticket resolutions, improve project visibility, or enhance communication between teams? Clarity at the start ensures you’re focused on the right outcomes.
Involve All Stakeholders
Integration is a team effort. Ensure that both the sales and development teams are actively involved in the planning and decision-making process:
- Sales Team: What customer data and features do they need in Salesforce?
- Development Team: What project management and task-tracking features do they need in Jira?
By bringing both sides together, you’ll avoid misalignment and ensure that the integration meets the needs of everyone involved. This collaboration also fosters better communication across departments.
Start Small and Iterate
Don’t attempt to integrate everything at once. Begin with a simple use case that provides immediate value and is easy to implement. Once that’s running smoothly, gradually expand:
- Phase 1: Sync customer support cases with Jira issues for real-time updates.
- Phase 2: Integrate sales opportunities with development requests.
- Phase 3: Extend integration to include more complex workflows, such as product updates syncing automatically to the sales team.
By starting small, you mitigate risk, solve problems incrementally, and ensure smoother scalability as you expand your integration.
Monitor and Maintain
An integration is only as good as how it’s managed over time. Make it a point to regularly check on its performance to ensure it’s still aligned with your objectives:
- Monitor: Are data syncs happening in real time? Are all systems talking to each other properly?
- Troubleshoot: Are there any delays, errors, or missing data?
- Optimize: As your needs evolve, make adjustments and integrate new features.
By staying proactive and keeping an eye on the system, you can avoid future headaches and keep the integration running at peak performance.
Conclusion
Integrating Jira and Salesforce unlocks powerful collaboration between sales, support, and development teams, ensuring smoother workflows, faster issue resolution, and improved customer outcomes. Throughout this article, we’ve explored four effective methods for integrating these two platforms:
- Native Integration offers a straightforward solution for basic use cases with minimal setup.
- Third-party Marketplace Connectors simplify integration but come with limited customization options.
- API Integration provides flexibility for custom solutions, though it requires technical expertise.
- Third-party Integration Platforms like Skyvia offer a balanced solution for more complex needs, with pre-built workflows and connectors that require no coding.
The Jira-Salesforce integration is a game-changer, enabling teams to sync crucial data seamlessly, automate workflows, and work more efficiently together. With the right solution in place, you can improve your team’s productivity and enhance customer satisfaction across the board.
Ready to transform your workflow? Try Skyvia’s seamless integration solution to connect Jira and Salesforce without any coding required, and experience the power of automation and real-time syncing for your team.
FAQ for Jira and Salesforce

What factors should be considered when choosing an integration tool?
– Automation needs
– Customization options
– Ease of setup
– Security
– Pricing
– Support for real-time two-way sync
What are common use cases for Jira Salesforce integration?
– Syncing support tickets with development tasks
– Tracking feature requests
– Automating status updates
– Generating cross-platform reports
Are there any security concerns to sync Jira and Salesforce?
Yes, consider data access controls, API security, compliance with industry regulations, and user authentication to prevent unauthorized access.