Hey there, financial trailblazers! Ever found yourself scratching your head at the mention of importing CSV to QuickBooks?
Don’t worry, you’re not alone! It’s like looking at a recipe for the first time. Those ingredients and steps might seem confusing. But trust me, it’s not rocket science.
Picture this: you’ve got a stack of financial info, like receipts, transactions, and numbers. They are all in separate places. And very unorganized. Just think of these as pieces of a jigsaw puzzle, and QuickBooks is your puzzle board. The magic key? A CSV file.
In this blog post, we’re taking you on a stress-free journey, explaining everything in plain ol’ human talk. We’ll break down the “how” step by step, making it as breezy as ordering your favorite takeout. So, if you’ve ever thought, “Am I too new for this tech stuff?” – fret not! We’ve got your back. And we’re here to show you that importing CSV files to QuickBooks is just like following a familiar recipe.
So, let’s dive in.
Table of Contents
- What is QuickBooks Online?
- What is QuickBooks Desktop?
- QuickBooks Online vs. Desktop: Which One is Right for You?
- Import CSV to QuickBooks: What Transactions Can You Import?
- Method #1: Import CSV to QuickBooks Online
- Method #2: Import CSV to QuickBooks Desktop
- Method #3: Automagically Import CSV to QuickBooks Like Clockwork Using Skyvia
- Conclusion
What is QuickBooks Online?
Think of QuickBooks Online like a digital organizer for your money matters. It’s like having a virtual wallet that you can access anywhere with the internet. You can track your cash flowing in and out. You can keep tabs on your business finances without carrying a physical ledger. And you can do this on your computer or phone.
What is QuickBooks Desktop?
Now, QuickBooks Desktop is like an old, reliable toolbox sitting on your computer. It’s like having all your financial tools in one place. You can crunch numbers, make invoices, and manage expenses without needing the internet. Everything’s right there on your computer, ready to fix up your finances. Just remember, it doesn’t update as often as QuickBooks Online. So, you might miss out on some of the fresher tricks.
QuickBooks Online vs. Desktop: Which One is Right for You?
This is like deciding between a smartphone and an old flip phone. Both do the job, but one might suit you better. So, let’s dive in and see which suits your financial fancy!
QuickBooks Online (QBO)
Pros
- Anywhere, anytime. It’s like having your money office in your pocket. Access your finances from anywhere with the internet.
- Automatic updates. Like a self-updating app, QBO gets new features regularly without hassle.
- Collaboration ease. Perfect if your team needs to dance with your financial data together.
Cons
- Monthly cost. Just like a subscription service, you pay regularly to keep the virtual office open.
- Internet hang-ups. If the net’s down, so is your access.
- Learning curve. Braving it to the online playground might take a bit longer.
Best for: If you’re a business on the move and need team access. And you don’t mind paying a little extra for the convenience.
QuickBooks Desktop (QBD)
Pros
- Standalone champion. Like a trusty old desktop computer, QBD doesn’t rely on the internet – it’s always there.
- No subscriptions. Pay once, and it’s yours – no regular money leaks.
- Mature features. Like a wise wizard, it’s got a bunch of tools from years of financial magic.
Cons
- Location bound. You can’t work at home or at your favorite coffee shop – no financial globetrotting.
- Manual updates. No auto-magic here – you update when you choose.
- Team tango trouble. Collaborating can be a bit more like a slow dance.
Best for: If you’re okay with staying put and want full control without a subscription. And you have a thing for old-school reliability.
Import CSV to QuickBooks: What Transactions Can You Import?
But What is a CSV File?
Let’s take a stroll down the data avenue and chat about CSV files and how they cozy up with QuickBooks.
Now, a CSV file, short for “Comma-Separated Values,” is like a table or spreadsheet. And a comma separates each piece of info. It’s like your trusty shopping list – plain and simple.
Imagine you’re a small business owner. You’ve got a stack of receipts, invoices, and expenses that need to be in QuickBooks. Instead of typing everything in one by one, you can import a CSV file to speed things up. Each line in the CSV file represents a transaction. And the columns hold the details – like the date of the transaction, the amount, the description, and so on.
Here’s a simple example of how a CSV file might look:
Date, Description, Amount
2023-07-15, Office Supplies, 50.00
2023-07-20, Client Invoice, 750.00
2023-07-25, Internet Bill, 80.00
You can import a CSV into QuickBooks like this one. And the software will understand each line as a separate transaction. And it neatly organizes the info into the right places. It’s just like slotting puzzle pieces into a picture.
Transactions You Can Import
You can import these types of transactions to QuickBooks from a CSV file:
- Invoices,
- Bills,
- Checks,
- Expenses,
- Payments,
- Credit Card Charges,
- Deposits,
- Journal Entries, and
- Money Transfers
Method #1: Import CSV to QuickBooks Online
Guess what? Feeding CSVs to QuickBooks is plain simple. It’s like putting together a jigsaw puzzle – a piece of cake!
Best for: Users of QuickBooks Online doing a one-time import.
Before You Start
First things first, before you upload a CSV to QuickBooks Online, here’s what you need to get ready:
- CSV File: This is your recipe card. Make sure its format is correct with columns for things like date, description, and amount. Double-check for any typos.
- Backup Plan: Just like a safety net, consider having a backup of your QuickBooks data handy. This is like having an extra umbrella in case of rain. You hope you won’t need it, but it’s good to have, just in case.
Piece-of-Cake Steps to Import CSV
- Login to QuickBooks Online.
- Find and click on the gear icon at the top left of the page. Then, click Import Data.
- Pick the type of data to import. Be it customers, vendors, or bank data, it’s all in QuickBooks. You can only pick one at a time for every import.
- Select CSV as the file type you want to upload.
- Locate Your File. Click the button to find your CSV file on your computer.
- Map Columns. This is like matching puzzle pieces. QuickBooks will ask you to match the columns in your CSV to the right places in QuickBooks.
- Review and Import. Click Review. Then, QuickBooks will show you what it plans to do. If everything looks good, proceed to Import.
Method #2: Import CSV to QuickBooks Desktop
Ready to take on the CSV journey in QuickBooks Desktop? Fear not. It’s as easy as ordering your favorite pizza!
Best for: Users of QuickBooks Desktop who need a one-time import.
Before You Start
The checklist is the same as the Import CSV to QuickBooks Online.
Easy-Peasy Steps to Import CSV
- Open QuickBooks Desktop.
- Click File and select Utilities.
- Choose Import.
- Choose the type of data, like Customers, Vendors, and more.
- Choose CSV as the file type to import.
- Locate your CSV file from your computer.
- Match your CSV columns with their QuickBooks equivalents.
- Click Review, then Import.
Method #3: Automagically Import CSV to QuickBooks Like Clockwork Using Skyvia
The two methods earlier are already good at importing CSV data.
But there’s a catch. If you have another CSV of the same column information, you have to do all the steps again.
What if you have a fixed place where your CSVs live, like a folder in a shared drive? And let software import the data on a recurring schedule?
That’s where a cloud solution like Skyvia can come in handy. It’s like construction power tools that can do the job faster. And Skyvia can deal with QuickBooks Online and QuickBooks Desktop.
Best for: Users of both QuickBooks Online and Desktop. It works on either a one-time or recurring CSV import. If you have other data formats like Salesforce, Zendesk, and more, Skyvia can handle it also.
Before You Start
Here’s your bucket list of Skyvia import stuff:
- Register on Skyvia. This is free, and once you’re in, you can start immediately.
- Note your QuickBooks Online or QuickBooks Desktop credentials.
- Prepare your CSV files.
- The CSVs should be in one place, so Skyvia will only refer to it every time. If you placed it in Google Drive, for example, you also need a Google account.
- Again, backup. Though marrying QuickBooks and Skyvia is an easy feat, things can go wrong when you’re starting. So, back up your QuickBooks data before importing anything.
The ABCs of Importing CSV to QuickBooks Using Skyvia
Let’s make your CSV-to-QuickBooks integration smooth sailing. Here’s how:
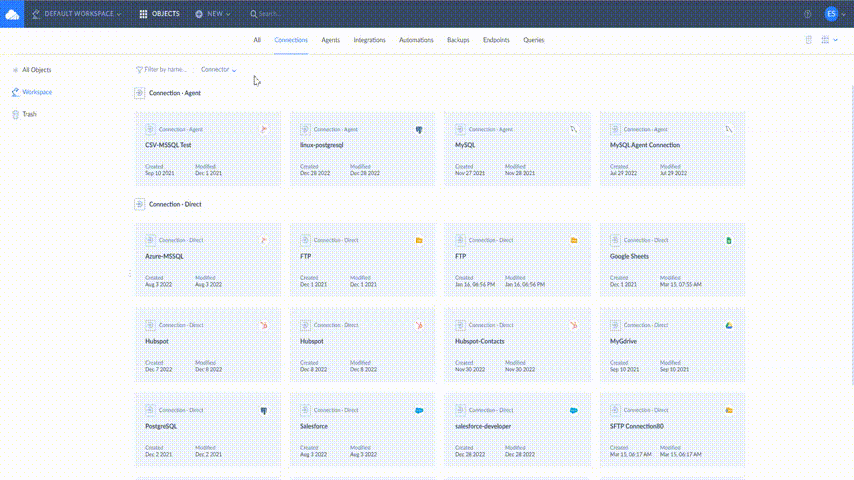
1. Make a New Connection to QuickBooks
Skyvia has connectors for both QuickBooks Desktop and QuickBooks Online. For CSV and QuickBooks to say “I do,” Skyvia is the knot, and this is the first part.
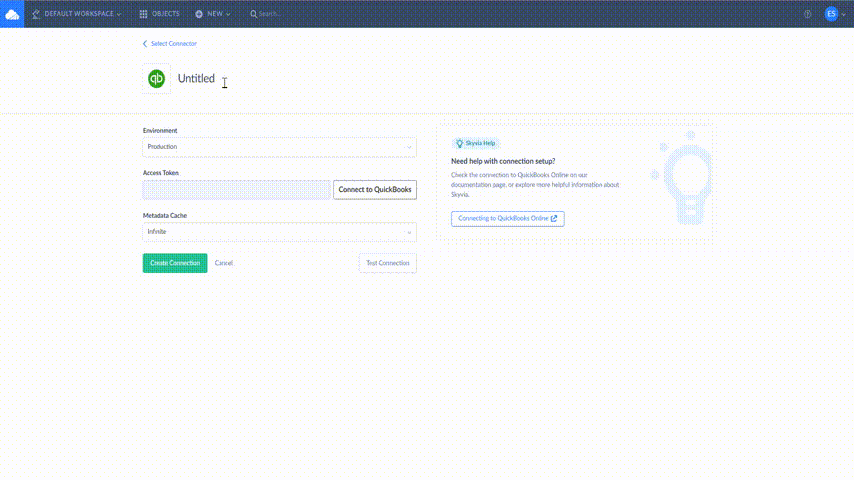
Let me show you how to start making a QuickBooks Online connection. Click NEW -> Connection. Then, select QuickBooks Online.
Configuring the QuickBooks Online connector is just as easy. Now, you don’t give Skyvia your QuickBooks User ID and password. You will log in to QuickBooks Online, and QuickBooks will give Skyvia an access token.
Anyway, check it out below:
QuickBooks Desktop connection, on the other hand, adds a few more steps. You need the Skyvia Agent to give Skyvia access to QuickBooks. Because Skyvia is on the internet and your QuickBooks is on your company computer. For more information, visit this tutorial page.
2. Make a New Connection to Your CSV Files
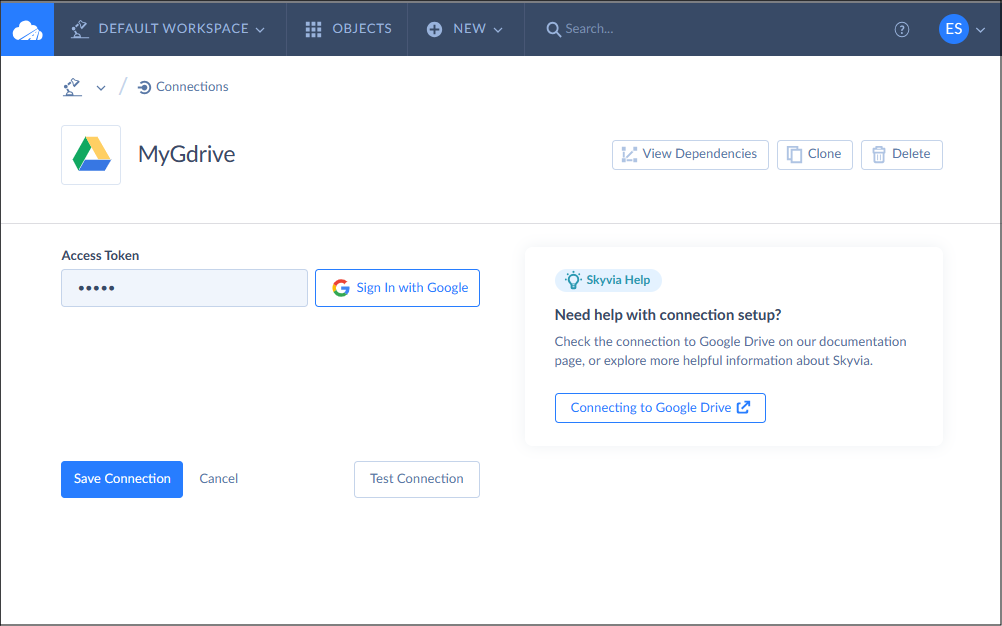
The second part of the knot is making a connection to where your CSV files are. You can put your CSVs online using Google Drive or your company’s FTP folder. Skyvia can connect to these and more online resources.
Let’s say you want it on Google Drive. So, here are the easy steps.
- Sign in to Skyvia. If you’re already inside Skyvia, skip this step.
- Make a new Google Drive connection. Click NEW from the upper menu. Then, choose Connection.
- Type in Google Drive to the search box. Then, click Google Drive.
- Log in to Google. Then, Google will give an access token to Skyvia.
- Test and save your new connection. You need this and the QuickBooks connection earlier for the next step. Don’t forget to give this connection a descriptive name.
The steps are almost the same with the QuickBooks connection but much simpler. You will see a similar screen below once you finish the steps:
3. Create a Skyvia Import
Before doing the Import, check the CSV file for red flags. The size of columns should fit the columns in QuickBooks. And the format is what you agreed with the one who made the CSV file.
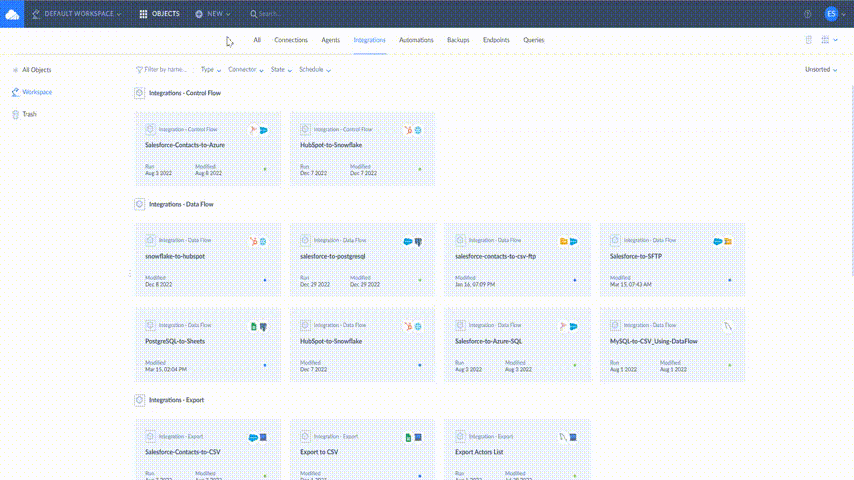
Then, it’s time to tie the knot. The Skyvia Import job will copy the CSV records to QuickBooks. So, see it below in action on how to make an Import integration and set the source and target.
Then, check below how you can add a task and map the CSV columns to QuickBooks Customer:

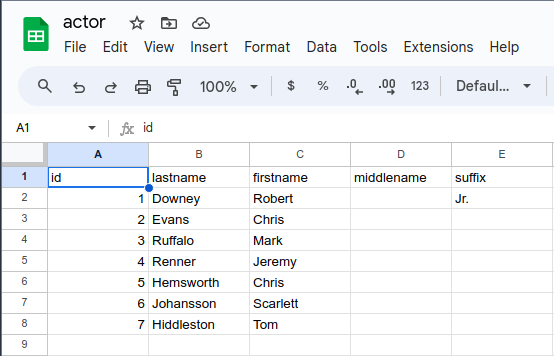
And you can check out what’s inside the CSV file below. Expect this to be in QuickBooks later.
Then, it’s time to run your new Import integration. Check it out below.

Finally, you can check it in QuickBooks. Here’s what happened to my customer list:
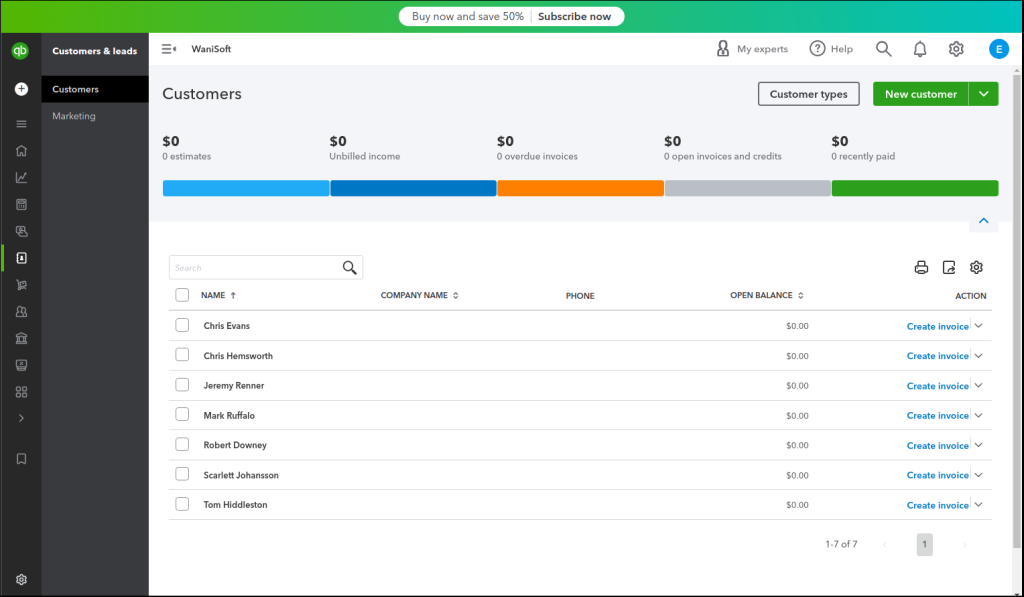
You all know these names. So, comparing it with the CSV records earlier will be painless.
4. Schedule the Import
Skyvia can schedule your imports so you can set up the import once and forget it. It will run on its own without your intervention. Simply click Schedule from the upper left of the Import integration. Then, set up when you want it to run. See a sample below:

That’s it.
You just made an import CSV to QuickBooks job. Kudos to you!
Conclusion
Using Methods 1 and 2 allows you to stay on QuickBooks to do the CSV import. Though you may learn another tool, Skyvia can let you set up the import once. Then, let it run for as long as you like. And it offers other integration opportunities, not just on QuickBooks and CSVs. It’s a jack-of-all-trades for your data.
Skyvia is a cloud data platform that allows you to integrate any data in various ways. Signing up won’t cost you a penny too. And you can start as quickly as now. All you need is a working email. And, of course, your data.
So, why not give it a try today?