

SQL Server is a massive database that usually stores lots of corporate information, but not everyone has full access to it. If you need to share some SQL Server data with your colleagues, then how should you do that? A great option is to export it into a CSV file.
This article explores five fundamental methods for pulling data from SQL Server and saving it in a CSV file. It also explains when each technique could be the most applicable, highlights its advantages and drawbacks, and introduces steps for its implementation.
Table of Contents
- Why Export SQL Server Data to CSV?
- Methods to Export Data from SQL Server to CSV
- Method 1. Using SQL Server Management Studio (SSMS)
- Method 2. Using Import and Export Wizards
- Method 3. Using Scripts
- Method 4. Using the BCP (Bulk Copy Program) Utility
- Method 5. Using Third-Party Tools
- Best Practices for Exporting SQL Server Data to CSV
- Troubleshooting Common Issues
- Conclusion
Why Export SQL Server Data to CSV?
This is a good question since it’s crucial to understand the root causes that create the necessity to export SQL Server data to a CSV file. It’s not only about various data structures across systems, but also some other reasons listed below.
- No SQL support. When you need to send a dataset from your SQL Server database to a system that doesn’t support SQL statements or queries, a CSV file may come in handy.
- Exporting a specific dataset. Given that an SQL Server database is usually a large storage, sending all that vast amount of data to another system isn’t a good idea. Instead, it’s possible to pull all the needed information into a more concise way, in a CSV file.
- Analytics offline. Connecting SQL Server directly to a SaaS BI and data visualization tool isn’t possible on some occasions. Luckily, most reporting solutions (Excel, Power BI, Google Sheets, etc.) extract data from CSV files.
- Backup and archiving. Saving database information as CSV files is a widespread approach towards preserving all the critical data.
Another reason to export SQL Server to CSV refers exclusively to the properties of the latter:
- CSV is a lightweight format that occupies less disk space than JSON or XML.
- CSV format is compatible with many data visualization, BI, and reporting tools.
- CSV files are machine- and human-readable, ensuring that users can easily open and understand their content.
Methods to Export Data from SQL Server to CSV
Below, find a brief description of each approach to exporting SQL Server data to CSV, described further in this article. Find the advantages and limitations of each technique to get a better idea of it. With this information at hand, you can evaluate each integration method and see how it coincides with your technical team’s expertise and data export needs.
| Method | Description | Pros | Cons |
|---|---|---|---|
| SSMS | Execute SQL query against the data and copy results or download them as a CSV file. | – Native integration with other Microsoft products. – No need to create a new account or subscription to start using SSMS. – No limit on data amount and quantity of files to be retrieved. | – Strong SQL skills are required. – Extraction of specific datasets or tables. – Additional installation setup and space on disk are required. |
| Import and Export Wizard | Retrieve tables or views via the visual wizard setup. | – No need for SQL queries. – Non-technical users obtain instant access to the data they need. – Included in SSMS, which comes with SQL Server. | – The entire table is retrieved; it may contain unnecessary data. – Data cleaning might be required. – To get a specific dataset, SQL queries are needed. |
| SQLCMD utility | Execute SQL or T-SQL commands and use scripts to pull data. | – This utility is integrated into the Command Prompt. – SQLCMD supports T-SQL commands for enhanced transaction management. – Advanced scripting scenarios. | – Understanding of T-SQL commands. – Not very efficient on large volumes of data. – Tech professionals oriented. |
| BCP utility | Perform bulk operations on SQL Server data import and export. | – No need to parse the data. – Support for both import and export. – Pull data into .csv, .txt, and .xml files. | – BCP utility comes as an extra tool. – It requires bash scripting skills. – Error messages might be unclear. |
| Skyvia | Data export with a no-code interface and pre-built connector to SQL Server. | – Support of various integration scenarios. – Pre-built connectors to 200+ data sources. – No need for additional installations. – Free plan is available. – On-screen tips and instructions. | – Advanced features are available under the paid plans only. – Some pre-built connectors are lacking. – Data blending feature is not available. |
Method 1. Using SQL Server Management Studio (SSMS)
Since SSMS usually comes hand-in-hand with SQL Server, it provides all the essential functions for administration and database management in a visual interface. It also allows the execution of SQL queries and returns results in a user-friendly manner.
Best for
This approach is often used to pull specific datasets from the bulk of data stored in SQL Server. It’s seen as a one-time, purposeful data extraction that will be further used for analysis or transfer to another system. For instance, you can take only your transaction data for the last month to see which days of the week are the busiest for business.
Step-by-step guide
Connecting to Your Database
When you open SQL Server Management Studio (SSMS), the very first thing you’ll see is the Connect to Server dialog.
This is where every SQL Server database connection begins, and it directly answers the classic “how to connect to SQL Server” question.

The dialog has a few key fields worth calling out:
Server type
Leave this set to Database Engine unless you specifically need another service. This tells SSMS you’re connecting to a standard SQL Server instance.
Server name
This is the actual SQL Server instance you want to reach.
Your value may be a machine name, an IP address, or a named instance. It’s the most common place people make mistakes, so double-check spelling and slashes.
Authentication
Right below the server name, you’ll choose how you want to sign in. SSMS supports two main SQL Server authentication options:
- Windows Authentication uses the Windows account you’re already logged into. That’s what’s selected in the screenshot, and it’s often the simplest option if you’re on the same network.
- SQL Server Authentication requires a separate username/password created inside SQL Server. This option becomes available once SQL Authentication is enabled on the server.
When Windows Authentication is selected (as shown), the User name field is greyed out because SSMS automatically uses your current Windows credentials. In the example, DEN\soft.
Once everything looks right, click Connect, and SSMS will open Object Explorer, giving you access to your databases, tables, and the tools you need to export to CSV.
Note: If you run into connection errors, it’s usually one of two culprits: the server name is incorrect, or SQL Authentication isn’t enabled. It’s rarely anything more complicated.
Running Your SQL Query
- Once you’re connected, pull the data you want to export. SSMS makes this part pretty straightforward, but only if you know where to look.
- Start by clicking New Query in the top-left toolbar. This opens a blank query window tied to the database you selected in Object Explorer. If you’ve ever searched for how to run SQL queries in SSMS, this is exactly the workflow you’ll see.

- In the empty query window, type a simple SQL query example like: SELECT * FROM YourTableName;
- Replace YourTableName with the actual table you want to export. In the example, the table is Persons. You can run anything here: a filtered query, a join, or just a quick SELECT * to grab everything.
- When you’re ready, click Execute (the red exclamation mark icon) or press F5. SSMS will run the query and display the results in the Results pane at the bottom.
Note: If no results appear or you get an error, it’s usually a typo in the table name or a missing “USE DatabaseName;” statement. Nothing catastrophic, just fix the query and try again.
Exporting the Results
- Once your query runs and you see rows in the Results grid, you’re ready for the part most people actually came here for: exporting the results to a CSV file. This step is simple once you know where to click, but it’s not immediately obvious if you’re new to SSMS.
- In the Results grid, right-click anywhere inside the returned data. It doesn’t matter which row or column. This opens the context menu shown above. From here, choose Save Results As….

This option is the key to SQL Server query results export. It lets you save exactly what your query returned. No extra formatting, no manual copy-paste. Directly into a CSV or another file format.
Saving as a CSV File
- After you click Save Results As…, SSMS will open a file dialog where you can choose the location and name of your output file.
- Set the “Save as type” to CSV, click Save, and SSMS will export the data exactly as shown in the grid.

Note: If the menu option is greyed out, it usually means the query hasn’t been executed yet or the Results pane is not active. Just click inside the Results grid or run the query again, and the option will reappear.
Once exported, your CSV is ready to use in Excel, Power BI, or whatever tool you prefer. No extra steps needed.
Pros
- SSMS tool natively integrates with other Microsoft products, specifically SQL Server, which makes it intuitive in installation and use.
- There’s no need to create new accounts or subscribe to start using SSMS.
- There’s no limit on the amount of data and files you can pull from the DBMS with this tool.
Cons
- Strong SQL skills are required to retrieve the dataset.
- This approach is mainly used for the extraction of narrow-purpose datasets.
- Additional software installation and space on disk are required.
Method 2. Using Import and Export Wizards
In contrast to the above-mentioned method, this approach doesn’t require any SQL knowledge to extract data. SSMS provides an integrated Import and Export Wizard that allows users to pull data from specific tables or views via a visual wizard.
Best for
Import and Export Wizard would be a good option for business users who understand the database structure but don’t have SQL programming skills. This tool might be suitable for marketers, sales managers, and other non-tech users who want to retrieve specific tables that would be valuable for their departments. For instance, those could be datasets with user information for data enrichment in marketing CRMs.
Step-by-step guide
- Open SQL Server Management Studio.
- Select the database of interest on the left panel and right-click on it. From the context menu, select Tasks -> Export Data.

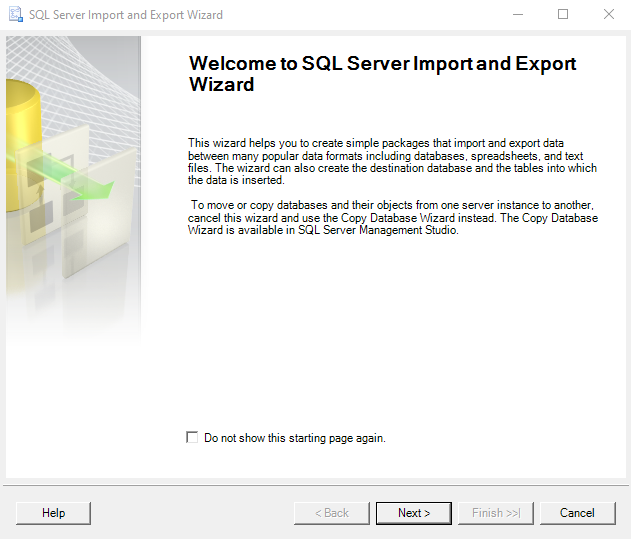
- In the SQL Server Import and Export Wizard that appears, click Next.
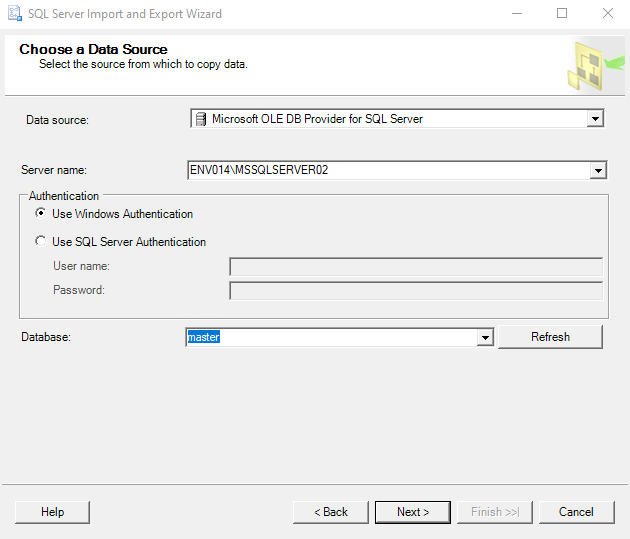
- Specify the data source, server instance, authentication method, and database to retrieve data from. Click Next.
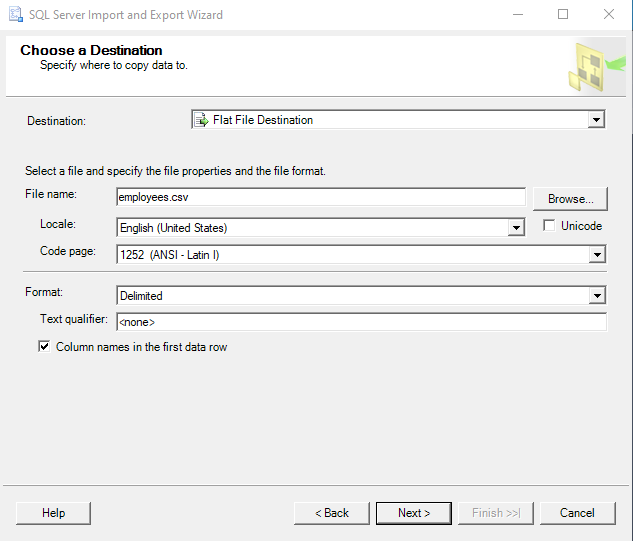
- As a destination, select the Flat File Destination option from the drop-down menu. Specify the name in the File name field for a CSV file creation. Otherwise, browse an existing CSV file from your computer. Make sure that the Delimited option is set in the Format field. Click Next.
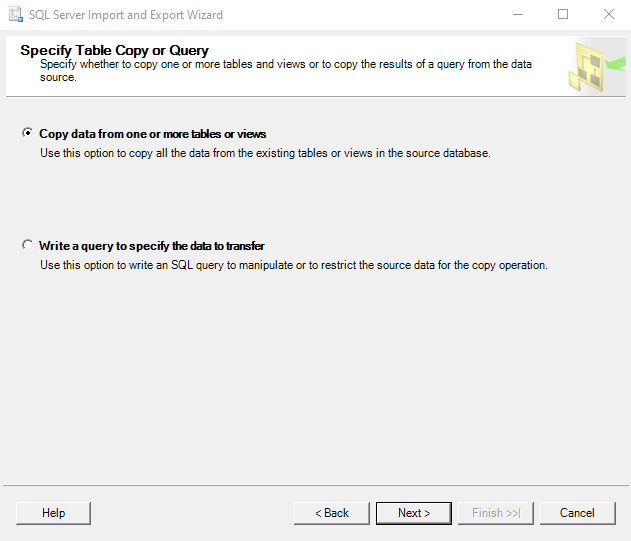
- Decide how you want to extract data: with a no-code approach in case of the Copy data … option, or with an SQL statement for the Write a query… option. Click Next.
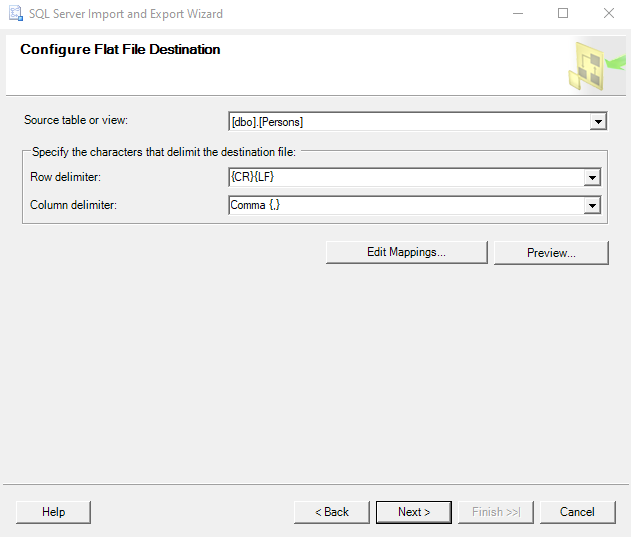
- Select the source table or view to be exported. Specify the delimited format for the CSV file. Click Next.
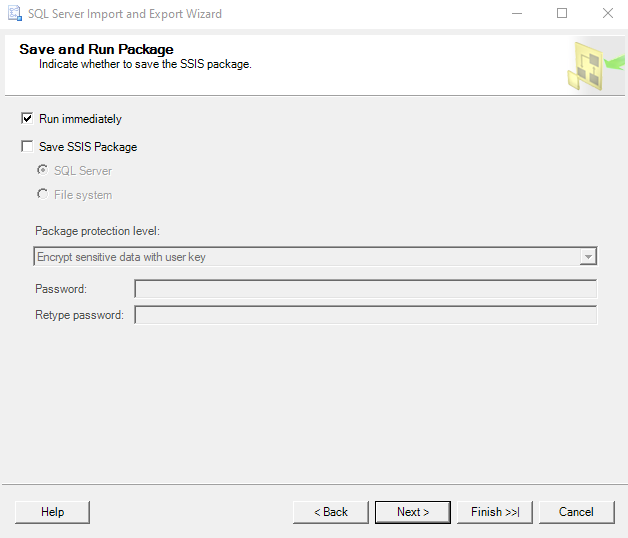
- Select the Run immediately option to save the file on your computer right away.
- Explore the data export report and click Close.
Pros
- No need to execute SQL queries since data can be extracted via a visual wizard-based procedure.
- Non-technical users can get access to the data without programmers’ help.
- This method requires SSMS, which usually comes together with SQL Server.
Cons
- The entire table is retrieved, and it may contain unnecessary data.
- Further data cleaning might be required upon CSV file creation.
- For specific information extraction, it’s necessary to execute SQL queries.
Method 3. Using Scripts
SQL Server comes with a bunch of utilities installed together with the server itself. One of those is called SQLCMD utility – it supports T-SQL (Transact-SQL) statements, system procedures, and script files.
First of all, check whether the SQLCMD utility is installed on your computer. For that, type ‘cmd’ in the search field near the Windows sign on your computer to open the Command Prompt window.
Then, type the following command:
sqlcmd -?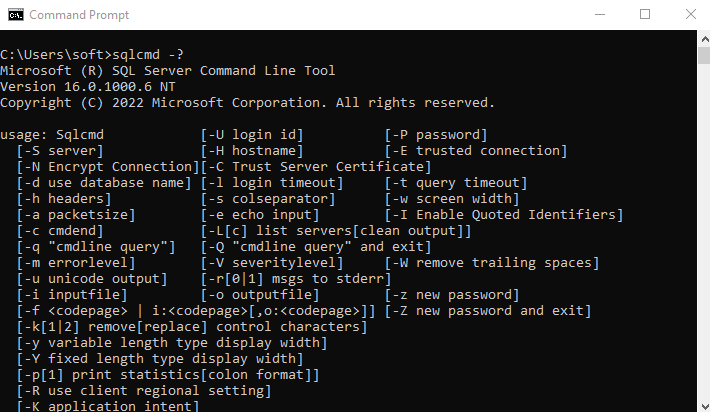
If it’s not installed yet or you need to access SQL Server from an external computer, type the following command:
winget install sqlcmdBest for
This approach would be suitable for IT experts with profound knowledge of SQL, scripting, and database administration skills.
Step-by-step guide
- Open Command Prompt on Windows.
- Connect to your SQL Server by typing this command, substituting SERVERINSTANCE with your SQL Server instance name.
sqlcmd -S SERVERINSTANCE -EExample:
sqlcmd -S ENV014\MSSQLSERVER02 -E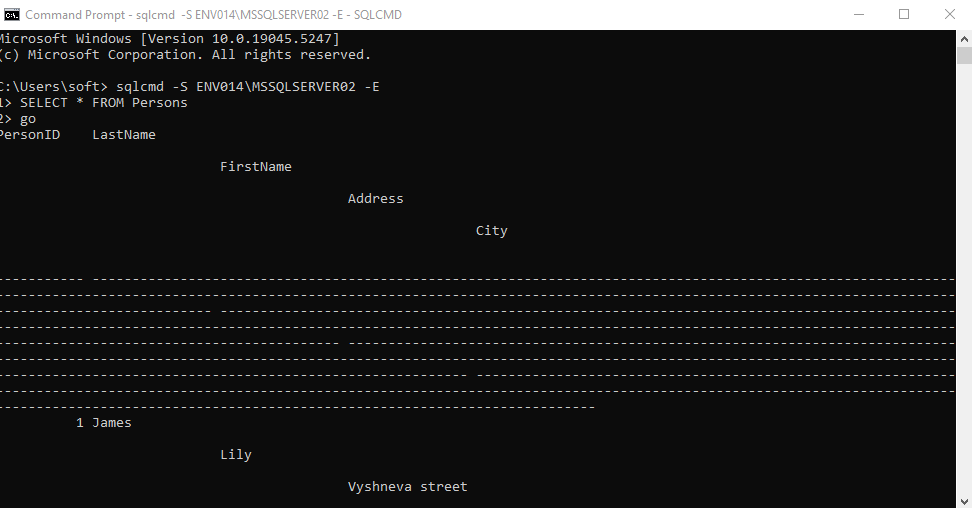
- To export data from SQL Server to CSV file, execute the following command:
Sqlcmd -S SERVERINSTANCE -o “PATH” -Q “SQL STATEMENT” -s”,” -w 700 -WExample:
sqlcmd -S ENV014\MSSQLSERVER02 -o "C:\Users\levko\employees.csv" -Q "SELECT * FROM Persons" -W -w 1024 -s","| Command-line option | Definition |
|---|---|
| -S | Server name |
| -Q | SQL query for fetching data from the server |
| -o | A file for storing data and its location |
| -W | Removal of the trailing white spaces visible in the CLI tool for correct data output |
| -w 1024 | Line length in the CSV file |
| -s “,” | Separator for the column values |
- Check the recently created CSV file in the previously specified location on your computer.

Pros
- SQLCMD is integrated into the standard Windows Command Prompt utility.
- Ensures enhanced transaction management due to T-SQL support.
- SQLCMD commands can be integrated into scripts that contain both T-SQL and SQLCMD statements, providing more advanced scripting scenarios.
Cons
- Required understanding of T-SQL commands.
- This approach isn’t very efficient when working with large volumes of data.
- Oriented toward tech professionals.
Method 4. Using the BCP (Bulk Copy Program) Utility
The BCP (Bulk Copy Program) utility is also a product designed by Microsoft, so users can freely download and install it. This tool can export SQL Server data to the .csv, .txt, and .xml file formats.
Best for
Data retrieval with BCP is usually used for bulk operations, including both SQL Server data import and export. Therefore, you might consider this utility a good option for one-time operations involving large amounts of data.
Step-by-step guide
First of all, check whether the BCP utility is installed. For that, type the following command in the Command Prompt interface:
bcp /vIf the tool is there, it will show its current version. Otherwise, download BCP from the official website.

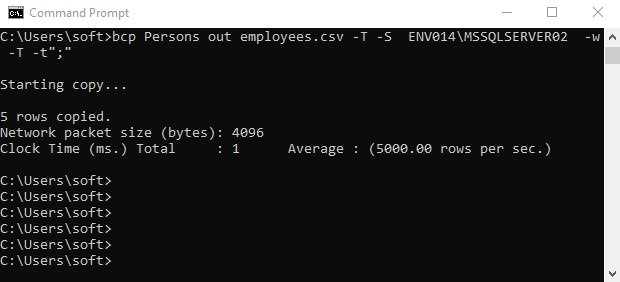
To export a table’s data to a .csv file, run the command below by substituting the sample value with yours:
bcp <database_name>.<schema_name>.<table_name> out <file_destination_path> -S<server_instance> -c -t"," -TExample:
bcp Persons out C:\Users\User1\employees.csv -s ENV014\MSSQLSERVER02 -c -t”,” -TCheck the exported .csv file in the location specified under <file_destination_path>.
| Argument | Explanation |
|---|---|
| out | Copies data from a database table to a specified .csv file. |
| -S | Used for specifying the SQL Server instance to connect to. |
| -c | The operation that uses a character data type. |
| -t | Sets the delimiter, which separates each column in a specified .csv file. |
| -T | Connection method between the BCP utility and SQL Server instance.T stands for Windows AuthenticationU employs SQL Authentication.P connect to SQL Server with the user password. |
Pros
- No need to parse the data since BCP does it for you.
- Support for CSV import into SQL Server.
- Besides CSV, the BCP utility can pull data into .txt and .xml files.
Cons
- BCP utility comes as an additional installation.
- Requires understanding of bash scripting commands.
- Error messages might be unclear.
Method 5. Using Third-Party Tools
Another integration approach is based on the use of third-party tools like Skyvia – a holistic data platform designed for versatile data-related tasks.
With Skyvia, you can not only export SQL Server data to CSV but also import CSV files into a database. Each operation can be easily carried out with no coding, within a GUI, and with tips at hand.
Best for
Skyvia is used by all kinds of businesses, from small family-based companies to large international enterprises. It perfectly copes with both simple one-time data transfer and complex multi-stage recurring integrations.
The most popular kind of tasks Skyvia deals with:
- Data sync between a database and business tools
- CRM data enrichment
- Data migration from legacy systems
- Single source of truth (SSOT) creation
- Data aggregation in a DWH
Step-by-step Guide
Before starting an integration, make sure to create an SQL Server connector.
- Log into your Skyvia account or create one.
- In the upper menu, click + Create New and select Export.

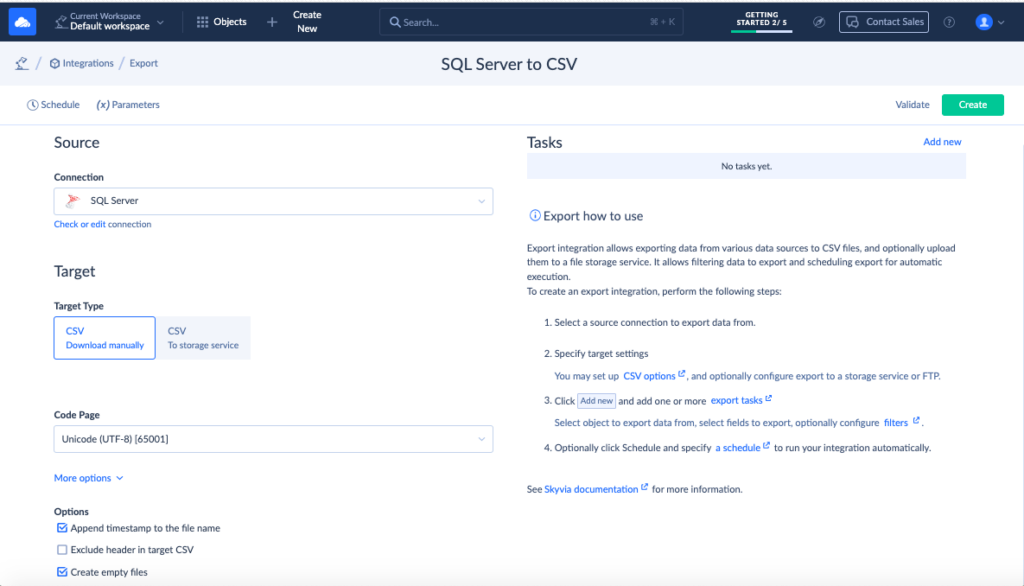
- Select SQL Server as a source connection.
- Decide whether you want to download a CSV file on your computer or send it to a storage service. In the second case, make sure to create the corresponding connector to your preferred storage service beforehand and then choose it from the list.
- Select the additional options to include the timestamp or exclude headers in the target CSV file.
- Click Add new on the right side of the screen to create an export task. Note that for every table, you need a new task.
- In the Source Definition tab, select the object from your SQL Server for export. Then, click Next Step.
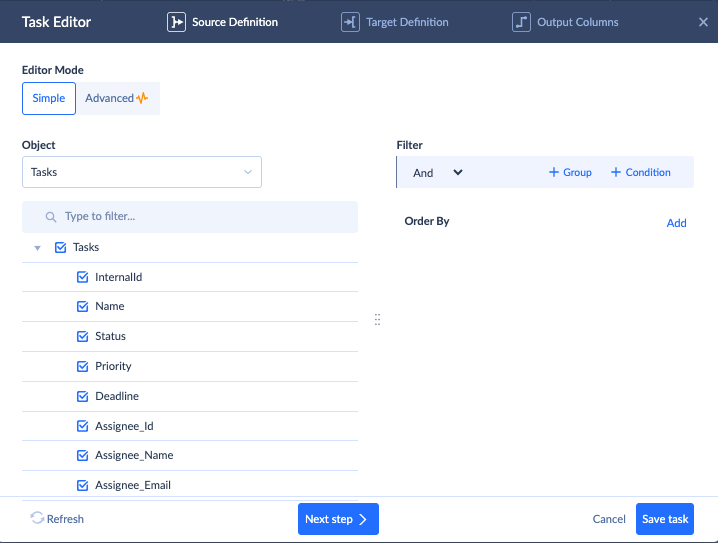
- In the Target Definition tab, decide on the file name and the compression type. Then, click Next Step.

- Check the column names in the CSV file and decide whether you need to edit them or leave them as they are.
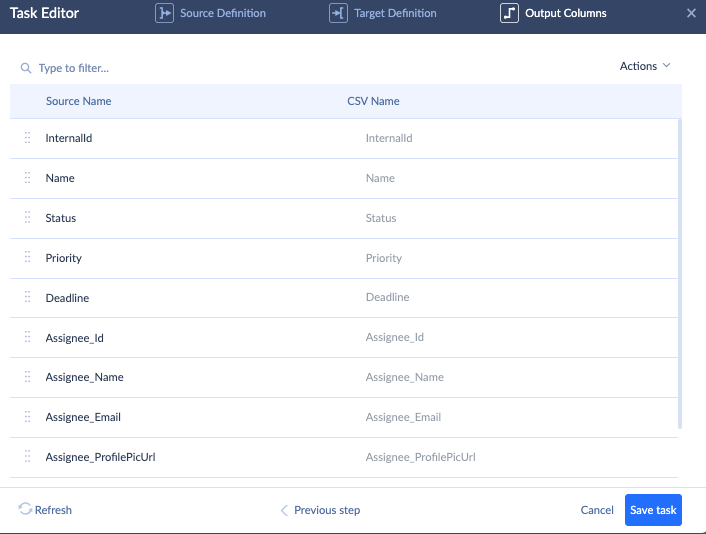
- Click Save task.
- Repeat steps 6-10 to export other SQL Server objects to a CSV file.
- Click Create in the upper-right corner of the screen to create an integration scenario.
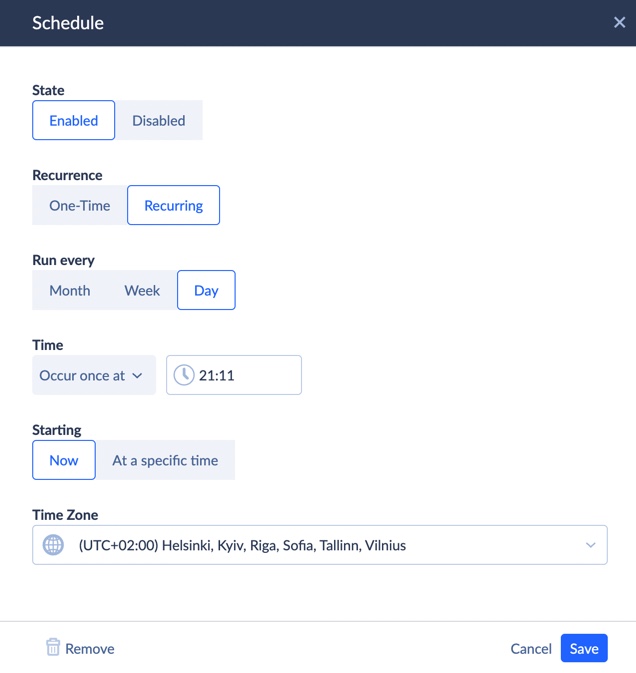
You can run the export right away by clicking Run in the upper-right corner of the screen. Otherwise, click Schedule in the upper-left corner of the screen to set certain times when the integration needs to run.
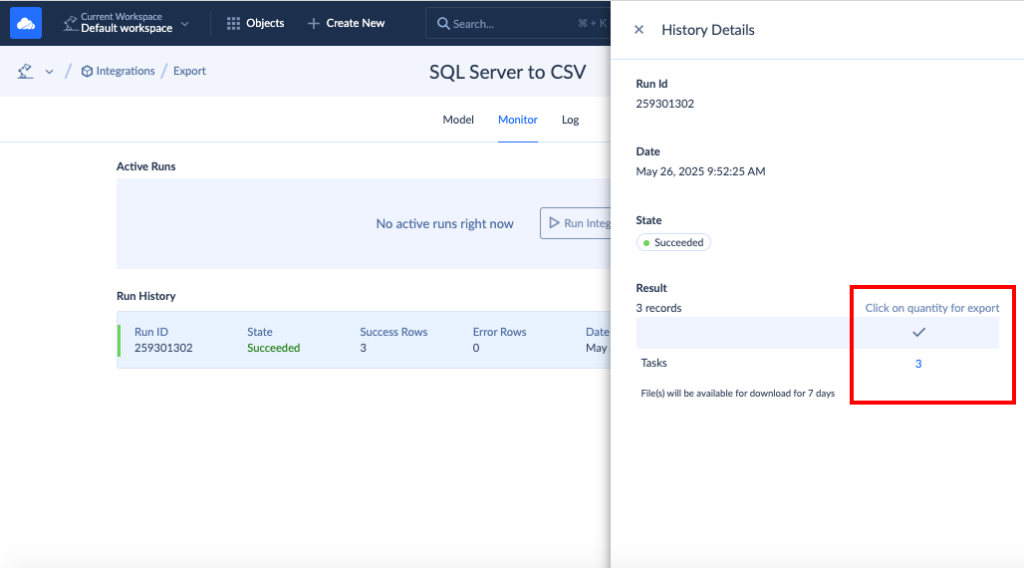
To download a CSV file with the integration results, go to the Monitor tab and click on the corresponding integration flow under the Run History. On the panel that appears, click the quantity number for file download.
Skyvia Query
Skyvia offers another tool for data extraction from SQL Server to a CSV file – Query.
This tool allows you to create SQL queries even with no knowledge of this language. Within a visual query builder, you can drag the needed fields to the Result Fields area.
It also enables sorting or filtering criteria to organize data before export. Once the data section is ready, click Execute. Get the file by clicking the CSV icon.
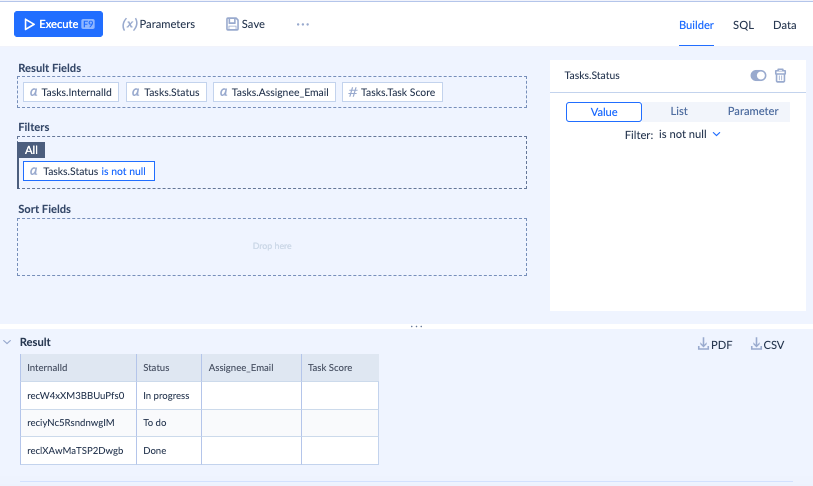
Skyvia Query also lets you create custom queries using SQL for more advanced users.
Pros
- Support of various integration scenarios, from simple data transfer to complex multi-stage operations.
- Pre-built connectors to 200+ data sources, including SaaS tools, databases, and flat files.
- No need for additional installations, Skyvia is a web-based solution.
- Availability of a free plan to start and try Skyvia.
- On-screen tips are available on the integration setup.

Cons
- Advanced features are available under the paid plans.
- The number of connectors is high, but it’s still lower than that of some of its competitors.
- The data blending feature is not available.
Best Practices for Exporting SQL Server Data to CSV
Choose the Right Method
We have presented five principal methods for saving data from an SQL Server instance to a CSV file. All these methods are rather obvious and easy to implement. However, you might need one or two for your particular integration needs. Feel free to refer to the method comparison table to evaluate all the approaches and see which one appears to be the most suitable.
Performance Evaluation
Depending on the selected approach, evaluate the speed and quality of data export. If the process takes too long or the resulting CSV file is corrupted, inspect the existing errors in detail and evaluate the performance of the chosen method. Based on the obtained results, decide whether data needs to be extracted in smaller chunks or if another method would work better.
Headers Presence
As you have noticed, some of the approaches allow users to exclude headers from a CSV file. The presence or absence of headers is determined by the purpose of the SQL Server dataset extracted.
If you need to use data from a CSV for analysis or machine learning operations with a programmatic approach, it’s better to create a file without headers. Otherwise, you will need to add extra operations in code to remove those headers.
In case you need to only view data or upload a file into spreadsheets, then it’s fine to include headers.
Data Formatting
In most cases, the CSV file still needs to be slightly adjusted before being used for the analysis. For instance, all character fields need to be converted to numeric formats. Some columns, which add no value, might need to be removed as well. That way, you need to inspect the CSV file with precision and perform the needed data cleaning and formatting.
Troubleshooting Common Issues
On the way from the source system to the target file, there might be obstacles. These might refer to endpoints as well as the pipeline itself.
Here, let’s take a look at some common issues and explore the troubleshooting approaches for each.
| Error | Troubleshooting |
|---|---|
| Access denied | SQL Server needs to have proper permissions to create a file in the specified directory. In case such errors occur, see the following: – Check the directory path indicated. – Verify whether the directory has writing permissions enabled. – Grant an SQL user the required privileges and provide access to the target folder. |
| Cannot create file | In this case, the path to the directory where a file needs to be created is incorrect. To fix this: – Make sure that the absolute path (not the relative path) is provided. – Verify whether the directory has writing permissions enabled. |
| Cannot open file – encoding issues | This problem is common when a file contains special characters. For that, try to convert the obtained file into UTF-8. Also, make sure to select the proper encoding format upon export, if possible. |
| Missing data | If you note that some data is missing, make sure that the size of the dataset for export doesn’t exceed the established data limits for export. |
| Messy text | In case the file opens in the incorrect manner with the data messed up, this might be the outcome of the wrong delimiter selection. Make sure to select “,” or “;” delimiters in the export settings. |
Conclusion
This article has presented five methods for SQL Server data retrieval into a CSV file:
- SSMS with SQL data query
- Import & Export wizard with UI
- SQLCMD with CLI commands and a programmatic approach
- BCP bash scripts for bulk data operations
- Skyvia for any kind of data extraction via an intuitive GUI
BCP could be a good choice if you need to perform a one-time large-volume data extraction or upload. SSMS and SQLCMD might be good for a narrow-purpose data extraction. With the Import & Export Wizard, you can extract specific tables of view.
Skyvia appears to be a universal solution for SQL Server data export to CSV. It offers the Export tool that can generate CSV files on schedule. Also, it offers a visual SQL builder to extract specific datasets without SQL language knowledge. All that is available under a free plan, so try it out!

F.A.Q. for SQL Server export to CSV

What is the fastest way to export large amounts of data from SQL Server to CSV?
BCP utility is usually used to import and export large data volumes from/to SQL Server to/from a CSV file. The data extraction method with BCP is described in this article.
Can I export all tables from a SQL Server database to separate CSV files automatically?
Yes. It’s possible to do that in Skyvia by creating separate tasks in the same integration scenario, where each task stands for a separate table and a corresponding CSV file. You can also perform that operation with other methods, but it will require SQL skills and more time.
How to handle commas within data when exporting to CSV from SQL Server?
In this case, use an alternative delimiter value, such as the semicolon sign “;”, for instance.
How to schedule an automatic export from SQL Server to CSV?
Automatic data export is possible with Skyvia. When setting up the integration scenario, click on the Schedule option and specify the exact time or intervals at which the data needs to be extracted.
