Storage limits, high costs, scattered files, and manual file transfers often slow down managing documents in Salesforce. A Dropbox-Salesforce integration eliminates these bottlenecks by enabling seamless file access, automatic synchronization, and improved team collaboration.
Document handling is critical for sales, customer support, and legal teams. Contracts, invoices, support tickets, and marketing assets need to be easily accessible, securely stored, and always up to date. Without integration, businesses face:
- Time-consuming manual file uploads to multiple platforms.
- Disorganized document storage, leading to lost or outdated files.
- Limited Salesforce storage space and rising costs for additional storage.
- Collaboration inefficiencies, meaning teams struggling to access the latest files.
With Dropbox-Salesforce integration, businesses can:
- Automatically sync Salesforce attachments to Dropbox to free up CRM storage.
- Access Dropbox files directly from Salesforce records, reducing the need to switch platforms.
- Enable real-time document collaboration, ensuring teams work with the latest versions.
- Automate document management, reducing errors and manual effort.
This guide is about two popular approaches to integrating Salesforce and Dropbox: the native one and using Skyvia. We’ll show both in detail to help companies decide which method mostly fits each unique business case.
Table of contents
- What is Salesforce?
- What is Dropbox?
- Why Do You Need Dropbox Salesforce Integration?
- How to Connect Salesforce and Dropbox: Two Effective Methods
- Method 1: How to Use Dropbox for Salesforce Application
- Method 2: Dropbox and Salesforce Integration Using Skyvia
- How to Automate Dropbox and Salesforce Integration
- Benefits of Connecting Dropbox and Salesforce
- Summary
What is Salesforce?
Salesforce is the undisputed leader in cloud-based CRM, and for good reason. It’s a full-blown ecosystem that helps businesses:
- Track leads.
- Automate sales workflows.
- Manage customer interactions.
- Optimize marketing campaigns.
All these activities are possible from a single platform. It’s extremely customizable. Whether you’re tweaking fields, building custom objects, or deploying Apex code and Lightning components, Salesforce adapts to all needs.
And it’s not just about storing data. Users can generate reports, visualize trends, and predict customer behavior with built-in analytics and AI-powered insights. Plus, it plays well with third-party apps like Dropbox, so integration is smooth. Whether you’re a sales rep, a marketer, or a hardcore developer, Salesforce gives you the tools to work smarter, not harder.
What is Dropbox?
Dropbox is a top cloud storage and file-sharing platform trusted by millions worldwide. It’s a secure, easy-to-use solution that helps individuals and businesses:
- Store and access files from anywhere with an internet connection.
- Sync files across devices automatically.
- Back up important data to prevent loss.
- Collaborate on shared documents in real-time.
With it, you don’t have to worry about losing files. The platform keeps everything backed up and in sync across all the devices.
Its team-friendly tools make collaboration a breeze, allowing multiple users to:
- Work on shared projects.
- Track recent activity.
- Manage file versions effortlessly.
And security? Top-notch. With customizable sharing permissions and file recovery for up to 30 days, your data stays protected. Dropbox also integrates seamlessly with business tools like Salesforce, making it an essential part of any modern workflow. Whether you’re working solo or as part of a team, Dropbox helps you stay organized, productive, and connected.

Why Do You Need Dropbox Salesforce Integration?
It allows direct access, management, and sharing of Dropbox content from Salesforce. Users no longer have to switch between Salesforce and Dropbox to access or upload pictures, files, or documents. Instead, they can quickly retrieve the correct information from Dropbox while working in Salesforce.
For example:
- Sales Teams. Easily attach Dropbox files (contracts, proposals, product catalogs) to Salesforce opportunities and share them directly from the opportunity record with team members. So, sales reps always have the latest materials without searching for files manually.
- Customer Support Teams. Access case-related files (logs, screenshots, user reports) from Dropbox directly in Salesforce support case records, allowing agents to resolve issues faster by having all necessary documentation in one place.
- Legal and Compliance Departments. Automatically store signed agreements, compliance documents, and audit reports in Dropbox while keeping them linked to relevant Salesforce records. In this case, you have secure storage, regulatory compliance, and easy document retrieval during audits.
- Project Management and Operations. Centralize project files, vendor contracts, and work orders in Dropbox while linking them to Salesforce records to streamline task tracking, project collaboration, and operational workflows. So, all stakeholders have real-time access to the latest documents.
How to Connect Salesforce and Dropbox: Two Effective Methods
You may integrate these two platforms with the Dropbox for Salesforce Application (native to the Salesforce AppExchange).
However, it has some limitations, like:
- Slow upload times.
- Limited tech support.
- Poor basic functionality.
Another approach to such an integration is available with Skyvia, allowing users to integrate CSV data from Dropbox with Salesforce quickly. Salesforce administrators can easily set up a mapping between Dropbox and Salesforce and schedule automatic data loading. With Skyvia’s Dropbox to Salesforce integration approach, users can enrich data and simplify business processes.
Let’s walk through the two ones to select the best fit for each business story.
Method 1: How to Use Dropbox for Salesforce Application
The Dropbox for Salesforce Application provides a basic yet effective integration for managing files between Salesforce and Dropbox. This solution allows users to:
- Sync files between Salesforce and Dropbox, ensuring that attachments and documents are always available on both platforms.
- Access Dropbox files directly from Salesforce records, reducing the need to switch between applications.
- Easily share and manage documents, improving sales, customer support, and project team collaboration.
Who is it best for?
- Sales teams who want to attach contracts, proposals, and customer documents to Salesforce records.
- Customer support teams that need to link case-related files directly to support tickets.
- Legal and compliance teams need secure access to signed agreements and policy documents in Salesforce.
Now, let’s walk through the step-by-step process of setting up the Dropbox for Salesforce Application.
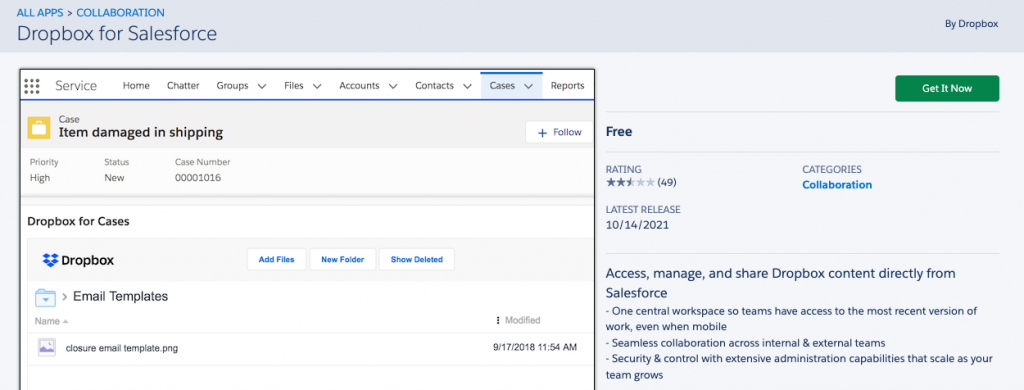
Install Dropbox Package for Salesforce
- Install the Dropbox for Salesforce Application, which can be found on the Salesforce AppExchange. Login to your Salesforce account and access this link to find the Dropbox for the Salesforce Application. Then, click the Get It Now button.
- Following the first step, a page will open asking where you want to install the package.
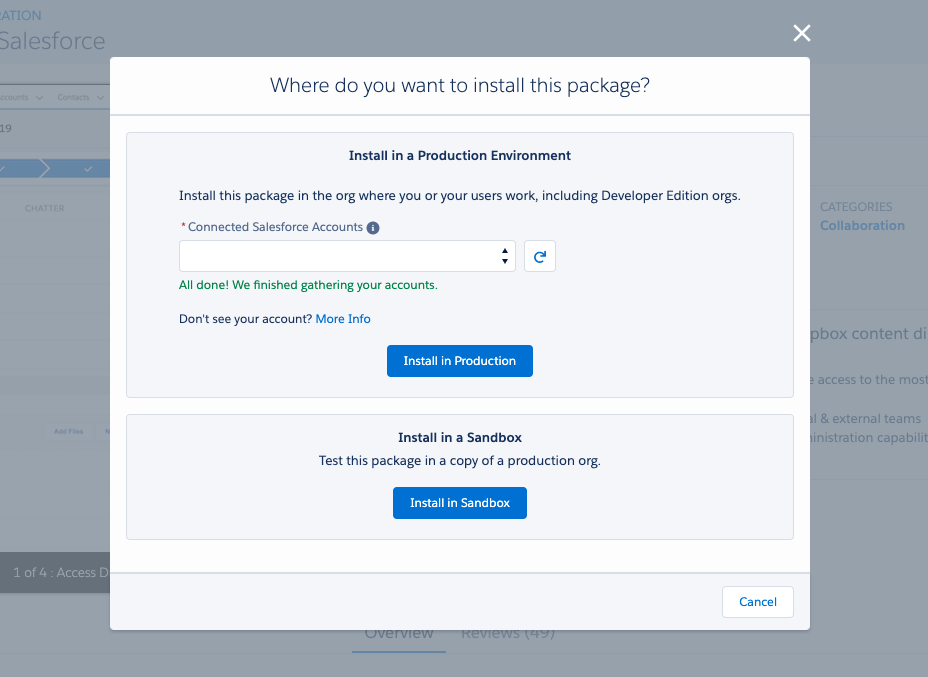
- After installing the package in the Production Environment, you can get access to all end-users. If you install the package in a Sandbox, you can first test the package using a copy of the production org. Choose which option best suits your needs, and then click the Confirm and Install button. At that point, you will be redirected to the Salesforce login page to continue the installation.
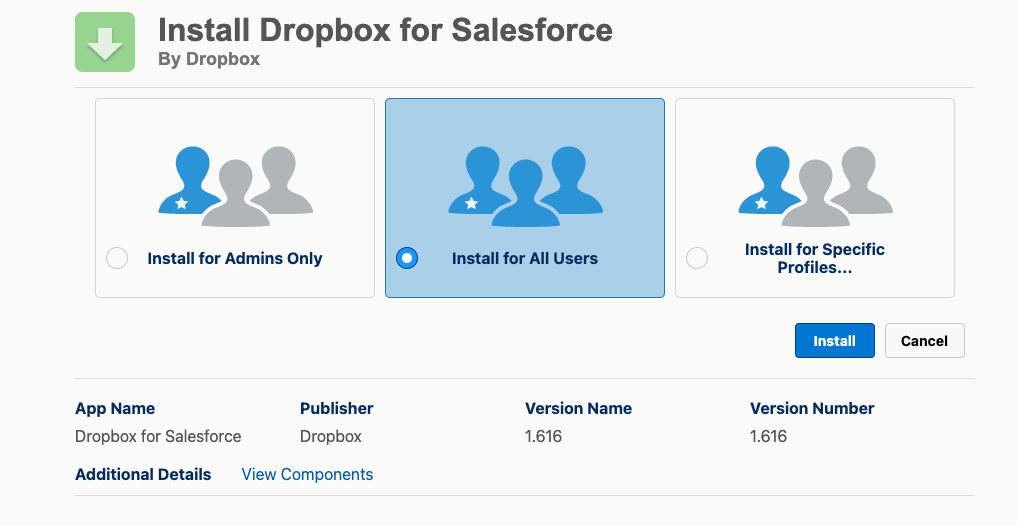
- Next, click the Install button to continue with the installation process.
Set Up Salesforce to Dropbox Connection
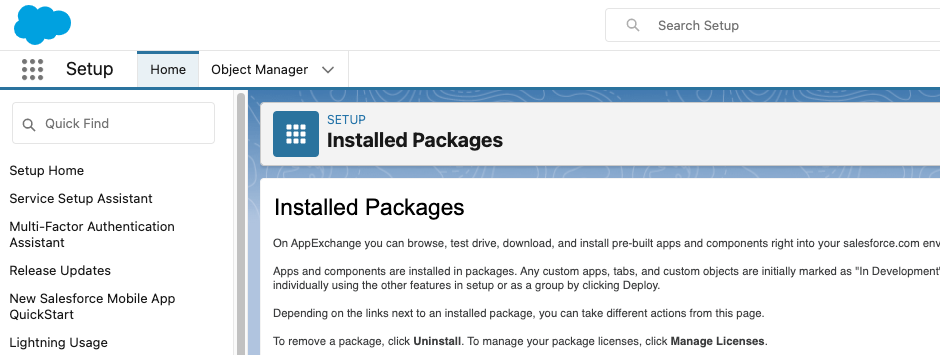
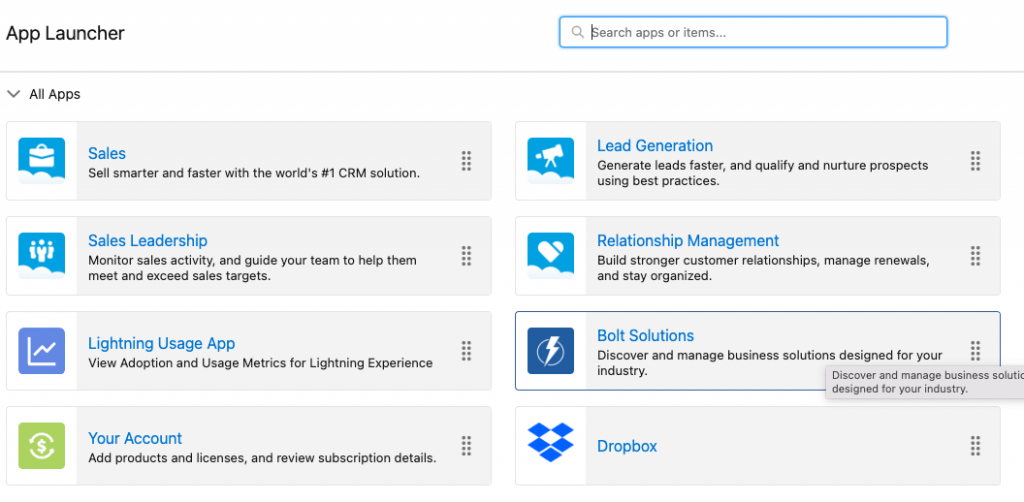
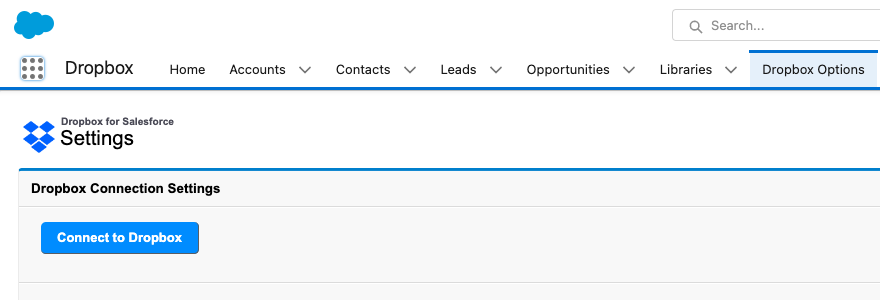
- After installing the Dropbox for the Salesforce Application, you need to configure the settings. First, log in to your Salesforce Account and click the Salesforce App Launcher.
- Search for Dropbox in the Salesforce App Launcher. Then, click the Dropbox icon.
- From this screen, click Connect to Dropbox and then click Continue.
- Next, log in to Dropbox; remember, you must have Dropbox for Business to proceed with this step.
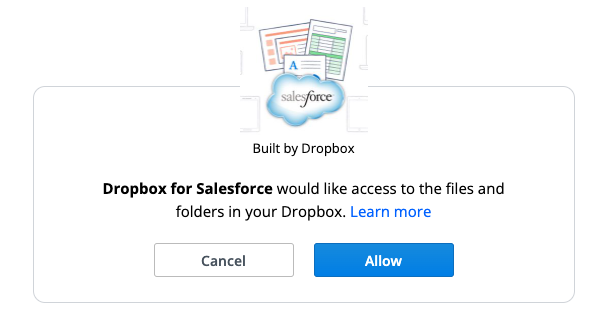
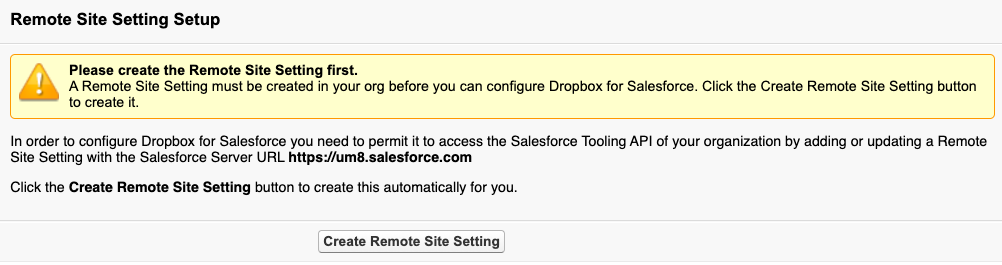
- At this point, Dropbox for Salesforce will request access to the files and folders in your Dropbox. Click Allow. You must then create a Remote Site Setting in the org. before configuring Dropbox for Salesforce. Click the Create Remote Site Setting button to do it.
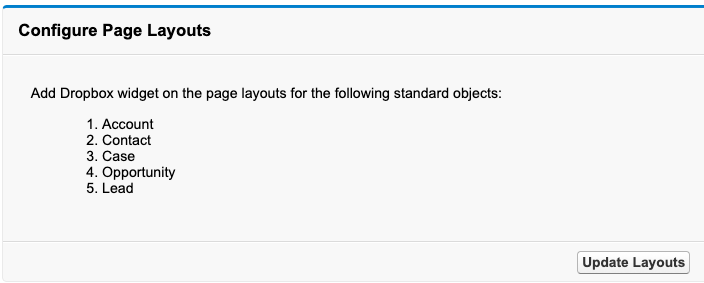
- Next, you must configure the page layout by selecting the Update Page Layouts button. As a result, all Account, Contact, Case, and Lead objects will now contain the Dropbox component on their page layout.
Share Dropbox Folders with Salesforce
- To complete the installation process for the Dropbox for Salesforce application, you must confirm that the folder is shared with Salesforce. To do it, navigate to an Account, Contact, Case, Opportunity, or Lead on the Salesforce Dashboard. Then, access the Dropbox component and click Add Files. Upload a test file.
Note: At this point, if you have correctly installed the Dropbox for Salesforce Application, the test file should be created in your Dropbox account.
Pros
- Users can open, view, and manage Dropbox files directly from Salesforce records, reducing the need to switch between platforms.
- Unlike custom-built integrations, this application requires minimal setup and is accessible to non-technical users.
- Since it is a native AppExchange solution, it provides a straightforward way for small businesses or teams to integrate Salesforce and Dropbox without additional costs for custom development.
- Centralized Document Storage helps users organize Salesforce-related files in Dropbox, ensuring a single location for document management instead of scattered files across multiple platforms.
Cons
- Users note that the application is buggy and clunky, with slow upload times.
- Multiple users complain about the lack of tech support when finding solutions for bugs and error messages.
- All Dropbox files must be saved under a new Salesforce Documents folder rather than linking a record to a specific folder already in Dropbox.
- The application only works for Leads, Accounts, Contacts, Opportunities, and Cases.
- The Dropbox for Salesforce Application is only useful for very basic integration tasks.
Method 2: Dropbox and Salesforce Integration Using Skyvia
Skyvia is a comprehensive Software as a Service (SaaS) no-coding platform that connects to 200+ data sources and solves diverse data-related tasks: data integration (ETL, ELT, reverse ETL), workflow management and automation, cloud sources data backup, sync, and API endpoints management.
With Skyvia, you can:
- Upload CSV file data to any available Salesforce object, extract Salesforce data to a CSV file, and place this file in any folder in Dropbox.
- Decide what Salesforce object to integrate and what scenario to implement. Skyvia helps to make it fast and easy.
- Avoid additional installations. All you need is a web browser.
- Try any paid Skyvia subscription with a two-week trial. You don’t need any premium ones to use this method.
Who is it best for?
- Enterprises and growing businesses that require customizable and automated data integration rather than just basic file linking.
- Sales and marketing teams that need to sync product catalogs, customer data, and marketing assets between Salesforce and Dropbox efficiently.
- Customer service teams managing large volumes of case-related documents, ensuring files are automatically stored and accessible when needed.
- Finance and compliance departments that require secure data transfers, scheduled backups, and audit-ready documentation stored in Dropbox.
- IT teams and data administrators who need a no-code solution to automate and control data movement between Salesforce and Dropbox without manual intervention.
Below, we show two examples of data integration scenarios using Skyvia.
Note: Before starting to implement the use case, you must be registered there.

Then, let’s create the connection for each scenario. To do it, log in to Skyvia and connect Salesforce and Dropbox.
Scenario 1. Importing Product Data from Dropbox to Salesforce
Example: A retail company regularly updates its product catalog and needs to sync product lists stored in Dropbox with Salesforce. By importing CSV files into the Salesforce Product2 table, the sales team always has the latest product details, including pricing, stock availability, and descriptions, ensuring accurate sales and inventory management.
Create the Import Data Integration
- In Skyvia, click + Create NEW and select Import.
- Click CSV from the storage service and choose the Dropbox connection as a Source.
- Select Salesforce connection as a Target and enable other available package options optionally.
- Click Add New to create the package task.
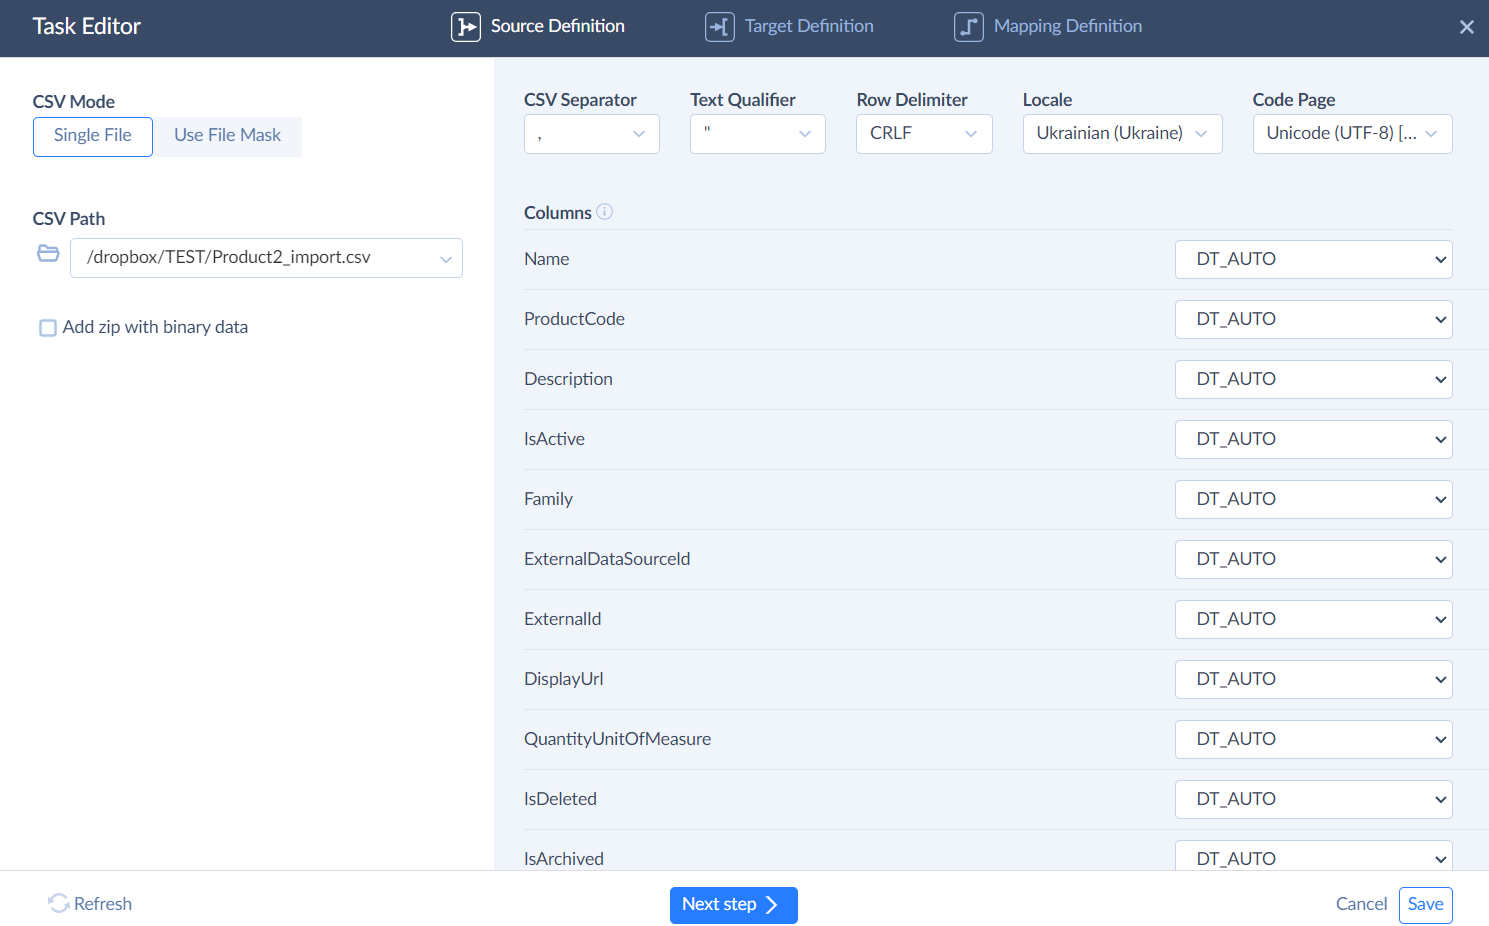
- On the Source Definition tab, set the CSV mode. In our case, we select the Single File mode.
- Select the needed CSV file in the CSV Path box and optionally adjust the CSV options.
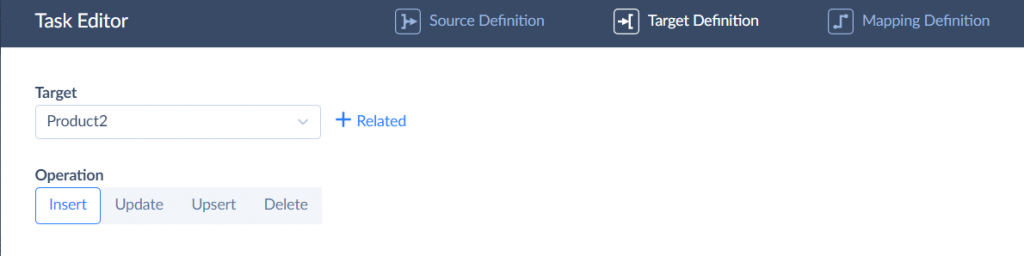
- On the Target Definition tab, select the target Salesforce object and click the needed operation. We select the Insert one.
- On the Mapping Definition tab, assign the column mapping. The columns with the matching names are mapped automatically. We leave the default mapping as it is.
- You can optionally set the automatic package launch by schedule.
- Save the package and run it. You can check the package results on the Monitor and Log tabs.
Scenario 2. Exporting Salesforce Data to Dropbox
Example: A marketing agency manages customer interactions and campaign performance in Salesforce. To generate monthly reports and share them with external partners, they export Salesforce data (such as leads, campaign results, and customer engagement stats) into a CSV file stored in Dropbox. This enables seamless collaboration, easy data access, and external analysis using BI tools.
Create the Export Data Integration
- In Skyvia, click + Create NEW and select Export.
- Select Salesforce from the dropdown list as a Source.
- Click CSV to storage service and choose Dropbox as a Target.
- Specify the folder to place the file in and adjust the package options if needed. We leave the default values for this scenario.
- Click Add New to create the package task.
- Select the Editor Mode. In our case, we use the Simple one. The Advanced Editor Mode is more convenient when you need to perform a complicated custom command or run a report.
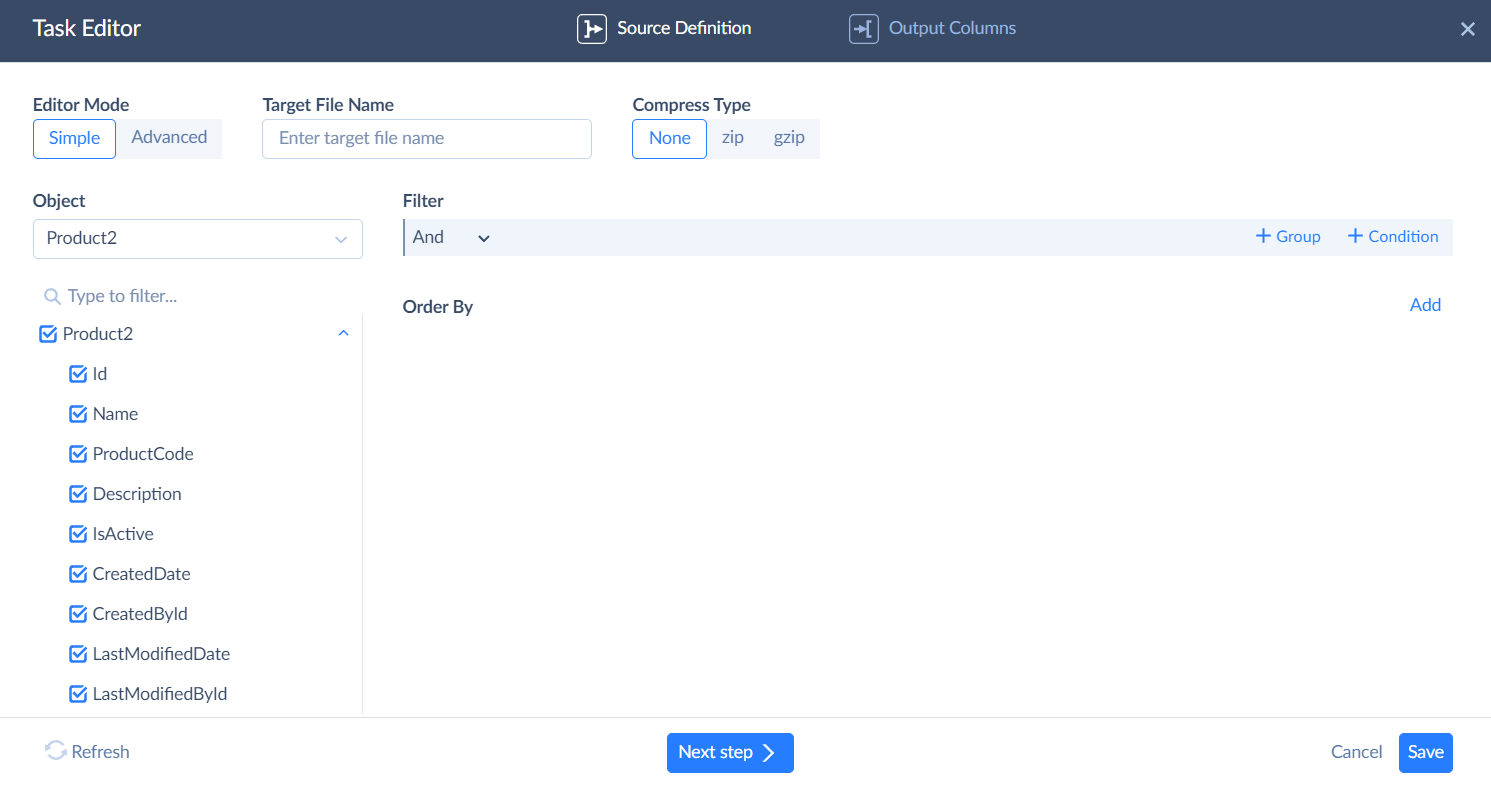
- Select the source table to export data. We use Product2 in the example. You can uncheck the unnecessary fields and use filters if needed.
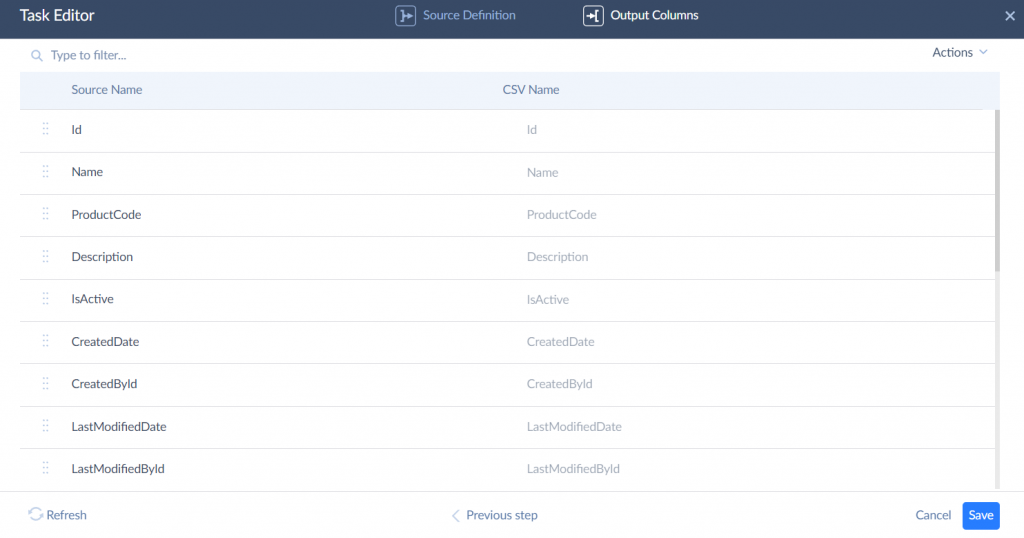
- On the Output Columns tab, you can rename the ones and adjust their order.
- Save the task and package and proceed to run the package. Check the package results on the Monitor and Log tabs.
Pros
- This method is different from the native one. Skyvia supports the integration of Salesforce and Dropbox in both directions, meaning that you may use the Dropbox files either as a source or as a target.
- Users can automate data import and export tasks, ensuring up-to-date records without manual intervention to reduce errors and save time for sales, marketing, and operations teams.
- Unlike basic file syncing, Skyvia allows users to map, filter, and transform data before transferring it to ensure only relevant and structured information is moved between Salesforce and Dropbox.
- The native Dropbox integration only supports specific objects, but Skyvia allows integration with any Salesforce object, giving businesses full control over their data workflows.
- The platform enables multi-source data integration, meaning users can connect Dropbox and Salesforce while integrating other platforms like Google Drive, AWS, or HubSpot, making it a scalable solution for growing businesses.
Cons
- Skyvia requires initial setup and mapping to define data flows. However, it remains a no-code solution.
- While Skyvia offers a free plan, advanced features like automation, scheduling, and larger data volumes require a paid subscription, making it less budget-friendly for very small teams.
- Since Skyvia is not built directly into Salesforce, users must access Skyvia’s web platform to configure and monitor their integration.
How to Automate Dropbox and Salesforce Integration
Automating the integration between Dropbox and Salesforce eliminates the need for manual file transfers, ensuring seamless data synchronization and improved workflow efficiency. With automation, businesses can streamline document management, reduce errors, and enhance collaboration across teams.
Ways to Automate the Integration
- Using the No-Code Integration Platforms like Skyvia, Zapier, and Workato allows businesses to:
- Automatically upload Salesforce attachments to a designated Dropbox folder.
- Sync Dropbox files with Salesforce records, ensuring teams always have the latest documents.
- Trigger automated workflows based on file changes, such as notifying a sales team when a new contract is uploaded.
- Salesforce Flow and Process Builder trigger Dropbox actions based on record updates.
- Example: When a new opportunity is closed, automatically generate a folder in Dropbox and store related documents there.
- Dropbox API for Advanced Automation enables custom workflow automation.
- Example: A custom script can detect when a new proposal is uploaded in Dropbox and update the associated Salesforce opportunity record.
Use Cases and Real-Life Examples
- Customer Contracts Management
- When a contract is signed in Salesforce, it is automatically moved to a secured Dropbox folder for legal storage.
- The sales team gets a notification that the contract has been archived successfully.
- Sales and Marketing Collateral Sync
- Marketing teams can upload the latest sales materials to Dropbox, and Salesforce automatically updates related records with the latest versions.
- Ensures sales reps always have access to the most up-to-date presentations and brochures.
- Support Ticket Attachments Storage
- Customer support cases in Salesforce often include attachments such as logs, screenshots, and documents.
- Automating the transfer of these files to Dropbox reduces Salesforce storage costs while keeping all case files easily accessible.
Benefits of Connecting Dropbox and Salesforce
Integrating Dropbox with Salesforce takes document management, collaboration, and efficiency to the next level, all while cutting down on storage costs.
Let’s summarize the key benefits and real-world examples of how businesses can maximize this integration.
Lower Salesforce Storage Costs
Salesforce storage isn’t cheap, especially when it comes to file attachments. Instead of piling up large files in Salesforce (and paying extra for storage), businesses can offload them to Dropbox while keeping everything accessible.
Example: A real estate agency moves high-resolution property images and legal documents from Salesforce to Dropbox. They save on storage costs while keeping quick access to essential files.
Access Documents Without Leaving Salesforce
No more switching between platforms. With Dropbox integrated into Salesforce, teams can view, edit, and manage files without leaving their CRM.
Example: A sales team working on a deal can instantly access brochures, contracts, and proposals stored in Dropbox. Right from Salesforce, speeding up the sales process.
Automate Document Management
Manually uploading and organizing files? A waste of time. With automation, documents are stored, sorted, and linked to the right records without extra effort.
Example: When a new contract is signed in Salesforce, it’s automatically sent to a Dropbox folder labeled with the customer’s name, ensuring everything stays organized.
Boost Team Collaboration
Dropbox’s real-time file sharing combined with Salesforce workflows makes teamwork effortless. Teams can work together on files without endless email threads.
Example: A customer support team uploads case-related logs and screenshots to Dropbox. Engineers and support reps can collaborate instantly, resolving issues faster.
Secure and Compliant Storage
Security matters, and Dropbox delivers advanced security features, version control, and compliance certifications to keep data protected.
Example: A hospital handling patient records meets HIPAA compliance by securely storing files in Dropbox while linking them to patient records in Salesforce.
Automate Workflows and Save Time
Automating Dropbox-Salesforce workflows eliminates repetitive tasks, saves time, and reduces errors.
Example: A company automates moving signed agreements from Salesforce to Dropbox and instantly notifies the legal team, ensuring timely processing.
Support Remote Work and Mobility
Since Dropbox is cloud-based, employees can access files from anywhere. With Salesforce integration, documents are always linked to the correct records.
Example: A field service technician uploads photos and reports from a mobile device to Dropbox, giving the back-office team real-time access to the latest updates in Salesforce.With this integration, businesses can cut costs, streamline workflows, and improve collaboration while keeping files secure and easily accessible.
Summary
Integrating Dropbox with Salesforce:
- Streamlines document management, collaboration, and workflow automation.
- Allows access and management of files directly from Salesforce while uploads sync automatically to Dropbox.
- Decreases Salesforce storage costs, improves efficiency, and eliminates manual file handling, enabling teams to collaborate on shared documents like contracts and support cases in real-time.
Dropbox’s strong security and compliance features make it a trusted storage solution.For integration, businesses can choose the Dropbox for Salesforce App (with some limitations) or Skyvia, a no-code tool offering flexible, automated data sync. Either way, combining these platforms helps businesses work smarter and faster.