Cloud adoption is on the rise, and most businesses are migrating to the cloud. Enterprises primarily use Salesforce’s Cloud-Based CRM (Customer Relationship Management) to manage customer records and engagement. Salesforce offers many other services, like Sales Cloud, Marketing Cloud, Mobile Connectivity, etc. Salesforce empowers organizations to improve their relationships with clients, customers, and partners, providing companies with tremendous adaptability, unlimited scalability, and a wholly linked workforce.
Collaboration on the cloud is a natural pathway as businesses expand their use of Salesforce, seeking centralized and secure control to facilitate seamless team collaboration. Here, Box Salesforce integration is an optimal solution. Businesses seek secure and accessible document storage. Enterprises seek to integrate Box and Salesforce for increased collaboration opportunities. In this article, you’ll see how to integrate Box with Salesforce to automate the secure storage of documents in two different ways. One is through the native Box App and another through Skyvia – a no-code automated integration. Before diving into the specifics, let’s briefly review Box and Salesforce.
Table of contents:
- About Box
- Benefits of Box and Salesforce Integration
- Integration via Native App
- Integration via Skyvia
- Conclusion
About Box

Box is a cloud content management service that serves as a secure content repository for all of your company’s data, papers, presentations, and so on. Box transforms how businesses operate digitally by providing a safe and simple-to-manage workspace that drives employee productivity and team collaboration from anywhere.
Box, founded in 2005, centralizes content online and enables secure and easy collaboration from any device. To ensure increased productivity, your business employees can effortlessly access and collaborate on content using Box’s different collaboration tools. Box gives customers complete control over their content, allowing them to securely share huge files or folders with persons outside their company in seconds.
The following characteristics contribute to Box’s tremendous popularity:
- The Box application enables you to keep your files in the cloud and provides you control over who can view and edit them. Box ensures seamless collaboration.
- It offers a centralized location for collecting feedback and automating approval operations.
- Box’s encryption, centralized controls, and reporting make it simple for businesses to connect and communicate.
- It supports integrating more than 1,500 applications, including Google, Salesforce, etc.
- The Box Sign functionality enables the collection of electronic signatures.
- Besides that, the Box Sync feature allows you to work offline as well. It enables offline access to the files on your desktop (from the cloud).
Benefits of Box and Salesforce Integration
- Easy point-and-click configuration of the Box app; no coding necessary.
- Box can handle Lead conversion actions and reassign various folders like Lead to Account, Contact, and Opportunity.
- The standard application manages the automatic sharing of the Box application between users.
- The native functionality allows you to review Box files directly within Salesforce. You can also add new files here.
- Additionally, you may assign tasks to team members, add comments to files, and edit documents.
- You can also exchange files with remote users who aren’t Salesforce customers.
- Customers can exchange files and folders using the native application’s regular sharing capabilities. This capability makes it possible to request documents from external clients straight from Salesforce.
- Box integration with Salesforce is the quickest and most cost-effective solution to meet some of your requirements.
Integration via Native App
Note: Before setting up the Box for Salesforce integration, you must have two Box accounts and two Salesforce accounts.
- A Box Service Account and a Box User Account
- A Salesforce Admin Account and a Salesforce User Account
A Box service account: It can be any managed user unless the Restrict Content Creation enterprise setting is enabled. If this setting is enabled, the service account must be either the primary administrator OR a co-administrator with the manage groups OR manage users’ permission.
Create a Box service account if you don’t already have one, and add xyz@example.com as a managed user. It’s advisable to keep this account solely for integration purposes and not assign it to any specific user. Furthermore, this account:
- Owns the Salesforce content on Box.
- Sends API requests from Salesforce to Box on behalf of the entire organization.
A Box user account connects a person’s Salesforce and Box accounts.
Note: To access the Box for Salesforce integration, you must also have two Salesforce accounts:
A Salesforce Admin Account for deploying packages in Salesforce and connecting them to the Box Service Account, which can be a frequent user account of Box for Salesforce integrations.
A Salesforce User Account to connect it to a Box User Account and access Box content.
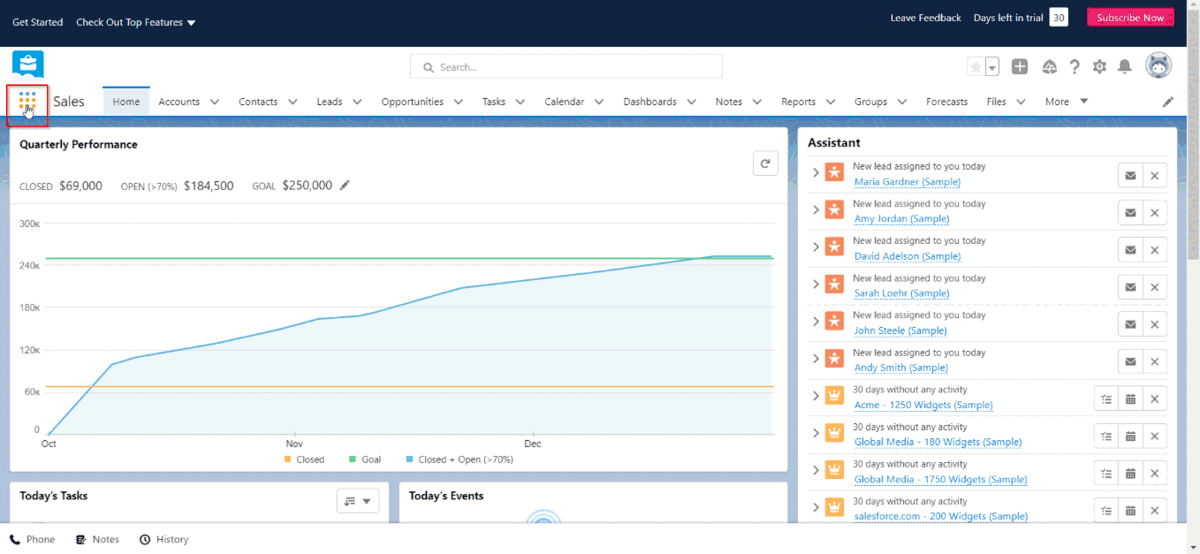
Step 1: Install Box for Salesforce
The initial step in this integration process is to install Box for Salesforce, as shown below.
- As Salesforce Admin, sign in to your account.
- Click the dots in the upper left corner of your site, followed by the Visit AppExchange icon.
- You can search and find the Box for Salesforce integration.
- Click the Get it now button and then either Install in Production or Install in Sandbox as needed.
- Allow access to third-party websites and proceed with the installation.
- Enable access for all users.
- The Box for Salesforce integration will be listed in your Salesforce App Launcher once the installation is complete.
Step 2: Create or Define a Salesforce Folder in Your Box
- You may now establish a Box folder to hold all the data/files you wish to access in Salesforce. You can define this under the Companies folder, for example.
- All files are the file path.
- All filesCompaniesYour CompanyFile.pdf
- You may also notice a folder called Your Salesforce Org, which is a duplicate of your Salesforce Org. For the time being, keep it in mind and go to the next stage.
Step 3: Reviewing Box Files in Salesforce
- Return to your Salesforce account and click on the Accounts button at the top to review your Box files.
- Click on the name Your Company to go to the Box tab.
- You will view all the content/files saved by default.
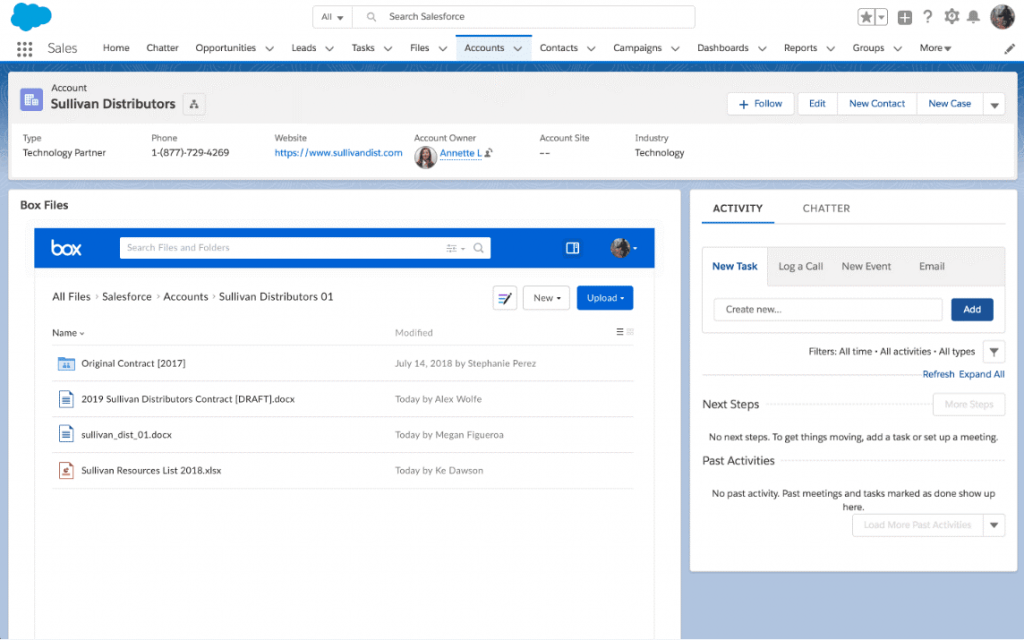
- To alter this, choose the Your Company folder from the Box file hierarchy by clicking All Files.
Step 4: Adding a File to the Box
- Now you can upload files and sync between both platforms. To upload a file into Salesforce’s Box tab, choose your selected Salesforce Record and navigate to the Box tab.
- Click Upload and then File.
- Select the file to upload and press the Open button.
- To ensure that the sync is functioning correctly, return to your Box account and refresh your folder to see the newly uploaded file.
Step 5: Insert Box into Standard Objects
- Salesforce objects should now include Box capabilities. The Salesforce standard objects supported by the Box for Salesforce integration are as follows:
- Accounts
- Cases
- Opportunities
- Contacts
- Leads
- To embed Box in regular Salesforce Lightning objects, navigate to the page of the Salesforce item to which you wish to add Box functionality. It’s shown here for a Salesforce Account.
- Click on the gear icon in the top right corner of your Account page, then select Edit Page. It activates the Edit mode, which allows you to add the Box module to the website layout.
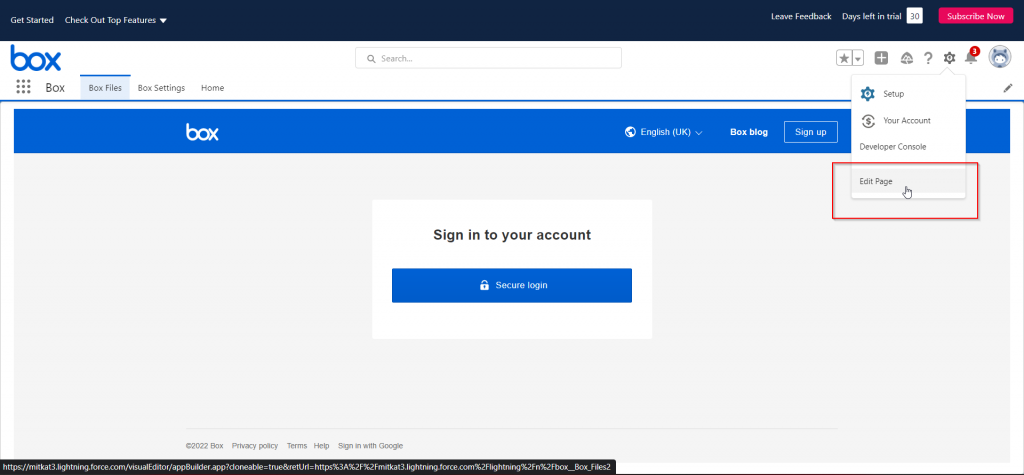
- Search or scroll down to locate Box under Custom – Managed components on the left panel.
- Drag and drop the Box element to the desired location on the page layout.
- Save your settings.
- Reload the Account page to view the Box functionality added to your page. Your Box Salesforce integration is currently operational.
Integration via Skyvia
With Skyvia, you can start exchanging data between Box and Salesforce in a few easy steps. Let’s check how to do that based on the example of exporting a CSV file from Salesforce to Box.
There are three steps involved:
- Create a Box connection.
- Create a Salesforce connection.
- Create and run Export package.
The instructions below assume that you have already created a Skyvia account. In case you haven’t, you can do that for free by visiting the Skyvia app page.
Create Box Connection
To create a Box connection, go to +New > Connection, select Box, and do the following:
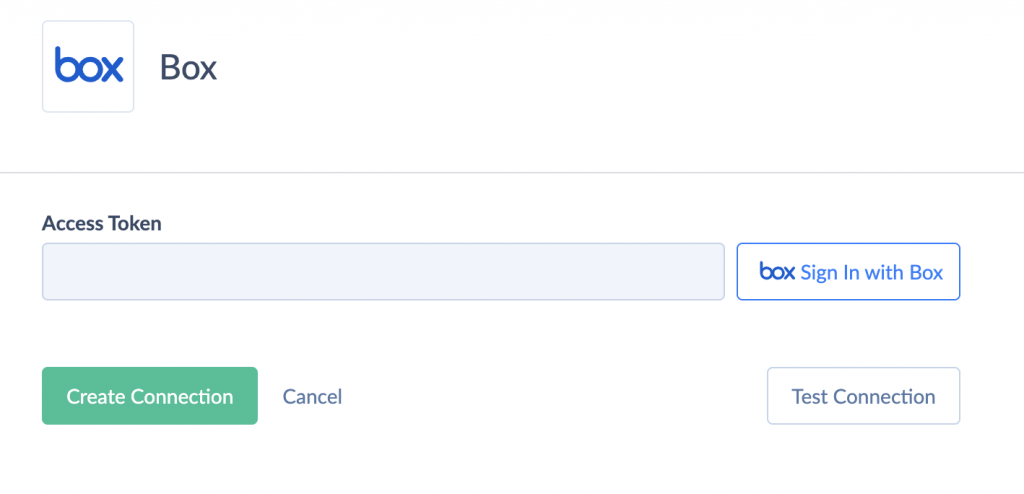
- Click Sign In with Box.
- Enter and confirm your credentials.
- Click Create Connection.
Create Salesforce Connection
To create a Salesforce connection, go to +New > Connection, select Salesforce, and do the following:

- Click Sign In with Salesforce.
- Enter and confirm your credentials.
- Click Create Connection.
Create and Run Export Package
Once connections to Box and Salesforce are created, you can start creating an Export CSV package. To create an Export CSV from Salesforce to Box package, do the following:
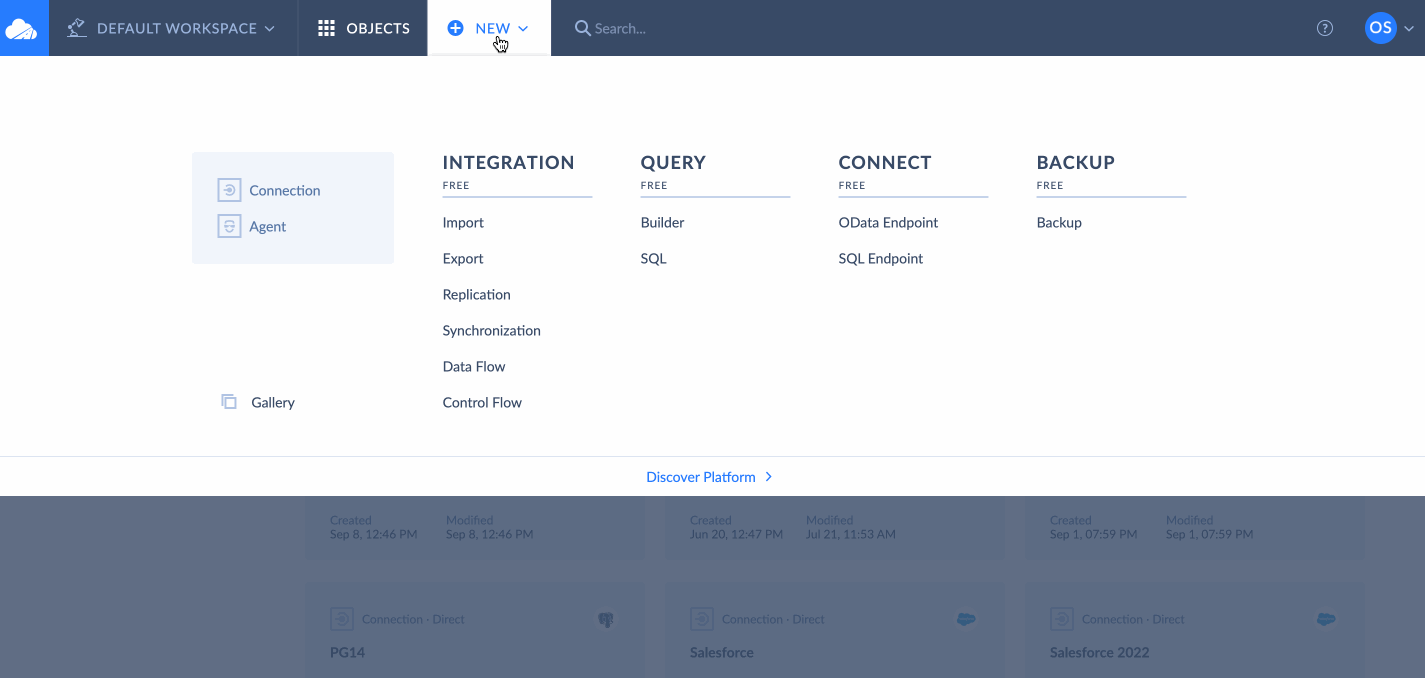
- Go to New > Export.
- Choose Salesforce connection as Source.
- Choose CSV to storage service and Box connection as Target.
- Optionally choose a Box folder to store your CSV file from the Folder dropdown.
- Click Add New to add a task. You can add any number of tasks to a package.
- Enter the name for the exported CSV file at the top.
- Choose what object you want to export and click Next Step.
- Optionally configure the column names in your CSV file and click Save.
- Name your package and click Create. Your package will appear under Objects > Packages.
- To execute the package, click Run.
Conclusion
In this quickly changing world, organizations increasingly rely on cloud-based applications. It’s essential to have safe, centralized access to your files and data. As the number of work increases, businesses must facilitate teamwork, which is one of the keys to success. It satisfies all of your wants and standards.
You have learned about Salesforce, Box, and how to integrate Box with Salesforce in this article. However, working with the Box Salesforce connector might be somewhat laborious. If you wish to automate the data flow between Box and Salesforce, you may choose to investigate Skyvia and other no-code automatic integration options.