

Your WordPress website has high traffic, but there are no sales? The probable reason for that is poor lead management. Generated leads often get stuck in the internal databases or spreadsheets, which often results in missing opportunities.
It’s possible to manually add new lead records to a CRM, such as Pipedrive, but this may cause inaccuracies in data due to human error. So, what should you do?
Don’t worry – the solution is around the corner! Pipedrive WordPress integration serves as a bridge, helping businesses to convert leads into paying customers. It ensures that every detail is instantly and accurately transferred to the CRM. It also draws a clear and systemized vision of your sales pipeline.
In this article, we describe four methods to connect Pipedrive and WordPress: dedicated plugins, connectors like Zapier, custom API scripts, and a comprehensive data integration platform like Skyvia. We also provide detailed information on each approach, including its benefits and limitations.
Table of Contents
- The Business Case: Why Integrate Pipedrive and WordPress?
- Methods for Pipedrive WordPress Integration
- Method 1: WordPress Form Plugins & Extensions
- Method 2: Using Middleware Platforms
- Method 3: Custom API Integration
- Method 4: Third-Party Integration Platforms
- Common Issues & Troubleshooting
- Conclusion
The Business Case: Why Integrate Pipedrive and WordPress?
WordPress plugins allow online store owners to create and integrate contact forms on their websites. Once a user submits a form with their contact details and request, the data is added to the appropriate section of the WordPress database.
Obviously, new leads are captured, but they aren’t managed efficiently within CMS. Sending these records to a CRM system, such as Pipedrive, would make sense.
Here are some well-grounded reasons to set up and maintain Pipedrive WordPress integration.
- Lead capturing. Once a user submits a form on your website, the information is instantly sent to the CRM system. This contributes to effective lead capturing and management as well as sales pipeline analysis.
- Manual error elimination. Instead of manually transferring prospect data, the Pipedrive WordPress integration automates this process. As a result, you obtain accurate user information with no typos that are typically associated with manual entry.
- Accelerated sales workflows. With CRM and CMS connected, the sales team gets a chance to contact new leads shortly after they have filled out the website form. Also, the system can automatically schedule a welcome email to each prospect.
- Improved productivity. Once new lead records appear in Pipedrive, they can be instantly qualified with AI features. That way, sales representatives can focus on the most promising prospects that are likely to become paying customers.
- Visitor activity tracking. With tracking plugins, you can gather user behavior data from your website. This includes view statistics, average time on page, scroll depth, etc. By moving this data to Pipedrive, you will enrich user profiles, enabling you to develop more personalized communications.
Methods for Pipedrive WordPress Integration
If you’re eager to connect Pipedrive to WordPress, there will definitely be a suitable method, even more than one.
Some of them are narrow-purposed, intended mainly for a small set of integration tasks, while others are multifunctional with a wide range of features.
Plugins are typically dedicated to a specific objective, such as collecting contact or user behavior data, for instance. Meanwhile, API coding, connectors, and third-party tools, such as Skyvia, support various integration scenarios.
In this article, we will review four Pipedrive WordPress integration methods. A brief overview of each, along with its benefits and limitations, is provided in the table below.
| Method | Description | Best for | Pros | Cons |
|---|---|---|---|---|
| Plugins | Built-in WP plugins are designed for submitting contact details and transferring user behavior data to a CRM. | – Companies with narrow-focused integration. – Suits startups and small businesses. | – Plugins are native to WP. – No-code installation. – Only the essential data is synced. | – A WP Business plan is required. – One-way sync direction. – Limited integration options. |
| Middleware | Workflow automation platforms are designed to streamline repetitive tasks, | – Companies that handle multiple automated workflows. – Medium-sized businesses and enterprises. | – No-code interface. – Scheduled or trigger-based run. – Possibility to configure multiple flows. | – Extra costs. – Additional skills are needed for complex automations. – Trigger-action logic knowledge is required. |
| API | Custom script development and optimization. | – Companies with highly skilled tech experts. | – High degree of customization. – Non-standard automated workflows. – Additional data management options. | – Complexity of development. – Additional costs. – Potential security and scalability risks. |
| Skyvia | Universal data platform designed for a broad spectrum of tasks. | – Companies of any size with diverse integration needs. | – Web-based access. – 200+ pre-built connectors. – Subscriptions for any integration needs. – Data refreshes every minute.- High rating on G2. | – Advanced features come with paid subscriptions. – A free trial has limitations. |

Method 1: WordPress Form Plugins & Extensions
WordPress has a store with plugins, some of which are free, while others require additional payment. For instance, WPForms and Gravity Forms are free to install and use if you are under the Business plan on CMS.
These plugins are used to create and embed lead generation forms on your website. They also integrate with popular CRM systems, allowing you to set up instant data transfer to Pipedrive once the form is submitted.
Another popular type of plugin is for web activity tracking. It also enables the transfer of user behavior data within the WordPress Pipedrive integration.
Best for
Plugins and extensions are well-suited for businesses that need to share lead contact details and user behavior data collected on the website.
Such tools tend to optimize, accelerate, and facilitate sales team workflows. They also greatly help to personalize communications with potential and existing customers.
Integration with plugins is both cost-efficient and simple, making it particularly beneficial for small businesses and startups.
Step-by-step Guide
- Log in to your WordPress account.
- Go to the Plugins tab on the left panel.
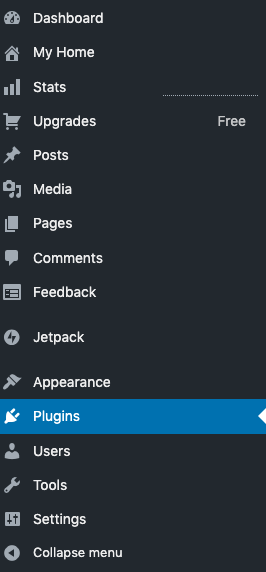
- Type “WPForms” in the search bar. You may also look for other form builders, such as Gravity Forms, for instance.
- Check the list of plugins that appear and click on the preferred one. In this example, we proceed with WPForms.
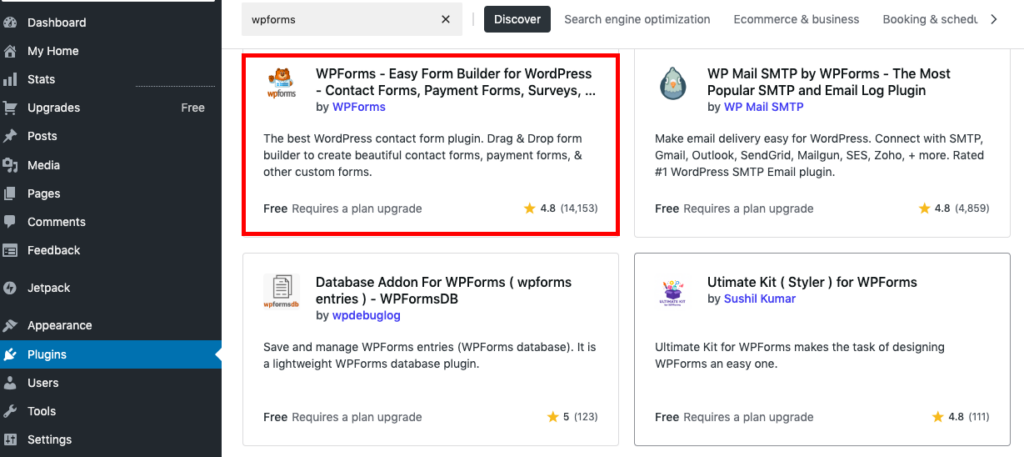
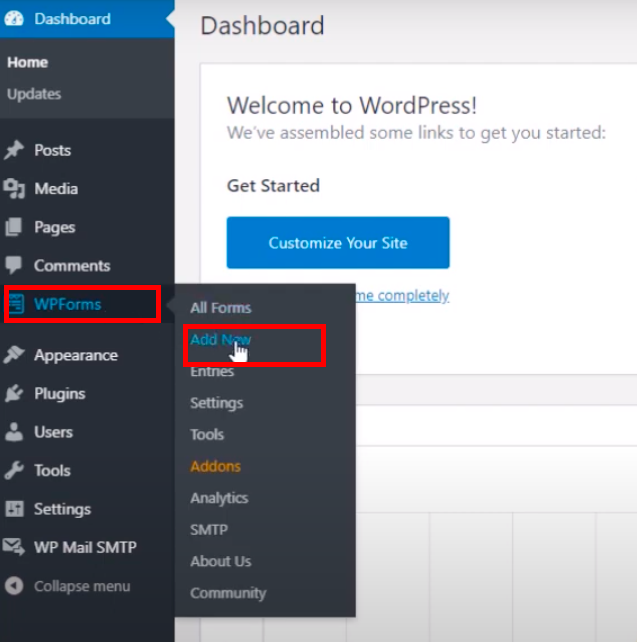
- Proceed with the on-screen instructions to install and configure the plugin. Once installed, WPForms will appear on the left panel.
- Click on WPForms and select Add new from the menu.
- Decide whether you want to create a form from scratch or use a template.
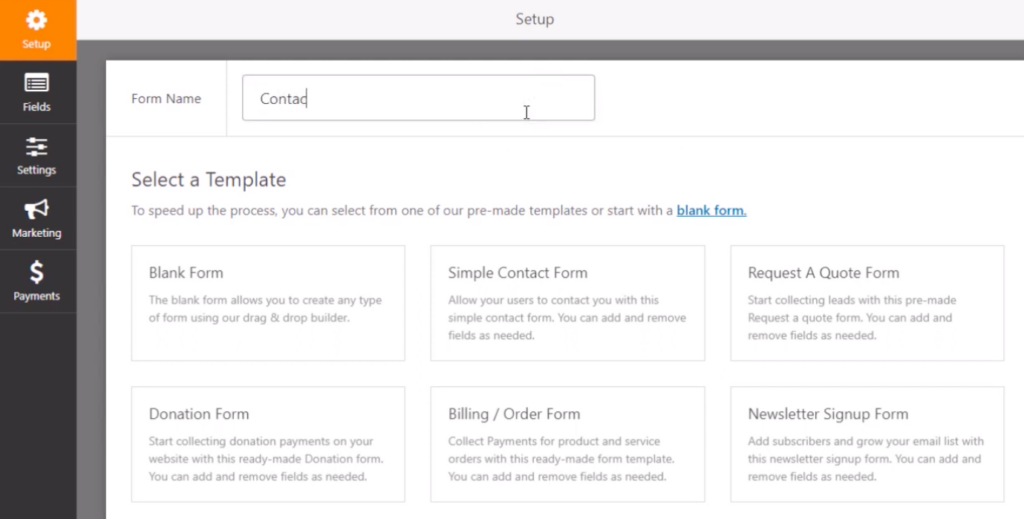
- Even if you have selected a template, you can still add other fields using the drag-and-drop functionality. Also, you can easily rearrange the elements on the form and customize them to your needs.
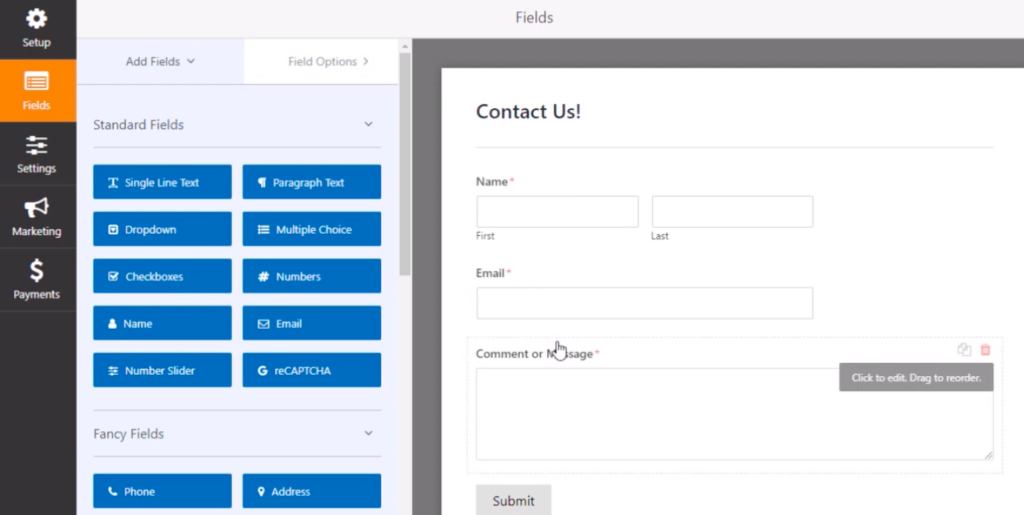
- Once the form looks good to you, save it.
- Click on the WPForms tab on WordPress and proceed to Settings.
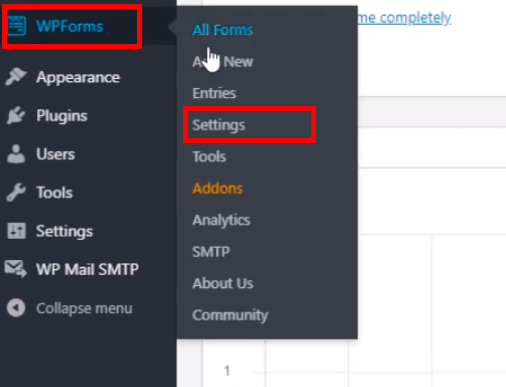
- Go to the Integration tab and click on Pipedrive to expand it.
- Click Add new account, and you will be redirected to the Pipedrive login page.
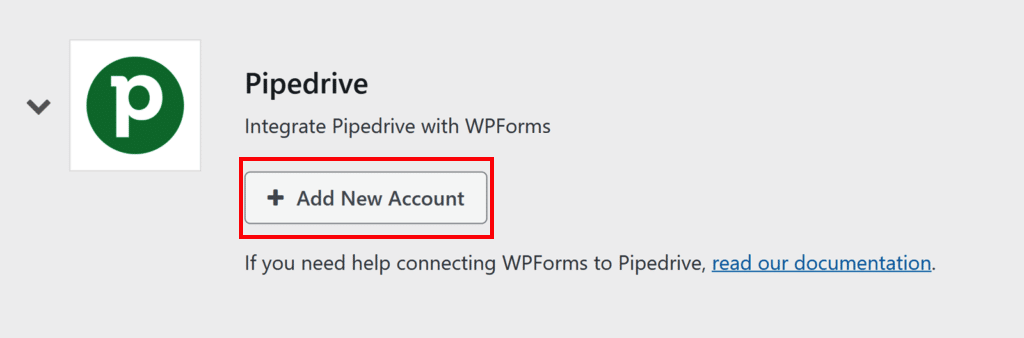
- Log in with your credentials and provide the necessary permissions for WPForms to access your Pipedrive data. Then, click Allow and Install to authorize the connection.
- Once the integration is set up, you will be redirected to your WPForms on WordPress and see that Pipedrive is connected.
- Click on the WPForms tab on WordPress and proceed to All Forms. Select the recently created form.
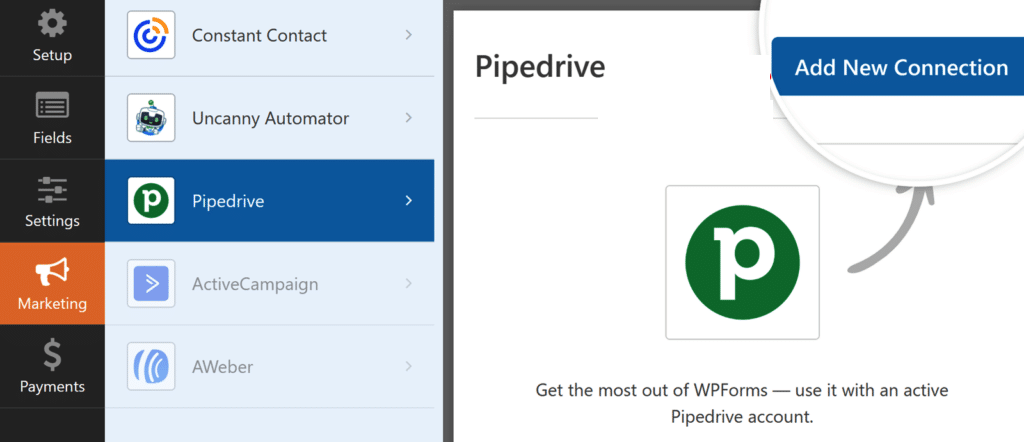
- Go to the Marketing tab and select Pipedrive.
- Click on Add new account to authorize WPForms to access your CRM account.
- Name the connection. Then, select the recently connected Pipedrive account and select an action to perform (Create/Update Person, Create a Deal, etc.).
- Click Save to apply the settings.
- Test your form before setting it live.
- Embed the form on your web pages.
Pros
- Plugins are available directly in the WP environment.
- No-code installation and configuration.
- Only the necessary data is exchanged between systems.
Cons
- Most plugins are available for users under the WP Business plan, and some of them require additional payment.
- One-way sync direction, from WordPress to Pipedrive.
- Limited number of integration options.
Method 2: Using Middleware Platforms
Another method for connecting Pipedrive and WordPress involves middleware platforms like Zapier and Make. Their primary purpose is to automate regular and repetitive business tasks, facilitating workflows in the process.
For instance, once a lead generation form is filled out and submitted on the website, a new or updated record is created in a CRM system.

Best for
Workflow automation platforms will work well for companies looking to streamline multiple processes, even those that go beyond the scope of the Pipedrive WordPress integration.
Therefore, this method will be organic for medium-sized businesses and enterprises that have dozens, if not hundreds, of processes to optimize.
Pros
- No-code setup with a user-friendly interface.
- Trigger-based or scheduled process run.
- Possibility to configure multiple flows that involve different data sources.
Cons
- Additional costs may apply.
- Complex automations require custom code and advanced error handling.
- Trigger-action logic understanding is required.
Method 3: Custom API Integration
This method addresses Pipedrive integration with WordPress that requires a customized approach. Therefore, it involves programmers who write custom scripts to connect two systems and exchange data between them.
Custom API integration assumes the Pipedrive API key extraction first. Then, developers need to write custom code to connect the Pipedrive API with WordPress REST APIs. Data cleaning, validation, and error handling are also performed programmatically.
Best for
The API method is useful for companies that need to create custom workflows between WordPress and Pipedrive.
Additionally, when it’s necessary to send specific data and website performance metrics to the CRM, this approach would also be suitable.
Since this method requires IT talents on the team. No matter whether it’s a startup or a large enterprise, proficient programmers are the key to accomplishing API integration.
Pros
- High degree of customization.
- Possibility to create non-standard workflows.
- Additional options for data cleaning and management on integration.
Cons
- Complexity of development and maintenance of scripts.
- Additional costs associated with IT talents.
- Potential security and scalability issues.
Method 4: Third-Party Integration Platforms
Third-party tools are another option to connect WordPress to Pipedrive. These are typically referred to as data integration services or iPaaS platforms that allow users to transfer data seamlessly between various sources.
One of such solutions is called Skyvia – a universal data integration platform designed for a wide variety of data-related tasks.
Skyvia is a multifaceted solution that comprises five components:
- Data Integration enables the construction of ETL, ELT, and Reverse ETL pipelines, ranging from simple to advanced. It promotes data exchange between systems in your tech stack.
- Automation lets you streamline repetitive and standard workflows, thereby eliminating manual input errors and accelerating business processes.
- Query allows you to execute SQL queries on data in a programmatic way or do that with a no-code visual SQL query builder.
- Backup makes snapshots of your cloud app data, compares them, and restores on demand.
- Connect provides you with ready-to-use API endpoints for any data source.
In this article, we’ll particularly focus on the first two components of Skyvia: Data Integration and Automation.
Best for
Skyvia is a multi-purpose solution that performs various operations on data, ranging from querying to backup. It also offers a freemium plan that allows anyone to try it and decide which functionality best suits their needs.
Any company that carries out data operations may benefit from Skyvia. Those could be either from recently established startups or large enterprises.
Its pricing plans also reflect this concept since there are subscriptions that suit different workload and functionality requirements.

Now, let’s have a look at the practical implementation of Skyvia for Pipedrive WordPress integration. First of all, we’ll observe how to use the Automation tool, which allows you to connect your favorite apps and services to simplify regular workflows and automate repetitive tasks.
And then, we’ll see how to connect CRM and CMS systems with the Data Integration tool.
Step-by-Step Guide with Automation Tool
The Automation tool acts similarly to the plugins and middleware discussed above. For instance, once the lead form is submitted on the website, the data is immediately transferred to the CRM.
Other automated workflows can be configured for various scenarios, tailored to your specific needs.
- Log in to your Skyvia account.
- Create connections to Pipedrive and WordPress. This process is rather simple and won’t take you more than 5 minutes.
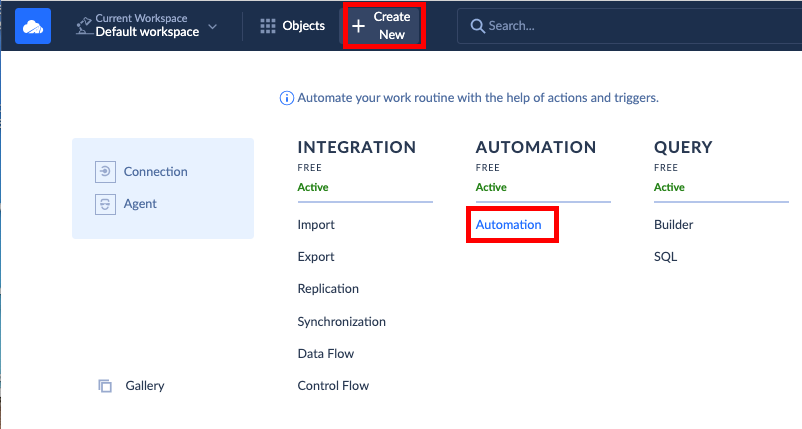
- Click on + Create New in the upper bar and select Automation.
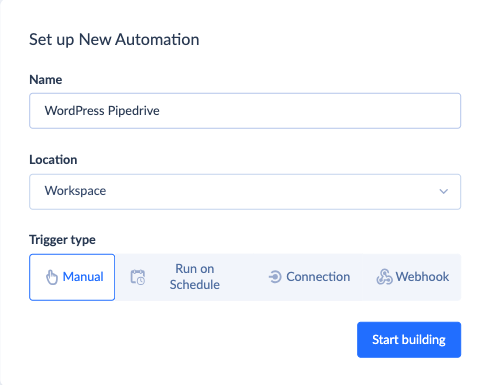
- Fill in the required fields and select the trigger type. Note that you’ll be able to change that later. Click Start building.
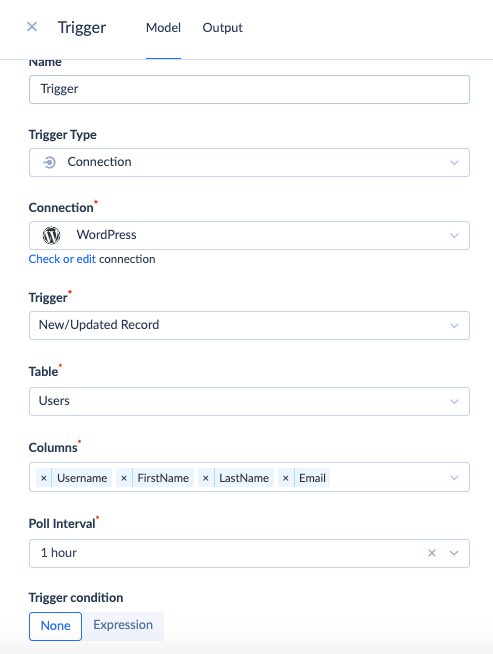
- Configure the trigger-related settings depending on the chosen type. In this case, we select Connection type with WordPress as the source.
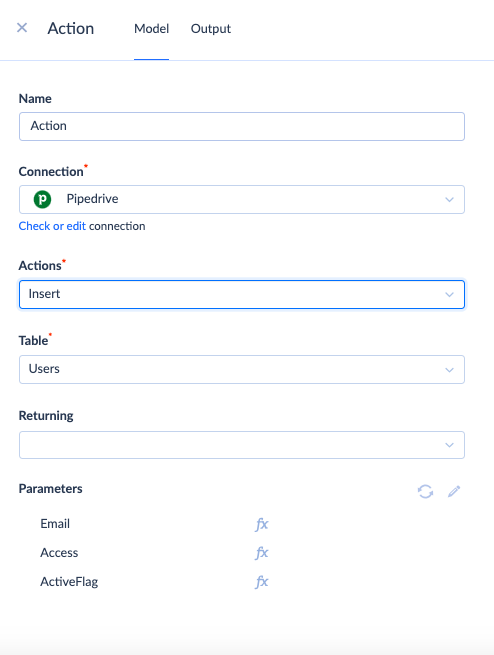
- On the left panel of the workspace, select the components to add to the automation workflow. In this example, we add an Action with Connection type and configure it properly.
- Once the flow is ready, you may test it. Then, switch to the Overview tab to have a general overview of the automation workflow.
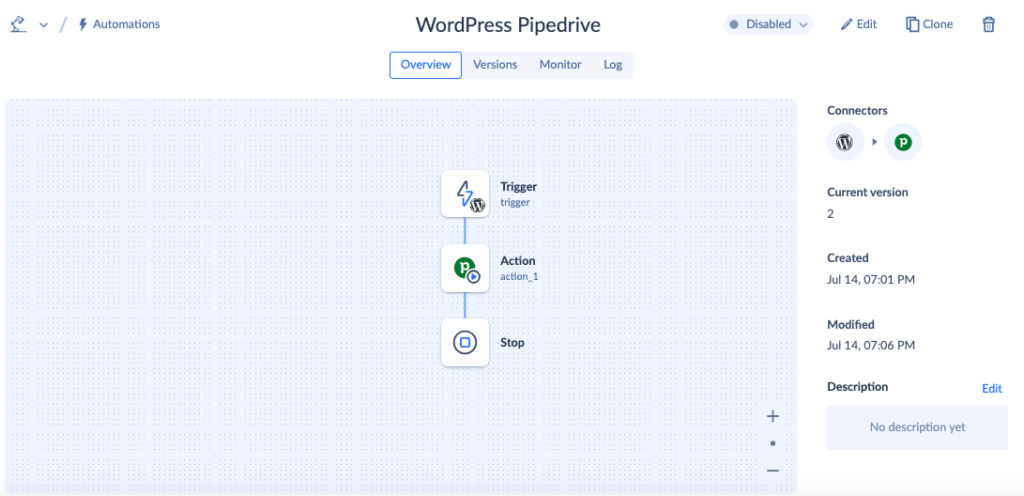
- To run the automation workflow, switch its state to Enabled in the upper-right corner of the workspace.
- Observe the results of the automation execution in the Monitor and Log tabs.
Step-by-Step Guide with Data Integration Tool
While an automation flow allows you to execute one task at a time, the Data Integration tool offers more ample opportunities. It allows you to create multiple integration tasks within the same scenario and schedule their execution as frequently as every minute.
Let’s see an example of how to create an import scenario where user data is shared from WordPress to Pipedrive.
- Log in to your Skyvia account.
- Create connections to Pipedrive and WordPress, if they don’t already exist. This process is rather simple and won’t take you more than 5 minutes.
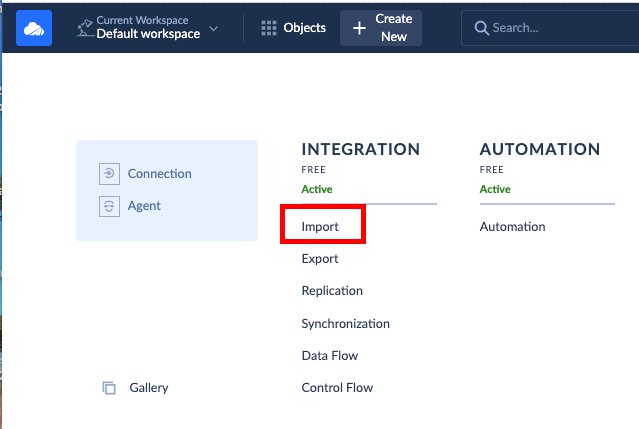
- Click on + Create New in the upper bar and select Import under the Data Integration column.
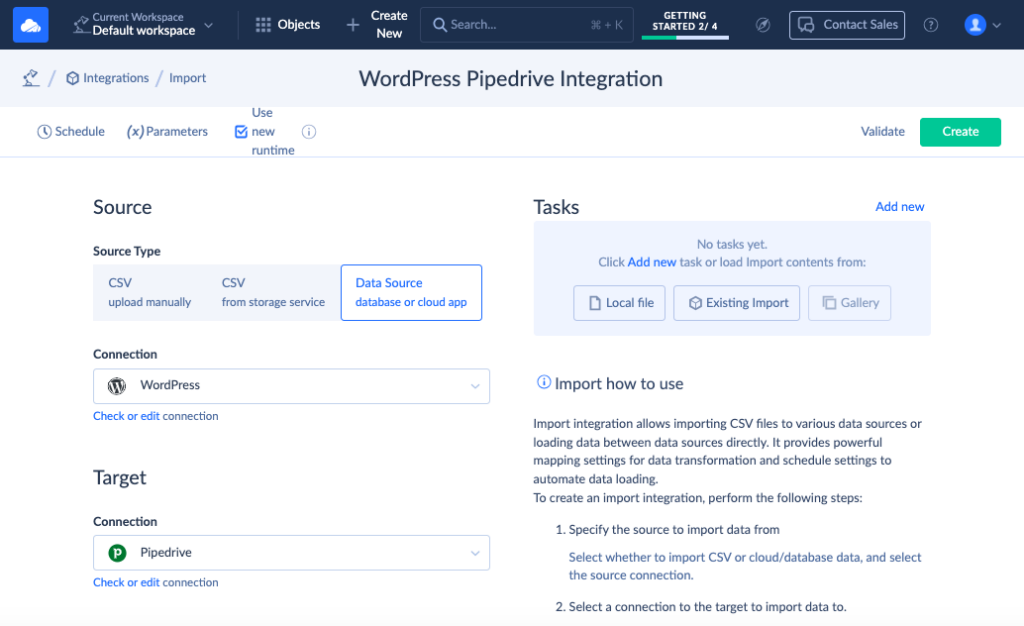
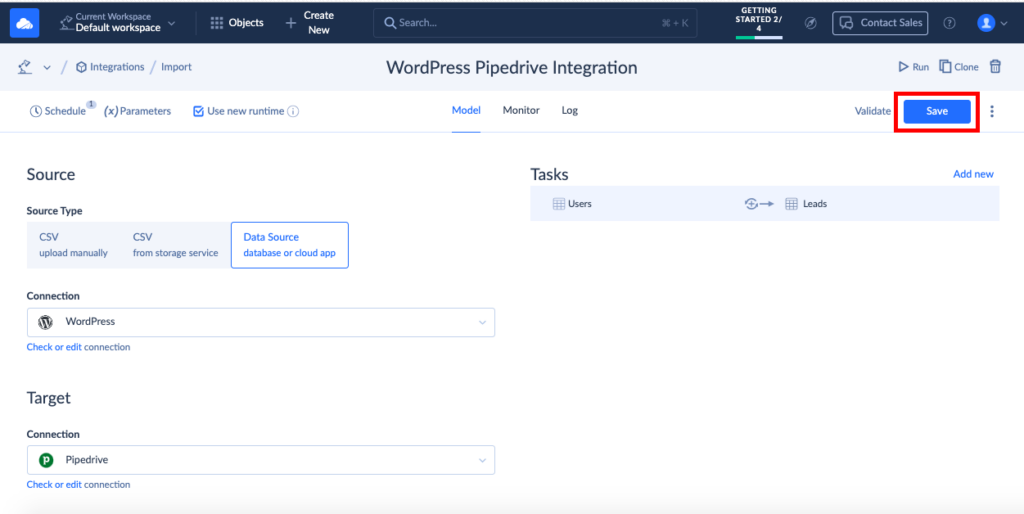
- Select Data Source under the Source Type section.
- Select WordPress from the Connection list in the Source section.
- Select Pipedrive from the Connection list under the Target section.
- Click Add new next to the Tasks section.
- Pick up an object from the Source drop-down list. Set filtering criteria, if needed. Click Next step.
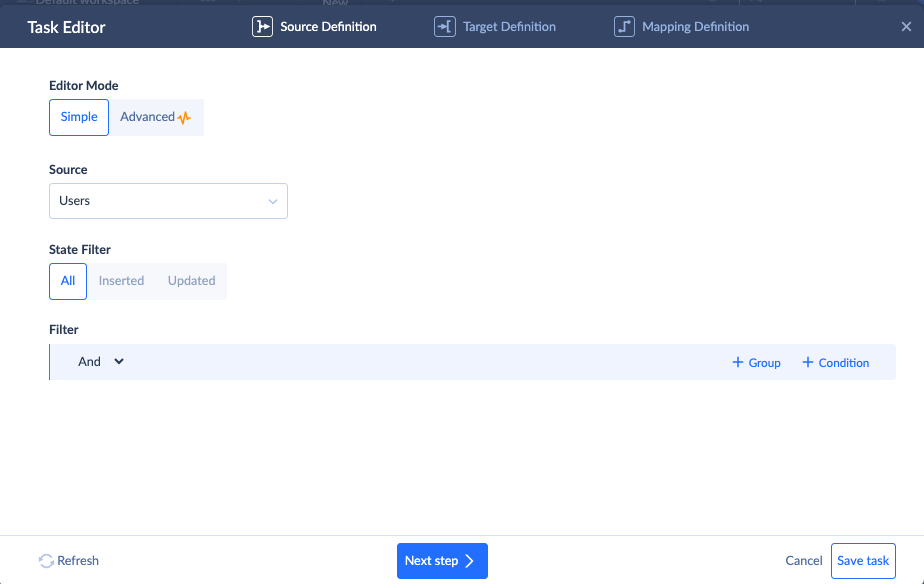
- Pick up the corresponding object on the CRM side from the Target list. Set the needed DML operations (Insert, Upsert, Update, Delete). Click Next step.

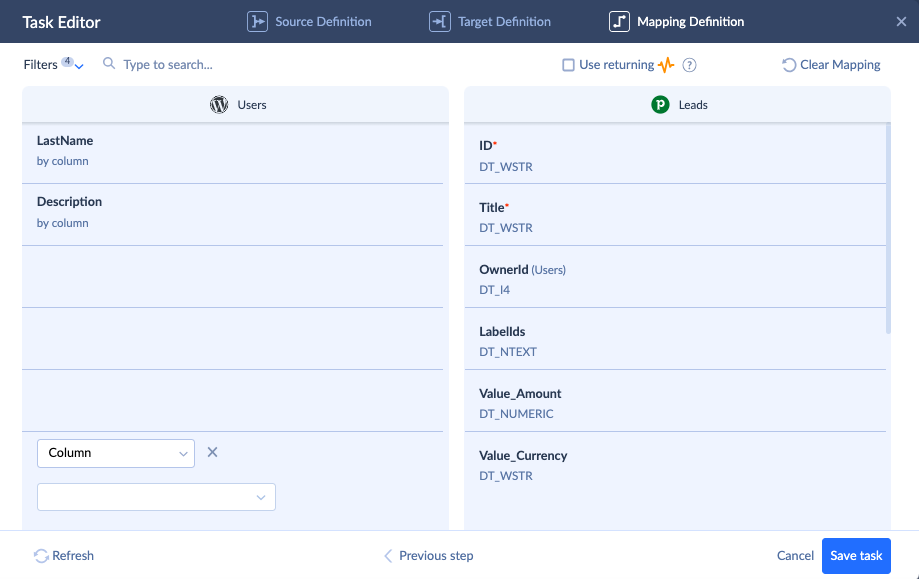
- Configure the mapping between the two systems to match their data structures properly before integration takes place. Once ready, click Save task.
- Repeat steps 7-10 for creating other tasks, if needed.
- Check the scheduling options by clicking on Schedule. Decide whether the integration should run once or needs to be recurring. Click Save.
- Click Save in the upper-right corner of the scenario configuration workspace to save the task.
- Click Run to start the integration execution on schedule or immediately.
Pros
- 200+ pre-configured connectors to CRM systems, e-commerce platforms, databases, and other tools.
- Multiple integration scenarios and tools for working with data.
- Data updates are as frequent as every minute.
- Web-based access, even from a smartphone or tablet.
- High customer satisfaction and trust levels – 4.8 out of 5.0 rating on G2.
Cons
- Advanced features are available only under paid subscriptions.
- A free trial has limitations on the number of scheduled integrations.
Common Issues & Troubleshooting
Even the most impeccable integration setup may go wrong. This may happen regardless of the chosen Pipedrive WordPress connection method – plugin, API setup, or even a third-party tool.
Certain issues may arise due to API call limits, pipeline configuration errors, data structure incompatibilities, version conflicts, and other factors.
Here, we’ll review some typical issues that occur during the Pipdrive WordPress integration and outline remedial procedures to achieve the expected results.
| Issue | Description | Recommendation |
|---|---|---|
| No Pipedrive deals created | New deals don’t appear on Pipedrive, and existing ones aren’t updated after the form data integration. | 1- If you use the WPForms plugin, check whether the Create a deal action is selected in the Pipedrive connection settings. 2 – For middleware, it’s similar – check the selected action on the automation flow. 3 – For Skyvia, check the source and target objects and verify that the integration or automation flow was executed correctly in the Monitor tab. |
| Some fields are missing | After the integration scenario is complete, the data shows up in Pipedrive, but some fields are missing or incorrect. | Regardless of the selected method, check the mapping settings of the setup. |
| Duplicate contacts | Upon the integration’s completion, duplicate deals or customer records are created on Pipedrive. | Pipedrive has a built-in feature called “Merge Duplicates”. Feel free to use it to combine information from duplicate records and eliminate duplicate entries. |
| Connection abrupted | During the integration run, the connection suddenly breaks, so the form data isn’t transferred to the destination. | Such an error may be caused by network connectivity problems, incorrect credentials, an invalid API key, or server-side problems. |
Conclusion
In this article, we have reviewed four different methods for connecting WordPress and Pipedrive. Plugins and connectors automate regular lead generation workflows.
Meanwhile, API integration and Skyvia offer more advanced options for WordPress Pipedrive integration. While writing API scripts can be cumbersome and complicated, Skyvia offers a similar functionality with a much simpler approach.
This comprehensive data platform enables you to build automated workflows and set up complex integration scenarios that go beyond the scope of lead management.
Don’t hesitate to try this tool for free and then select the subscription that meets your integration needs.

F.A.Q. for WordPress and Pipedrive

Can I connect my WordPress contact forms to Pipedrive?
Yes, you can integrate data from WordPress contact forms using the WPForms plugin. It also provides the possibility to send data directly to Pipedrive once the form is filled and submitted on the website.
Do I need to know how to code to integrate Pipedrive and WordPress?
No, programming knowledge is not necessary to connect Pipedrive and WordPress unless you have very specific integration requirements. WP plugins, middleware, and third-party tools like Skyvia offer a no-code user interface, allowing you to integrate two systems in minutes.
What is the main difference between using Zapier and using Skyvia?
Zapier focuses only on workflow automation, while Skyvia is a more comprehensive solution, offering a much wider range of integration and other data-related procedures (backup, query, synchronization, replication, etc.).
