

With Skyvia you do not need to build web API manually — no need in developing a service, caring about security, hosting and domain, obtaining respective certificates, deploying, administering or maintaining. Skyvia Connect is a universal cloud-based solution that takes care of all this. It needs no coding, no technical skills.
Skyvia Connect allows you to easily expose your SQL Server data via OData service — RESTful API for quick, real-time data access and manipulation. OData is a widely accepted open standard built on HTTP, ATOM/XML and JSON, intended for data access over the Internet with no firewall configuration. You can use it to expose any kind of data in a fast and convenient way – both from cloud and on-premise servers. To connect to on-premise servers, use our new Agent application developed by Skyvia team exactly for these needs.
Table of contents
- What Is Agent? How Can We Configure It?
- Creating an Agent in Skyvia
- Creating a Connection in Skyvia
- Creating an Endpoint in Skyvia
- Supported Versions of Microsoft SQL Server
What Is Agent? How Can We Configure It?
Agent is a secure tunnel application developed to connect your Skyvia account to local, on-premise databases with ease and comfort and to establish secure communication bypassing firewall.
Try its functions by installing Agent application to your PC and creating a SQL Server connection you want to work with. Follow our easy step-by-step tutorial on how to do it in Skyvia.

Creating an Agent in Skyvia
To start, first you need to create a free account in Skyvia. Second, you need to proceed with creating an agent. We’ve tried to provide the detailed instruction on how to do it.
To create an agent, perform the following steps:
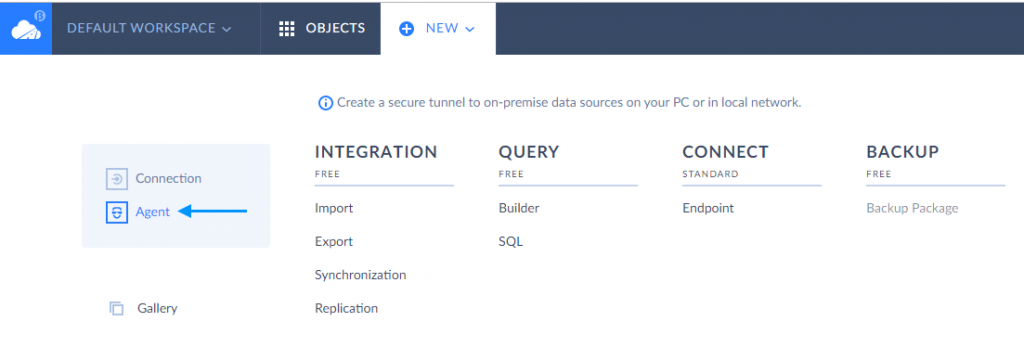
- Click +NEW in the top menu and select Agent from the list on the left.
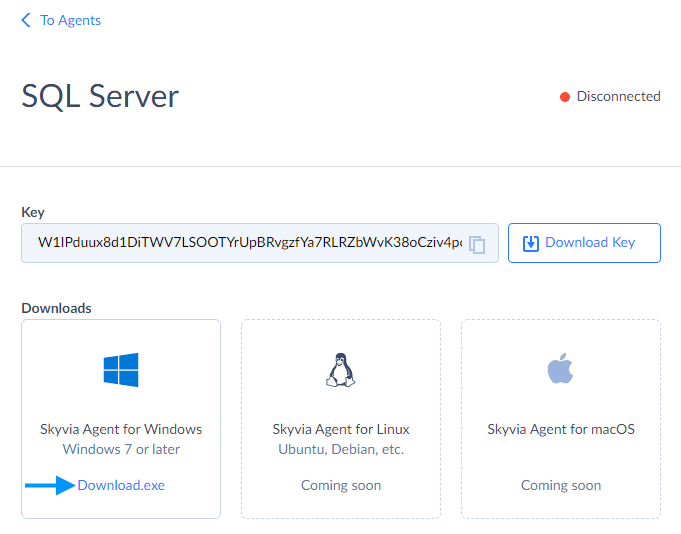
When the Agent editor page opens, click Download.exe to download an Agent application
- Click the downloaded file to install the Agent application.
- When you do it, the Skyvia Agent window pops up. Click the INSTALL button. By default, agent will be installed to C:\Program Files (x86)\Skyvia Agent.
- After you have downloaded the Skyvia agent, you need to download the security key. To do it, click Download Key at the top right corner.
- When the key file is downloaded to the Downloads folder, move it to the folder where the Agent is installed. Note that the key file name should always be skyvia_security_agent.key.
- Then, in the Skyvia Agent folder, click Skyvia.Agent.Client to start the program.
- If you have done everything correctly, on the Agent editor page you will see Connected sign and green light next to it.
- Optionally test the agent connection by clicking the Test agent button.

Creating a Connection in Skyvia
To create a connection, perform the following steps:
- Click +NEW in the top menu.
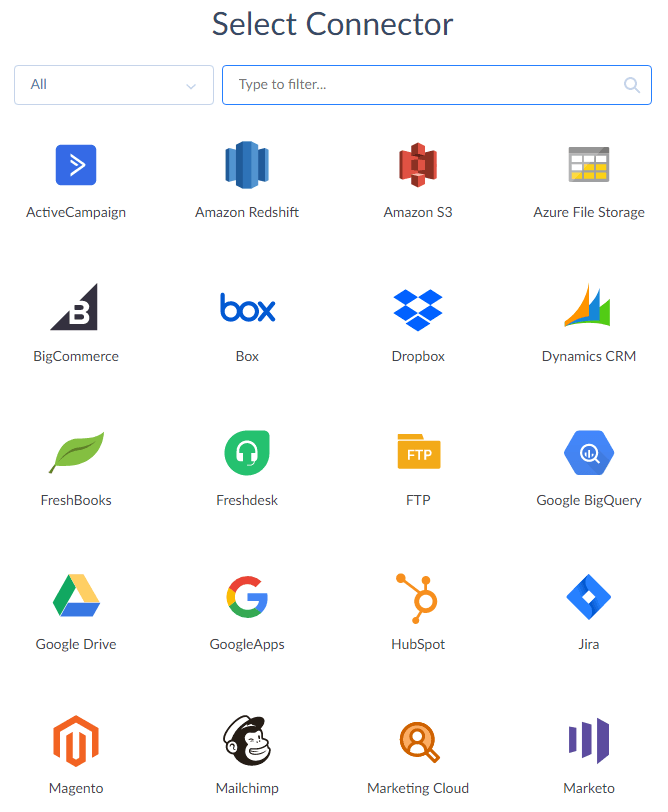
- Select Connection from the list on the left. The Select Connector page will open.
- Select SQL Server from available connections.
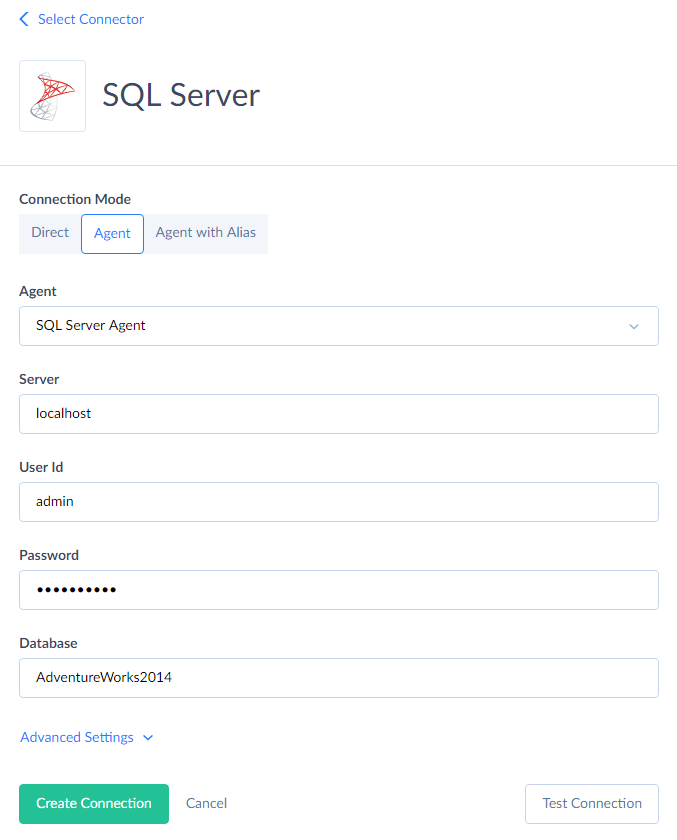
- When the Connection editor page opens, select Agent under Connection Mode and fill in all the required parameters.
- Click Test Connection to check whether the connection is successful. Then click Create Connection to create and save the connection.
Creating an Endpoint in Skyvia
To create an SQL server OData endpoint, perform the following steps:
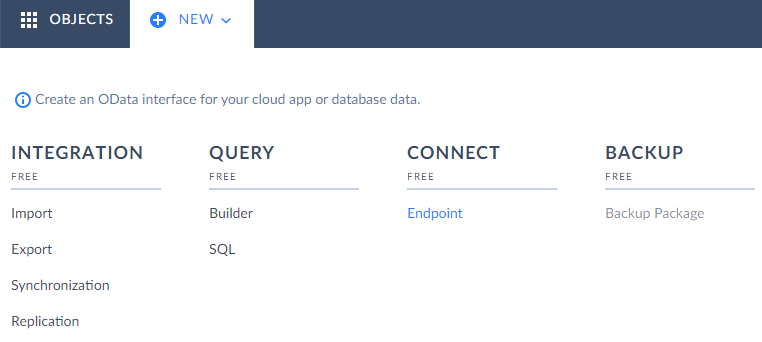
- Click +NEW in the top menu and click on Endpoint under Connect.
- On the page that opens, select the SQL Server connection from the created ones and you are transferred to the Endpoint editor page.
- On the Endpoint editor page, drag-n-drop tables you need and manage connections between them.
- In Skyvia, you can optionally allow only authenticated users to access endpoint data and optionally limit IP addresses, from which the data of the endpoint can be accessed. Click Users on the toolbar and add a user to enable authentiсation for your endpoint. The same you can do with IPs.

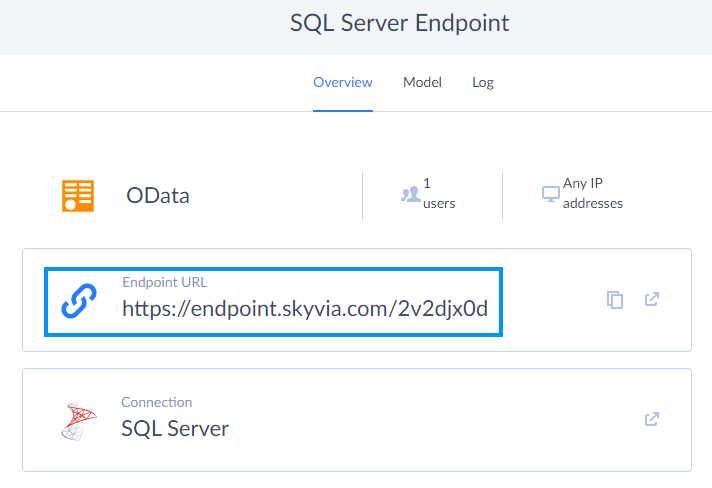
When you have already created the endpoint, you can copy its URL from the Overview tab and use it for different purposes as well as in your OData consumer applications. You may also test the endpoint URL in the browser.
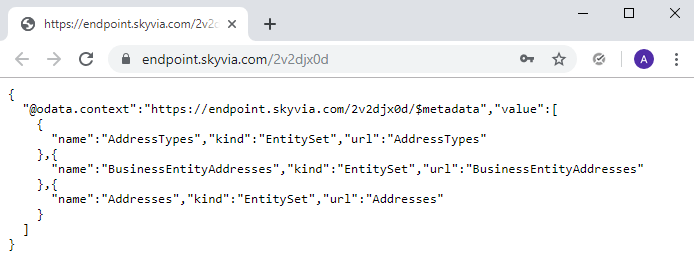
Having made a request in the browser, you will receive a response containing entity sets. In our example, we have received a response with 3 entity sets in JSON format — AddressTypes, BusinessEntityAddresses and Addresses.
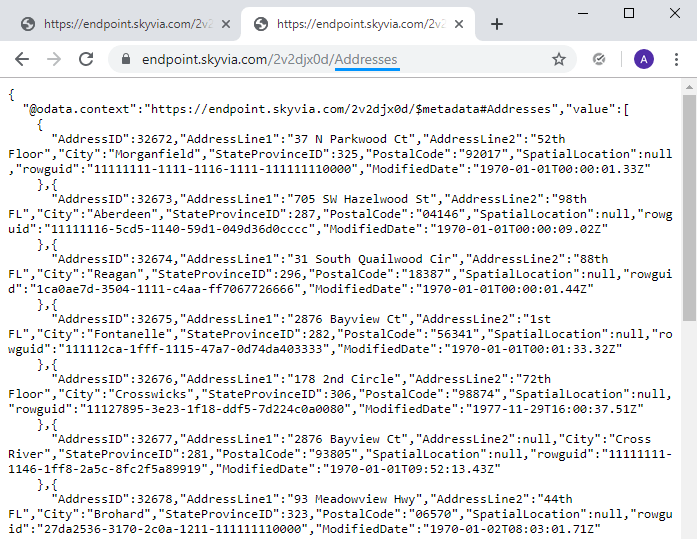
To receive all addresses with such parameters as AddressID, AddressLine, City, StateProvinceID, etc., we add the corresponding name of the entity set, Addresses, in the URL bar and check the displayed data.
You may use the endpoint URL in any other OData consumer applications, such as Excel or Salesforce Connect, etc. You determine it yourself based on your business needs and actual demand.
Supported Versions of Microsoft SQL Server:
- Microsoft SQL Server 2005
- Microsoft SQL Server 2008
- Microsoft SQL Server 2012
- Microsoft SQL Server 2014
- Microsoft SQL Server 2016
- Microsoft SQL Server 2017
We welcome you to try OData REST API for SQL Server and enjoy the full functionality of our platform by creating SQL Server OData connectors and exposing SQL server databases as OData endpoints and many more. Give us your feedback and share your thoughts!
