

Thinking about how to export Jira data into a local file for further processing? Whether you’re building reports, tracking KPIs, creating backups, or sharing insights with people outside your team, exporting Jira data to CSV is often the fastest and most flexible way to do it. CSV files make your Jira data easier to work with in familiar tools, but the process isn’t always easy. There are several possible ways to do that.
In this guide, we’ll:
- Discover what types of Jira data are available for export.
- Look at three practical export methods from built-in features to apps and no-code tools.
- Learn expert tips to help you get clean, usable CSVs.
Table of Contents
- Understanding Jira Export Needs: What Data Can You Export?
- Methods for Export Data Between Jira and CSV
- Method 1: Using Jira’s Built-in CSV Export Functionality
- Method 2: Leveraging Jira Marketplace Apps for CSV Exports
- Method 3: Third-Party Tools
- Tips for Optimizing Your Jira CSV Exports
- Conclusion
Understanding Jira Export Needs: What Data Can You Export?
Jira organizes complex project structures, which can be critical for reporting and decision-making, encompassing issues and epics, user information, and detailed time logs. Depending on your goals, you might need to extract different types of data.
Jira Issues
The most frequently exported data type. Jira issues (also called work items) include tasks, bugs, user stories, epics, and sub-tasks, along with standard and custom fields. This data is vital to reporting, backlog prioritization, and sprint planning.
Jira Project Data
In addition to individual issues, project-level data is also important. It includes details like project keys, workflows, and configurations that help put individual issues into a broader context.
Jira User Data
Data that stores information about users is another common need, especially for tracking workloads, permissions, or user-specific metrics. This can include who’s assigned to tasks, team roles, or time logs, helping you assess team productivity and allocation.
Jira Comments and Attachments
While Jira is great at storing issues and workflows, comments and attachments can often be a pain point when it comes to export. Native exports do not contain issue comments, making it challenging to share them with stakeholders or in reports.
Jira Worklogs and Time Tracking Data
Time tracking is another aspect of Jira that requires more than just a basic issue export. Worklogs and time entries are key for reporting on team performance, understanding resource allocation, and even for billing purposes. But unlike issue extraction, worklog exports may not be easy with the built-in functionality.
Data from Jira Reports
Jira offers various built-in reports, like burndown charts and sprint reports. But extracting this data directly from Jira can be challenging. You may need to manually reconstruct these reports or use apps that can export them in a more accessible format.
Ultimately, understanding which data you need and which methods can deliver it to you in the desired format is crucial for project management and reporting.
Methods for Export Data Between Jira and CSV
Each method of getting Jira data has its strengths and suits different needs. Here’s an overview of the main approaches:
| Criteria | Jira’s Built-in CSV Export | Jira Marketplace Apps | Third-Party Tools (Skyvia) |
|---|---|---|---|
| Export Limit | 1,000 records per export. | Varies by app; typically higher limits or no limits. | No limit; handles large datasets effectively. |
| Automation | Manual exports only; no automation. | Limited automation; depends on app capabilities. | Fully automated; supports scheduled and recurring exports. |
| Cost | Free; included in Jira. | Subscription-based; costs vary by app. | Subscription required for advanced features; free trial available. |
| Pros | – Quick and simple – No additional cost – Ideal for small datasets | – Supports hierarchies and metadata – Exports custom fields – Reduces post-export cleanup | – No-code and easy to use – Bypasses 1,000-issue limit – Automates exports and integrates with other systems |
| Cons | – Flat data only – No comments/attachments – 1,000-record limit | – Subscription costs – Setup time – Varies by app features | – Subscription for advanced features – Less granular format control |
| Ideal Use Case | One-off reports for small teams. | Complex projects needing detailed exports. | Recurring exports, large datasets, or cross-platform integrations. |

Method 1: Using Jira’s Built-in CSV Export Functionality
Jira’s built-in CSV export feature allows you to get issue data into a CSV file directly from the Jira interface. It’s simple and convenient but limited in terms of flexibility and data depth.
Best For
- Quick, one-time exports of small datasets.
- Users who need basic reports or data sharing without additional tools.
Step-by-step instructions
- Set a basic filter or use Jira Query Language for advanced filtering to select the issues you want to get.
- Click the Export button in the top-right corner.
- Choose one of the available CSV options.
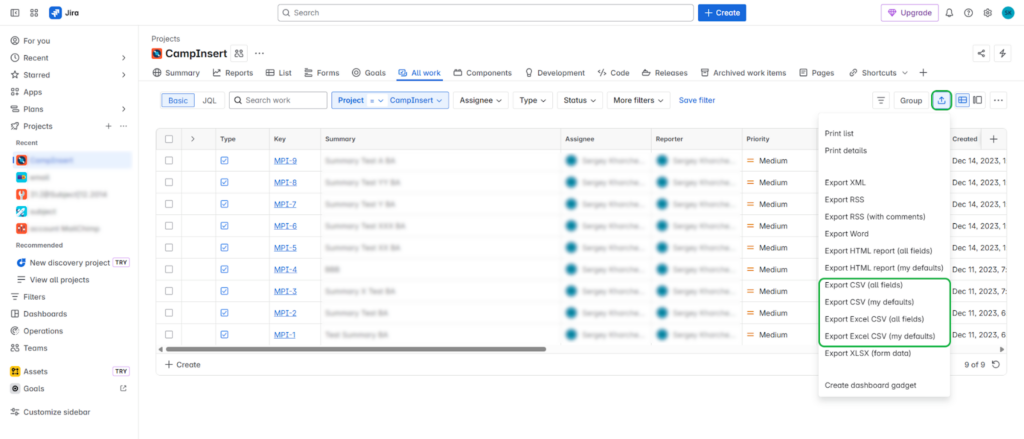
- Save the result file on your computer.
Pros
- Quick and easy to use, with no additional setup required.
- Ideal for small datasets and one-off exports.
Cons and Limitations
- Flat data only, with no preservation of work items hierarchy (e.g., parent-child relationships).
- No options for getting comments, attachments, or detailed worklogs.
- A 1,000-record limit applies to a single export.
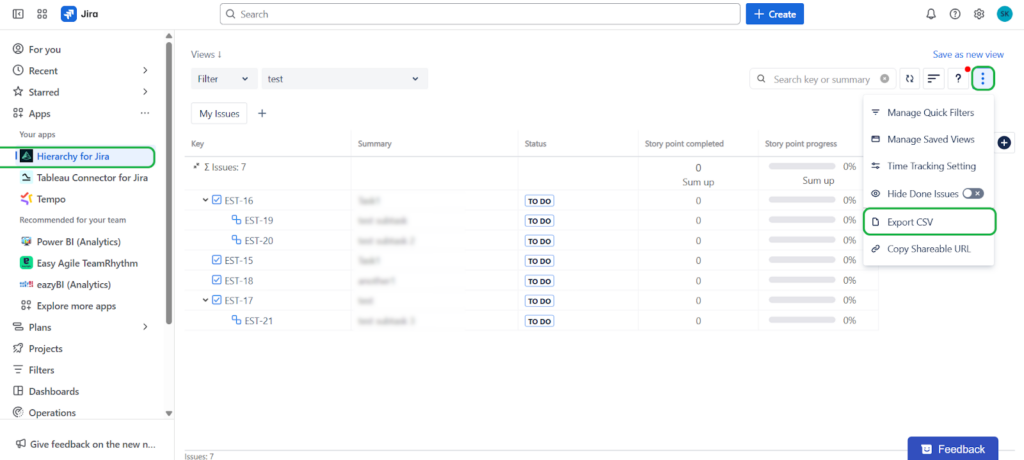
Method 2: Leveraging Jira Marketplace Apps for CSV Exports
Jira Marketplace apps provide more advanced features for extracting Jira data. For example, an app like Hierarchy for Jira helps to export multi-level hierarchies and custom fields. Exporter for Jira enables getting not only issues, but also their metadata (transitions, comments, attachments) to Excel and CSV. These and other marketplace apps can better handle the complexities of large projects or specific export needs that Jira’s native features can’t cover.
Best For
- Advanced export of hierarchical data, complex structures, and issue metadata.
- Users who need more control over the extracted data, including custom fields and richer data structures.
Step-by-step guide
- Click Explore more apps in Jira to open the marketplace.
- Search for Hierarchy.
- Click Try it free on the right.
- Wait while Jira installs the app for you, and select the app on the left.
Pros
- Displays multi-level issue hierarchies (e.g., epics, stories, sub-tasks).
- Can export custom fields that Jira’s native feature doesn’t support.
- Reduces manual data cleanup after export.
Cons and Limitations
- Some apps may require additional subscription.
- Setup and configuration may take extra time.
- Each app has its own features and capabilities. You may need different apps for multiple purposes.
Method 3: Third-Party Tools
Third-party tools like Skyvia offer no-code, cloud-based integrations that allow for more flexible data exports. These tools are helpful for teams that require regular or automated data exports or those working with larger and more complex datasets.
Skyvia connects directly to your Jira instance and supports advanced data extraction without coding. It’s ideal for teams that need to regularly export large datasets, automate extract tasks, or integrate Jira with other platforms for seamless data workflows.
Best For
- Teams that need automated, recurring exports of Jira data.
- Users working with large datasets.
- For data migration or integration scenarios.
Step-by-step guide
To export data from Jira using Skyvia, you need an active Skyvia account.
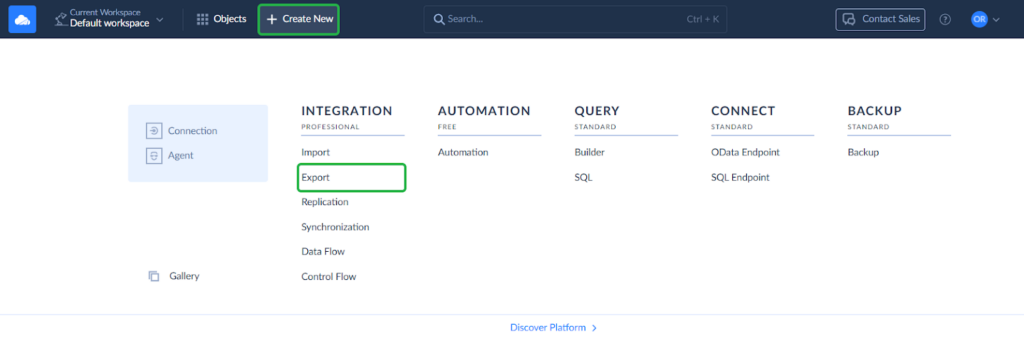
STEP 1. Set up a new connection to Jira.
- Click + Create New connection.
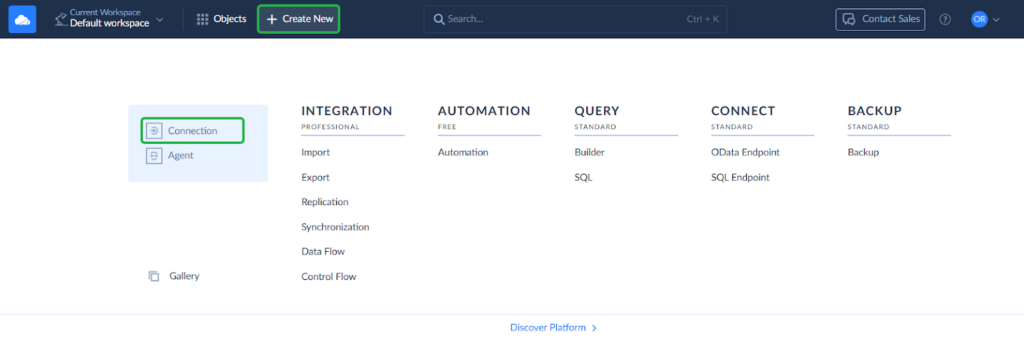
- Select Jira from the list of available connections.
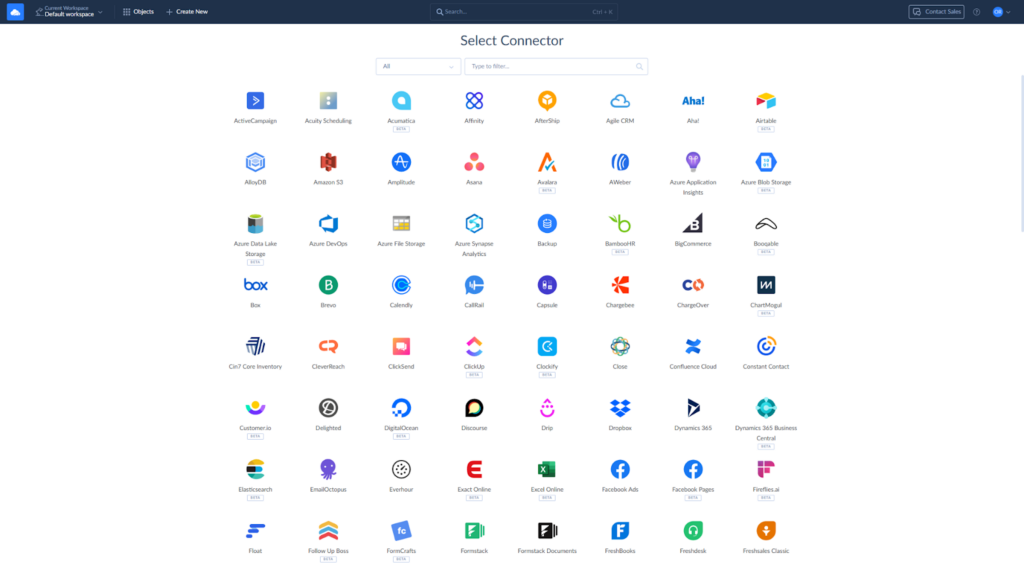
- Enter your Jira credentials and save the connection.

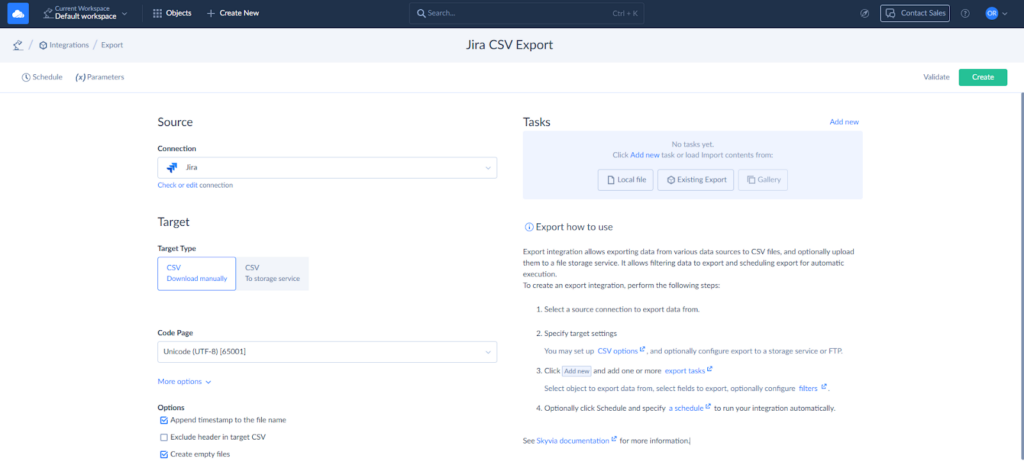
STEP 2. Configure Export.
- Click + Create new and select Export.
- Select your Jira connection as the Source and choose whether to save the result file on your computer or in your data storage.
STEP 3. Add an Export task.
- Click Add new to create a new export task.
- Select a whole Jira object or switch to the Advanced mode to write a custom command for data selection. Here you can set filters and sorting.
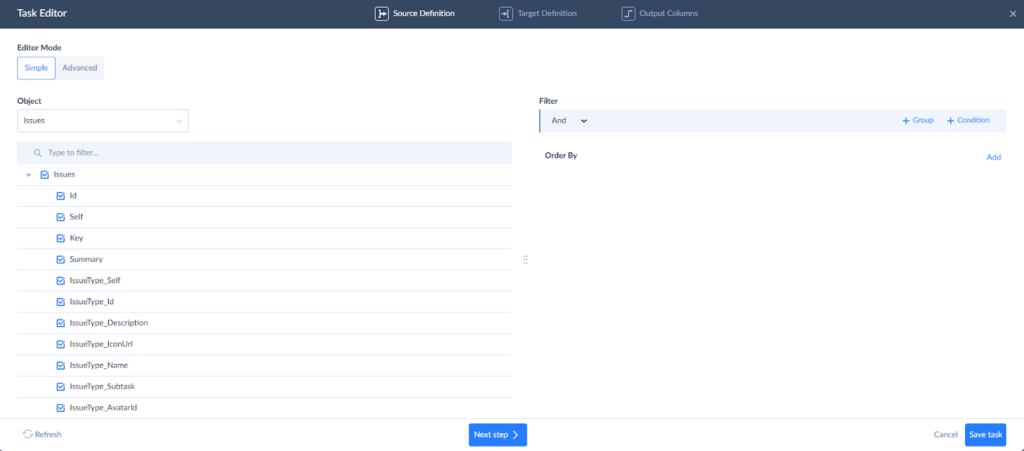
- Set the custom name for the target file, if needed.
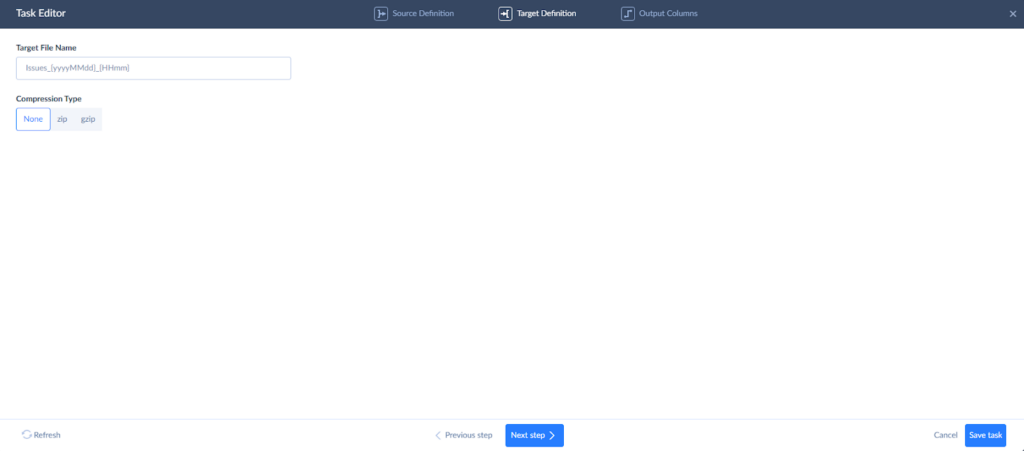
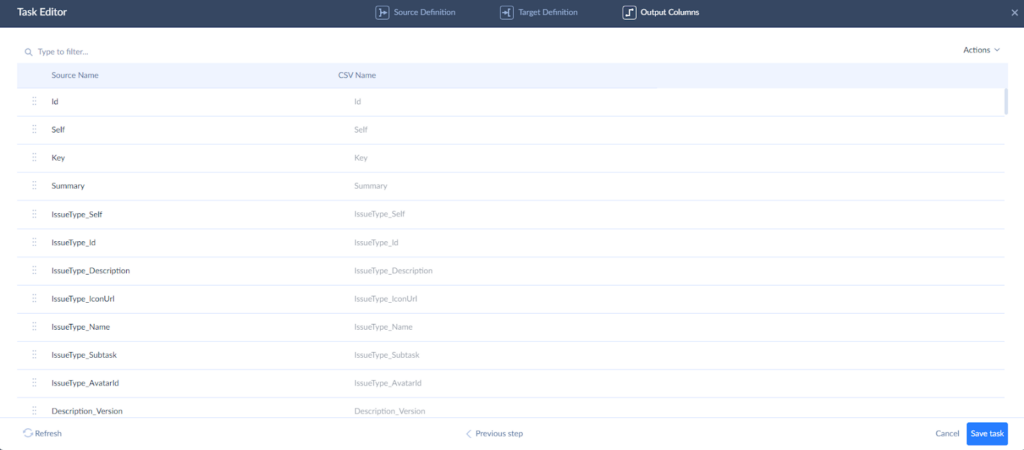
- Rearrange the columns for the export file, if needed, and save the task.
STEP 4. Run and monitor the integration.
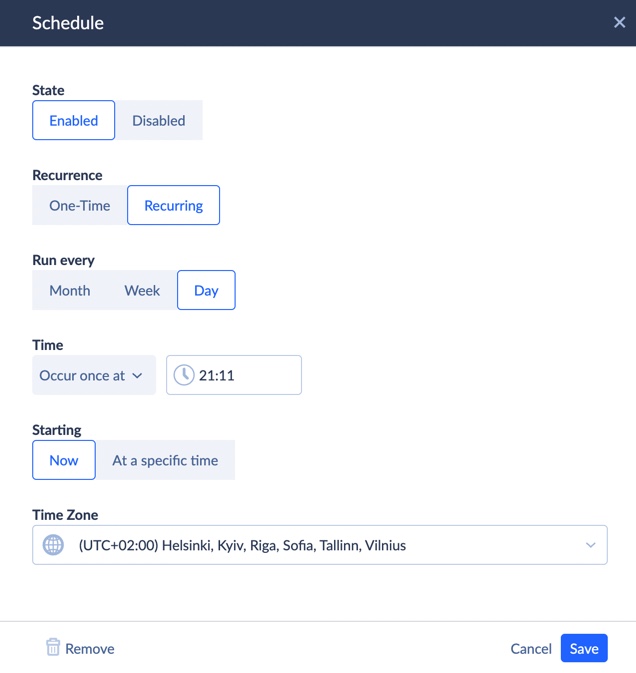
- Run the export manually or set the schedule if you need to get Jira data regularly.
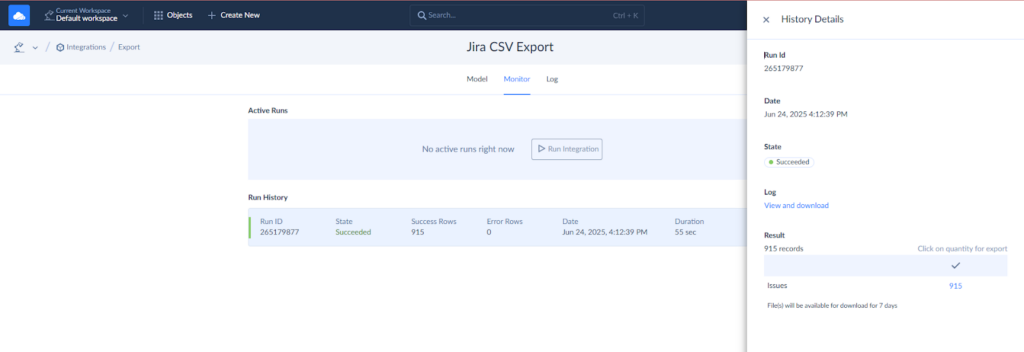
- Check the export results on the Monitor or Logs tabs.
- To download the file on your computer, click the last export run on the Monitor tab.
Pros
- No-code solution that’s easy to set up.
- Supports large datasets, bypassing Jira’s 1000-issue export limit.
- Automates data exports and integrates easily with other systems like Google Sheets, Excel, or databases.
Cons
- Requires a subscription to use advanced features.
- May not offer as granular control over the export format as Jira-specific apps.
Tips for Optimizing Your Jira CSV Exports
Here are some tips to help you optimize your Jira CSV exports and ensure you get the most relevant and clean data every time. By following these tips, you can guarantee that your Jira CSV exports are efficient, helping you make better decisions and reducing the need for further manual cleanup.
1. Clearly define what data you need.
Jira offers vast amounts of data, but getting it all may result in unnecessary clutter and a cumbersome file. JQL (Jira Query Language) is your friend here. It can help you filter out the irrelevant data and extract exactly what you need. Whether you’re looking for specific issues, sprints, or status updates, JQL enables you to target only the most relevant records.
2. Consider data accuracy.
Make sure that the data is up-to-date, accurate, and complete. Missing or inconsistent information can lead to incomplete reports or misleading conclusions. Review fields for proper formatting and correct date entries.
3. Think about the purpose.
It’s important to consider what the recipient of your CSV file is expecting. Different tools or systems may require different formats or field structures. Before you start, ask yourself:
- What kind of report or analysis will this data feed into?
- Does the receiving system require specific fields or formats?
Aligning your export with these needs can save time and reduce the need for subsequent data manipulation.
4. Reduce unnecessary fields.
If your export tool allows you to select specific fields, choose only the necessary ones for your analysis or reporting. You can exclude empty or unnecessary values to improve the export performance.
5. Check your automated export jobs regularly.
If you’ve automated the recurring data extraction, you should review and adjust the tasks from time to time. Data needs may change, and your original export setup may no longer be relevant. Regularly check your automated jobs to ensure they align with your project goals and objectives.
Conclusion
Getting data from Jira looks like a simple task at first sight, but the challenges are real. Limitations of Jira’s native export functionality, the complexity of keeping issue hierarchy, or the need for clean, relevant fields can create some problems. However, the right approach can help you easily overcome these obstacles.
There are several methods for exporting data from Jira:
- Jira native CSV export feature
- Advanced marketplace apps
- Third-party integration tools like Skyvia.
The best approach depends on your use case, whether it’s a simple one-time task, handling large datasets, or automating recurring exports.
Solutions like Skyvia provide a no-code approach to handling exports and integrating with other platforms. If you’re ready to optimize your Jira data extraction and unlock automated, efficient workflows, explore Skyvia integration solutions. Empower your team with better data management today.

F.A.Q. for Jira Export to CSV

Can I export more than just Jira issues to a CSV file?
Yes, you can get project data, user data, worklogs, and reports, but Jira’s native export is limited to flat issue lists. Apps like Hierarchy for Jira or Visor can extract more complex data structures.
Is it possible to automate Jira to CSV exports?
Yes, third-party tools like Skyvia allow you to automate Jira to CSV exports on a scheduled basis, avoiding Jira’s limitations and saving time on manual tasks.
What should I do if my Jira CSV export is missing data, such as comments or full field history?
Use Jira Marketplace apps like Export Jira Comments or third-party tools like Skyvia, which support getting detailed data like comments, attachments, and complete field histories.
How can I select specific Jira issues or fields for my CSV export?
Use Jira’s JQL (Jira Query Language) to filter issues by criteria like status or assignee. If using an app, select the relevant fields for export during the configuration process to avoid unnecessary data.
