Hey there, financial adventurers! Ever wondered how to import CSV files into QuickBooks without hassle? If the very thought of it makes you procrastinate, don’t worry – this blog post is here to brighten your day.
Uploading CSV to QuickBooks may sound tricky, but it’s a game-changer for organizing your financial data. In this article, we’ll guide you through the process step by step, breaking it down into plain, simple terms. Whether it’s about income reports or vendor payments, you’ll see how easy it is to format, upload, and manage your data.
So, let’s roll up our sleeves and dive in!
Table of Contents
- What is QuickBooks Online?
- What is QuickBooks Desktop?
- QuickBooks Online vs. Desktop: Which One is Right for You?
- What’s a CSV File, and How Does It Differ from Excel?
- How to Prepare CSV Files for Importing into QuickBooks?
- Import CSV to QuickBooks: What Transactions Can You Import?
- Method #1: Import CSV to QBO
- Method #2: Import CSV to QBD
- Method #3: Automagically Import CSV to QuickBooks with Skyvia
- Why Is Importing CSV Files Essential for Businesses?
- How to Handle Errors During the Import Process?
- Conclusion
What is QuickBooks Online?
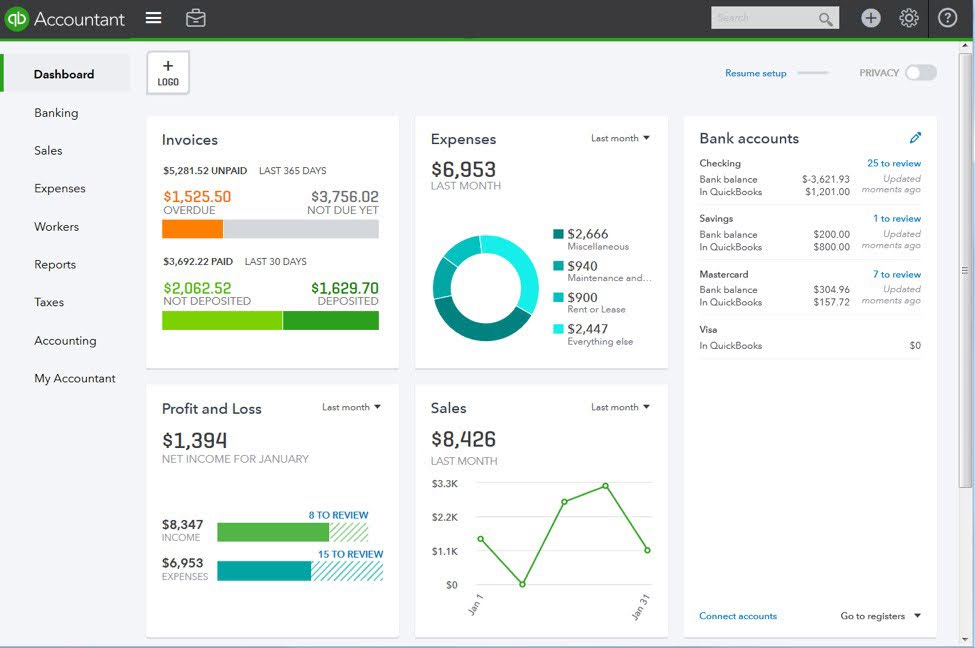
Think of QuickBooks Online like a digital organizer for your money matters. It’s like having a virtual wallet that you can access anywhere with the internet. You can track your cash flowing in and out. You can keep tabs on your business finances without carrying a physical ledger. And you can do this on your computer or phone.
What is QuickBooks Desktop?
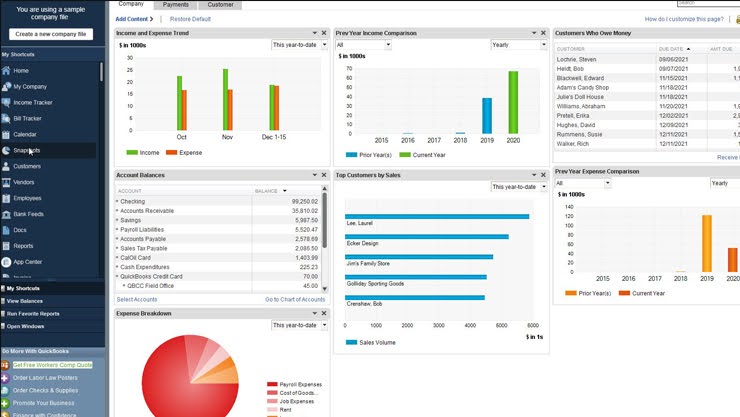
It is like an old, reliable toolbox sitting on your computer. It’s packed with all the financial tools you need – crunching numbers, creating invoices, and managing expenses – all without needing the internet. Everything’s right there, ready to help you fix up your finances. Just keep in mind it doesn’t get updates as often as QuickBooks Online, so you might miss out on some of the latest features and tricks.
QuickBooks Online vs. Desktop: Which One is Right for You?
It’s like choosing between a smartphone and a trusty old flip phone. Both get the job done, but one might fit your style better. Let’s dive in and find out which of the QuickBooks products matches your financial needs!
QuickBooks Online (QBO)
Pros
- Anywhere, anytime. It’s like having your money office in your pocket. Access your finances from anywhere with the internet.
- Automatic updates. Like a self-updating app, QBO gets new features regularly without hassle.
- Collaboration ease. Perfect if your team needs to dance with your financial data together.
Cons
- Monthly cost. Just like a subscription service, you pay regularly to keep the virtual office open.
- Internet hang-ups. If the net’s down, so is your access.
- Learning curve. Braving it to the online playground might take a bit longer.
Best for: If you’re a business on the move and need team access. And you don’t mind paying a little extra for the convenience.
QuickBooks Desktop (QBD)
Pros
- Standalone champion. Like a trusty old desktop computer, QBD doesn’t rely on the internet – it’s always there.
- No subscriptions. Pay once, and it’s yours – no regular money leaks.
- Mature features. Like a wise wizard, it’s got a bunch of tools from years of financial magic.
Cons
- Location bound. You can’t work at home or at your favorite coffee shop – no financial globetrotting.
- Manual updates. No auto-magic here – you update when you choose.
- Team tango trouble. Collaborating can be a bit more like a slow dance.
Best for: If you’re okay with staying put and want full control without a subscription. And you have a thing for old-school reliability.
What’s a CSV File, and How Does It Differ from Excel?
Let’s stroll down Data Lane and chat about CSV and Excel files and how they fit right into QuickBooks.
A CSV file, short for “Comma-Separated Values,” is basically a simple spreadsheet where commas separate each piece of information – like a neat, plain shopping list. Each row in the CSV represents a transaction, while the columns hold all the details: date, amount, description, and more.
Now, Excel is like the Swiss Army knife of spreadsheets. Unlike the simple, no-frills CSV plain text format, Excel is a fully-fledged spreadsheet software that saves files in .xlsx (modern Excel files) or .xls (older version) formats. It’s packed with tools – formulas, charts, and fancy formatting – that let you analyze, organize, and present data like a pro. Think of it as your go-to for everything from crunching numbers to crafting colorful reports.
CSV vs Excel: main differences
To better understand the difference between these tools, let’s have a concise breakdown of their core features:
| Criteria | CSV | Excel |
|---|---|---|
| File format | A plain text file with data separated by commas. It’s lightweight and simple, with no formatting, special characters, or images. | Uses a binary file format (.xls) or a modern XML-based file format (.xlsx) with advanced features like formulas, formatting, and charts. |
| Purpose | Designed for data transfer and compatibility across platforms. | Built for data analysis and presentation. |
| Structure | Only raw data, no formatting or formulas. | Includes formatting, styling, and complex calculations. |
| Compatibility | Universally compatible with most software. | Requires software like Microsoft Excel or similar tools. |
| File size | Smaller due to its plain text nature. | Larger because of additional features. |
As businesses often use both CSV and Excel to organize their financial data, their seamless integration with QuickBooks remains a top priority. The software handles CSV files natively, treating each line as a separate transaction and organizing the details perfectly – just like fitting puzzle pieces into place. As for Excel, you can either upload data directly or convert your worksheet to a CSV file first: that’s as easy as selecting “Save As” and choosing “CSV (*.csv).”
How to Prepare CSV Files for Importing into QuickBooks?
Getting your files ready is fairly easy. Just follow a few simple rules, and your CSV import will run like clockwork.
- Set the Stage with the Right Columns
Ensure your CSV file has the essential columns:
- Date: When the transaction took place.
- Description: A brief note about the transaction.
- Amount: The transaction value.
Note: for some imports, you might need columns like Credit and Debit instead of a single Amount column.
2. Keep the Formatting Simple and Clean
- Dates: Use a consistent format, like MM/DD/YYYY.
- Numbers: Avoid currency symbols and commas; just the digits and decimal points.
- Text: Steer clear of special characters that might trip up QuickBooks.
3. Mind the Details
- No Blank Rows: Empty rows can confuse the import process.
- Consistent Columns: Each column should have a clear, consistent purpose.
4. Save with Care
Once your data is polished, save the file in CSV format.
5. Give It a Once-Over
Before importing, open the CSV file with a text editor like Notepad to ensure everything looks tidy and in order.
Import CSV to QuickBooks: What Transactions are Supported?
Overall, QB allows importing the most common transaction types via CSV files, such as bills, invoices, and checks. But there is a catch – some data types require a bit of manual setup. Read on to discover which transactions are QuickBooks-friendly and which ones are a no-go.
What Can You Import?
QuickBooks supports importing these types of transactions from a CSV file:
- Invoices
- Bills
- Checks
- Expenses
- Payments
- Credit Card Charges
- Deposits
- Journal Entries
- Money Transfers
What Can’t You Import?
Let’s face it – nothing is perfect. Here’s the list of data types that just don’t make the cut:
- Payroll Records
Why? Payroll involves sensitive and complex data. QuickBooks prefers you set up payroll within the system to ensure accuracy and compliance.
- Sales Orders
Why? Sales orders are not directly importable. You’ll need to recreate them from a scratch to maintain proper workflow and tracking.
- Invoice Templates and Other Custom Templates
Why? Custom templates don’t transfer over. You’ll get to flex your creative muscles by redesigning them again.
- Memorized Transactions
Why? These personalized shortcuts won’t make the journey. You’ll need to set them up anew in QuickBooks.
- Budgets
Why? Budget data doesn’t import directly. Instead, consider inputting your financial plans directly into the system.
- Attachments
Why? Documents or files attached to transactions won’t come along. Keep them handy to reattach as needed.
- Non-Posting Entries (e.g., Estimates)
Why? Entries that don’t impact your accounts, like estimates, need to be recreated within QuickBooks.
- Audit Trail
Why? Your historical audit trail stays behind, but you can start a fresh log for all future activities within the system.
- Reconciliation Reports
Why? Past reconciliation reports won’t import. Save them elsewhere and continue reconciling in QuickBooks from where you left off.
Remember, while these data types need manual entry, QuickBooks offers reliable features to handle them once on board.
Method #1: Import CSV to QBO
If you’re looking for a simple way to manage your financial data, the QuickBooks Online import CSV feature makes it easy to upload transactions, invoices, and more directly into your account. And guess what? It is plain simple!
Best for: Users of QBO doing a one-time import.
Before You Start
First things first – before you upload your CSVs, here’s what you need to prepare:
- CSV File: This is your recipe card. Make sure it’s formatted correctly with columns for the date, description, and amount. Double-check for any typos.
- Backup Plan: Like an extra umbrella for a rainy day, have a backup of your QuickBooks data ready. You probably won’t need it, but it’s better to be safe than sorry.
Piece-of-Cake Steps to Import CSV
- Login to QuickBooks Online.
- Find and click on the gear icon at the top left of the page. Then, click Import Data.
- Pick the type of data to import. Be it customers, vendors, or bank data, it’s all in QuickBooks. You can only pick one at a time for every import.
- Select CSV as the file type you want to upload.
- Locate your file. Click the button to find your CSV file on your computer.
- Map Columns. This is like matching puzzle pieces. The software will ask you to match the columns in your CSV to the right places.
- Review and Import. Click Review. Then, QBO will show you what it plans to do. If everything looks good, proceed to Import.
Method #2: Import CSV to QBD
Ready to take on the CSV journey in QuickBooks Desktop? Fear not. It’s as easy as ordering your favorite pizza!
Best for: Users of QBD who need a one-time import.
Before You Start
The checklist is the same as for the Import CSV to QuickBooks Online.
Easy-Peasy Steps to Import CSV
- Open QuickBooks Desktop.
- Click File and select Utilities.
- Choose Import.
- Choose the type of data, like Customers, Vendors, and more.
- Choose CSV as the file type to import.
- Locate your CSV file from your computer.
- Match your CSV columns with their QuickBooks equivalents.
- Click Review, then Import.
Method #3: Automagically Import CSV to QuickBooks with Skyvia
The two methods described above are already good at importing CSV data.
But there’s a catch. If you have another CSV with the same column information, you must repeat all the steps.
What if you have a fixed place where your CSVs live, like a folder in a shared drive? And let software import the data on a recurring schedule?
That’s where a cloud solution like Skyvia can come in handy. It’s like construction power tools that can do the job faster. And Skyvia can deal with QuickBooks Online as well as QuickBooks Desktop.
Best for: Users of both QuickBooks platforms that work on either a one-time or recurring CSV import. If you have data in other formats from services like Salesforce or Zendesk, Skyvia can handle it, too.
Before You Start
Here’s your bucket list of Skyvia import stuff:
- Sign up for Skyvia. This is free, and once you’re in, you can start immediately.
- Write down your QBO or QBD credentials. You’ll need them when creating the connection.
- Prepare your CSV files.
- The CSV files should be stored in a single location that Skyvia can access consistently. For example, if you store them in Google Drive, you’ll need a Google account to connect Skyvia to that storage location.
- Again, backup. Though marrying QuickBooks and Skyvia is an easy feat, things can go wrong when you’re starting. Secure your data with Skyvia backup or any preferred solution of your choice before importing anything.
The ABCs of Importing CSV to QuickBooks Using Skyvia
Let’s make your CSV-to-QuickBooks integration smooth sailing. Here’s how:
1. Make a New Connection to QB
Skyvia has connectors for both QuickBooks Desktop and QuickBooks Online. For CSV and QuickBooks to say “I do,” Skyvia is the knot, and this is the first part.
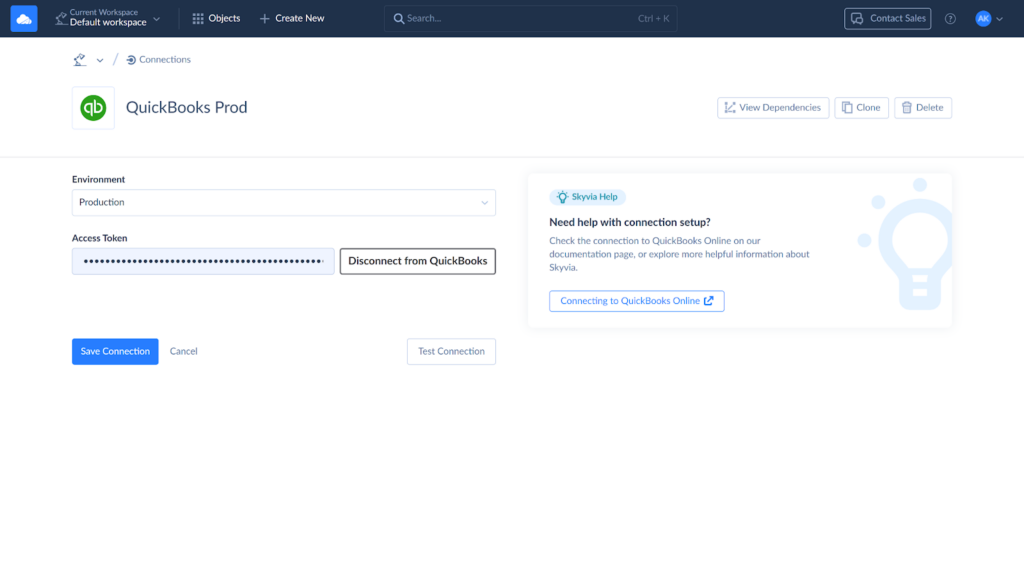
Let me show you how to start making a QBO connection. Click NEW -> Connection. Then, select QuickBooks Online.
Configuring the QBO connector is just as easy. Now, you don’t need to share with Skyvia your QuickBooks User ID and password: you simply log in to the QB platform, and it will give Skyvia an access token.
The QBD connection, on the other hand, adds a few more steps. You need the Skyvia Agent to enable Skyvia to access it. Because Skyvia is on the internet and your QuickBooks Desktop is on your company computer. For more information, visit this tutorial page.
2. Make a New Connection to Your CSV Files
The second part of the knot is making a connection to where your CSV files are. You can put your CSVs online using Google Drive or your company’s FTP folder: Skyvia can connect to these and many other online storages, such as SQL Server, PostgreSQL, Oracle, Snowflake, Amazon Redshift, and Azure Synapse Analytics.
Let’s say you want it on Google Drive. So, here are the easy steps.
- Sign in to Skyvia. If you’re already inside Skyvia, skip this step.
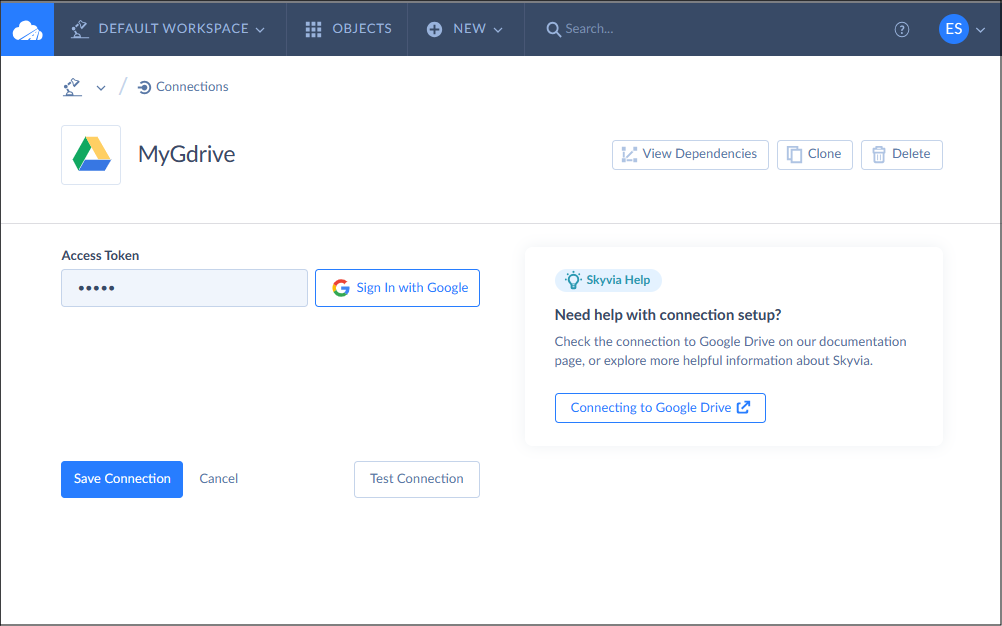
- Make a new Google Drive connection. Click NEW from the upper menu. Then, choose Connection.
- Type in Google Drive to the search box. Then, click Google Drive.
- Log in to Google. Then, Google will give an access token to Skyvia.
- Test, save, and name your new connection – you’ll need it for the next step.
As you can see, the process is almost the same as with the QuickBooks connection but much simpler. You will see a similar screen below once you finish the steps:
3. Create a Skyvia Import
Before doing the Import, check the CSV file for red flags. Make sure the size of columns fit those in QuickBooks.
Then, it’s time to tie the knot. The Skyvia Import scenario will copy the CSV records to QuickBooks. Check out this animated step-by-step guide on setting up a new import integration below.
- Set the source and target connections:
- Click Add New to create an import task. This will open the task editor window.
- Configure the Source settings on the Source Definition page. Since importing a CSV file from Google Drive, select the file from the CSV Path drop-down list.
- Define the Target settings on the Target Definition page. Choose the object you want to import data into and select one of the available operations: INSERT, UPDATE, UPSERT, or DELETE.
- Next, map the CSV columns to QuickBooks Customer. Note that only fields with the same data type can be mapped.
- Use Column mapping to match target fields to source fields without transformations.
- If you need to convert a source column’s data type to match the target field type, use Expression mapping, like, for example, the DisplayName field.
- Finally, save the task and run the integration.

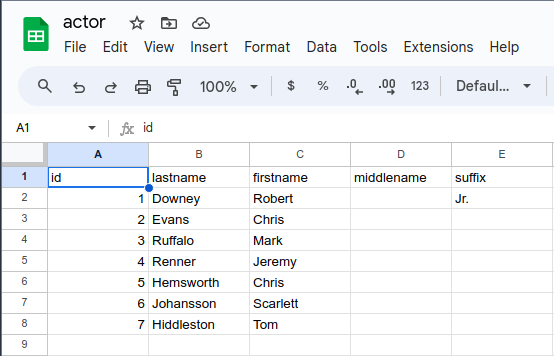
And you can check out what’s inside the CSV file. Expect this to be in QuickBooks later.
Then, it’s time to run your new Import integration. Check it out below.

Finally, you can check it in QuickBooks. Here’s what happened to the customer list:
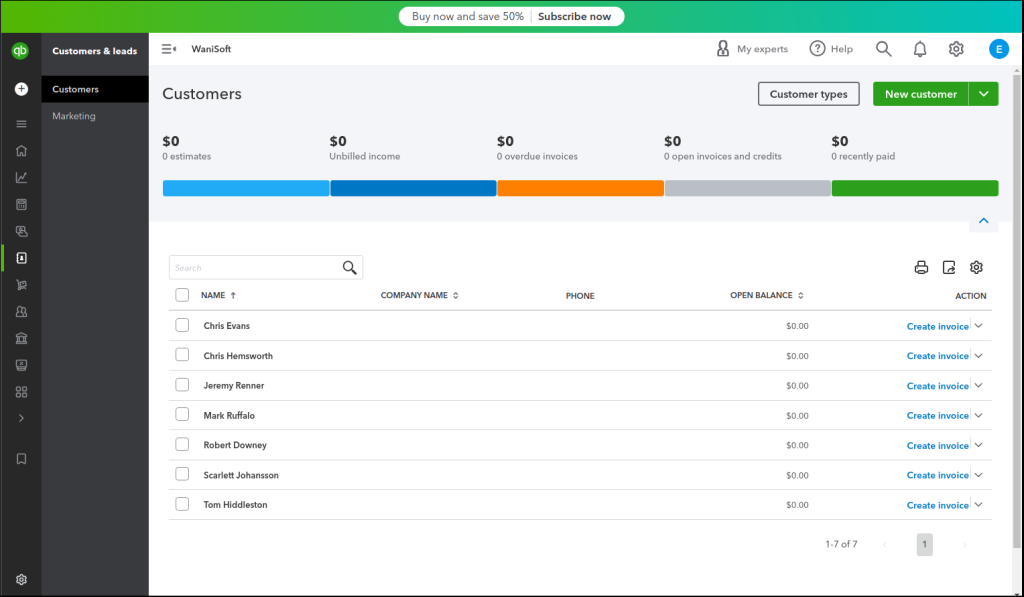
You all know these names. So, comparing it with the CSV records earlier will be painless.
4. Schedule the Import
Skyvia can schedule your imports so you can set up the import once and forget it. It will run on its own without your intervention. Simply click Schedule from the upper left of the Import integration. Then, set up when you want it to run. See a sample below:

That’s it. Mark your import CSV to QuickBooks task as resolved. Great job!
Why Is Importing CSV Files Essential for Businesses?
Now, picture yourself as a small business owner with a mountain of receipts, invoices, and expenses that need to be digitalized. Instead of manually entering everything, you can save hours of typing in just a few clicks! And that’s not all. Importing CSV files directly into QuickBooks gives the following perks:
- Seamless transition: ideal when upgrading from manual spreadsheets to accounting software.
- Organized data: QuickBooks automatically sorts your data into the right places – no fuss, no muss.
- Fewer errors: reduce typos and improve data accuracy by bypassing manual entry.
- Integrated historical data: import records for a clear, comprehensive view of your financial performance.
- Effortless setup: skip most of the system setup and get started faster.
How to Handle Errors During the Import Process?
Alright, things happen – even the best carts sometimes tip over. So, what should you do if you hit a snag during the import process?
- Exclude mapping issues. Incorrect column mapping is the first suspect during CSV imports. To keep things running smoothly, double-check that your CSV columns align perfectly with those in QuickBooks.
- Keep it consistent. Give your CSV file a thorough check, looking for unsupported characters, missing values, or duplicate entries – like a detective on the case!
- Your CSV format matters! Check your column headers, adjust data formats, and ensure all the required fields are filled in properly. A template or a well-formatted worksheet can save you from many common formatting headaches.
If all that fails, take a cue from Captain Obvious – use manual entry to circumvent those especially pesky errors.
Conclusion
Using Methods 1 and 2, you can import CSV files directly into QuickBooks. But with Skyvia, you can set up the import once and let it run automatically for as long as you need. Plus, Skyvia offers more than just the QuickBooks and CSV scenario – its vast gallery of predefined integrations spans the most common cases of synchronizing cloud apps. From creating Mailchimp lists from Salesforce contacts to more complex scenarios, it is a jack-of-all-trades for your data.
Skyvia is a cloud data platform that lets you integrate any data in various ways. Signing up is free, and you can start as quickly as now. All you need is a working email. And, of course, your data.
So, why not give it a try today?